DIY Faux Rice Paper Tutorial - Easy!!!
Published May 28, 2023, 6:20 a.m. by Jerald Waisoki
Are you looking for an easy way to add some interest to your book collection? Well, look no further than this diy Faux Rice Paper tutorial! With just a few supplies, you can transform any boring book into a work of art.
This project is so simple, anyone can do it. And the best part is, it only takes a few minutes to complete. So gather up your supplies and let’s get started!
First, you’ll need some rice paper. You can find this at any craft store. I like to use the thicker sheets, but you can use whatever you have on hand.
Next, you’ll need some mod podge. I like to use the matte finish, but you can use whatever you have on hand.
Now, it’s time to get started! Begin by tearing your rice paper into small pieces. I like to make mine about 2 inches square. But you can make them whatever size you like.
Once you have your pieces torn, it’s time to start mod podging! Simply brush a layer of mod podge onto your book cover. Then, begin placing your rice paper pieces onto the mod podge. Continue until your book cover is completely covered.
Now, let your book dry overnight. Once it’s dry, you’re done!
Isn’t that easy? With just a few supplies and a little bit of time, you can easily transform any book into a work of art. So go ahead and give it a try!
You may also like to read about:
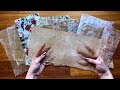
hello everyone it's natasha from
treasure books in this video we're
making faux rice paper
and let me tell you it's very easy to do
and extremely satisfying i saw a video
on this technique a few months ago on
facebook i'll have to dig it up and and
share it in the description box below
but ever since seeing that video i've
experimented with using different types
of materials and different techniques
and all that sort of stuff so in this
video we're going to talk about
materials you need the techniques that
you can use some of the variations on
the projects that you can do and then of
course at the end we're going to talk
about
what can you actually do with this all
right let's get started but before we
get started and in case if you're
wondering
these are quite durable
i mean they're not
indestructible
but they are definitely as durable as
paper
and they actually look very fragile but
they are definitely tougher than they
seem
you can rip it but you know it's quite
sturdy see
quite sturdy let's start with all the
materials that you can use so the first
most obvious one is napkins don't worry
if you don't have any napkins because
there are other things that we can use
you only need one ply of the napkins so
you would separate those flies and then
of course as i've got here you can use
this blank side as well and in a lot of
the cases this actually produces an even
better result i'll show you in a moment
you might also use some paper roll like
this it doesn't even have to be you know
i mean this one is quite thick but it
would still work i think i haven't tried
it i have tried other things but why not
give that a go as well when it comes to
napkins
this is how they look and there is one
thing that i have realized and that is
the more white in the napkin the better
the result so this one here you can see
it's very
dark see it's not very sheer like you
can't really tell that this is the
technique i use look at this i love it
but then on this one here it really
looks like actual rice paper look at
that
so the more white in the napkin the
better
and even just using this all white gives
you a really beautiful result i'll show
you look at this this is just all white
and these as well these are the other
plies that i used in a napkin and
sometimes when you peel off that ply
will have a little bit of the print left
on it so that's what happened here and
the reason why it's colored brown is
because i used a bit of coffee in my
glue solution i'll show you all of that
in a moment this one here is just no
coffee in the glue solution just glue
and then this one here as well so that's
the napkin ones and we will have a play
with napkins in a moment another thing
that you can use is just tissue paper so
this is the tissue paper that i use on
this one here and just plain glue no
coffee additive solution i think i
really like that coffee added to the
solution we'll talk about that next so
this is just some tissue paper from a
shoe box right when i got shoes and then
i scrunch it up even more
and i use that this also here is
slightly better quality tissue paper and
i find that the thinner the tissue paper
the better
for this project right because this is
you can't really even see that much has
happened on here
there's really not that much difference
in the one that i have applied the glue
to so if you can get your hands on some
really thin tissue paper
any material that's really thin it works
perfect for this project another thing
that i've used and i love love love the
effect is this sewing pattern paper it's
pretty much just tissue paper but it's
very thin and very pliable and the
effect it produced is just
outstanding i absolutely love the look
of this look at it
sheer underneath
see it's got the crinkle it's got the
sound it's got the texture it's just
absolutely beautiful so if you have some
of this go for it uh or otherwise just
you know really think tissue paper
another thing that i have used is
cheesecloth and this is not very good
cheesecloth at all as you can see it's
very thinly woven i guess
and it's perfect for this project so
basically produces almost like a
skin i guess you can say look at that
it has
substance to it look at it it's like
leather almost not as thick as leather
but like a skin
i just love how this turned out and i
have done another little variation of
this
which i'm going to show you later on in
the video so these are sort of the main
things that i've thought of using so far
so in this tutorial i'm going to use the
cheesecloth the tissue paper and the
napkin so if you have any one of these
in your possession you can get started
right away so the very first thing we
need to do is the glue solution this is
really quite simple all you need is pva
glue or school glue almost glue cheap
white glue right nothing special you
want you need it to be really really
runny the way you make it really runny
is to add water to it or what i'm going
to do is add this coffee into it instead
of water you can add perhaps some
water mixed with brown acrylic paint or
even watercolor i've also done that and
i want to show you this napkin here is
done with brown watercolor and this one
here is done with the coffee so really
if you don't want the coffee if you're
not a fan of the coffee smell then there
are ways okay or just do clear water i'm
doing coffee so basically what you want
to do is use some type of a something
plastic container and you want
two-thirds glue in there you don't have
to measure anything just you know
just approximately
so that's about you know when i
tilt it like this it looks like a lot
more but that's about two-thirds glue in
there and then we're adding one part
water
or in this case we're adding one part
coffee so now i'm just gonna close it
and i think my coffee solution might be
a little bit too strong
so it'll be quite brown but that's okay
and now i just cover it with some type
of a rag and shake
mix it up the only reason why i cover it
with this rag is because it sometimes it
can
leak on the sides all right let's see
what we have
there's my solution it's quite brown
and you know if you're doing a solution
with coffee you might want to use it all
up
rather quickly you don't want to leave
it sitting in there for a month because
it's going to go bad if you just mix
water and glue then in my case i found
that it can just sit in there forever
and not get not you know go bad because
pva glue is water-based glue so there's
water already in there but there's no
coffee in there so if you had coffee
it's gonna go bad all right so that's
the solution and basically look at it
it's like you know it's quite runny
and that's what you want next thing you
need is a plastic bag or some type of a
non-stick surface
what i'm using here is a cereal bag or a
cereal box liner that i've opened up and
i've made lots of projects using these
so i have lots of them on hand
if you don't happen to have those you
can just go ahead and just use
any plastic bag that you have at home
right next thing we want to do so i'm
going to start off with the napkin and
firstly i just need to remove
you know i just want one ply i want that
really really thin so i'm only using one
ply i want to apply glue first
underneath the napkin and then on top of
the napkin so in order to know how large
my napkin is on my surface i'm just
going to mark
just the corners
and then you can see i have my corners
marked so now i need my glue solution
i'm going to explain in a moment why i'm
doing this but
now i just want to apply
glue on that whole surface
the reason why we're doing this even
though the glue is going to seep if you
put the napkin on top of the bag and go
over it with glue the glue will seep
through underneath so you might be
wondering why would you be applying the
glue
first the reason why is because we in
order to make that faux rice paper
sturdy
we need that glue so the glue is there
the glue almost becomes like a plastic
right when it dries so when you have a
thick layer of glue on top and some glue
underneath as well it all helps with
that sturdiness right all right so
here's my napkin and now what i want to
do is i'm just going to fold it a little
bit like this this holding that like
this helps me set it down without it
being messed up too much so now i'm
going gonna set it down like this
now i know some people might want to eye
in this napkin first i really don't want
to bother with that but i don't like
having these straight lines in there so
as i'm holding it up i'm trying to kind
of get rid of the straight lines
and here's my napkin down it's kind of
laying up a little bit here so i might
maybe just pick it up a little bit now
personally i love creases and you know
the more creases there are in my opinion
the better
so you can look at these creases
so i'm not avoiding creases in fact i
want to create as much as i can so now
i'm just going to tap it down a little
bit there's that glue that's grabbing
onto the napkin straight away and now
i'm simply going to brush glue over all
over this whole thing i'm starting
somewhere in the middle
and just with the gentle hand
brushing towards the outside
the napkin will start to tear if your
brush is dry if there's not enough glue
on the brush that's gliding through
also the napkin will tear if your glue
is too gooey if it's not runny enough so
that's why you know adding that water in
there really helps this whole process it
just makes it so quick and easy
and you can see like i add glue and as
soon as i feel like my
brush is starting to drag like it's
getting dry i add more glue so
we do use quite a bit of this solution
and of course another thing if you don't
like the smell of coffee of course you
can use tea as well i didn't mention tea
before acrylic paint black tea
watercolors all of that will do all
right here we go that's all completely
covered and now once this is dry we're
going to peel it off and i'm going to
show you that as well how to do it but
what i found is that at this point
there is one little step that we can
take to make the peeling easier later on
when this is dry so if you look at this
here my edges are straight at this point
if we just simply move these edges in a
little bit and create that kind of a
scrunched up thing there all around it
makes the peeling much easier and the
chance of tearing a lot less so what i
do i just kind of go in with my brush
just like this
let's get you closer so here is my
straight edge here which might be a
little bit difficult to peel off later
on when everything is dry and all i do
is just this just move it in a little
bit like that and it also creates a
really nice kind of
vintagey old scroll looking type of an
effect so i'll show you the difference
now because i didn't work it out until
i've done a few of these this is the
straight edge one
and then this is the one where i
scrunched up those edges
and in my opinion it just looks so much
better
as opposed to this straight edge kind of
a look
all right so this one's all done look at
those edges love it and now i'm gonna
pop this aside let it dry usually i'll
leave it on overnight all right let's
move on now that you know how it's done
i'm gonna speed up the rest of this
process so the next thing i'm going to
use is tissue paper and i really like as
i said before
i love the crinkle so i'm going to
scrunch up that tissue paper first to
get all as much you know
wrinkling as i can and then follow the
exact same procedure
uh how satisfying is this especially
when it's speeded up it looks like magic
i forgot to mention if you get a tear in
a napkin because napkins are very thin
it can very well happen and it has
happened to me and i was able to salvage
it so basically what i did just like as
i was doing with the edges before and
like i'm going to do now i did it to the
napkin let's say there's a tear here i
just kind of smooshed it all together
that tear smashed it all together popped
the
glue on you know that did that kind of
thing and then when it was dry it was
perfect i'm gonna leave this one to dry
and the next one i'm going to do just
half of the napkin so i can fit both in
here and the cheesecloth so
i'm going to make a deliberate tear in
here to show you how to repair it oh it
pains me to do this but let's do
a tear so i went over that spot one too
many times right and now i have a tear
in there you can see
look at that tear so what i would do but
now i'm gently trying to you know
depending on how large the tear is if
it's a little tear you can bring
napkin from the surrounding area to the
tear to cover it up like that but i did
make that take quite large so i might
need to add
a tiny little bit of napkin over the top
which will be visible when it dries i
just want to check i have covered the
tear and the more i kind of fiddle with
it and play around with it the more you
know things go wrong but
that's the tear right so once that's dry
it's going to be completely you know
glued together i want to see if i can
show you the one that it actually
happened on i was looking for a tear and
i just have to show you look how cool
this looks when i turn it towards the
light
oh it's just so incredibly satisfying
look at it
okay i think i found the one that had
the tear i don't even know if you can
see it on here so i might have to turn
it towards the light my point is
that if you get a tear you can fix it up
and then the glue here you can see it in
the light this way and then the glue
holds it all together so anyway
let's move on to cheesecloth now
cheesecloth it requires a little bit
more glue because it starts to seep into
these little spaces
so i'm going to pop it down and you can
see straight away because you know it's
not thin like napkins so it's not really
soaking up all that glue right away and
now same thing you know i start applying
the glue and i try not to move
that cheesecloth too much right
you can just leave it as this let it dry
like this or
i'm gonna do this to the edges because i
want to have a nice neat look to this i
want it to look like pepperous or
something you know i just want it to
look good so i'm just going to do this
to the edges
it looks like an old map if you you can
imagine a map printed on there or drawn
hand drawn you know
you know those maps treasure maps all
right so that's i'm going to leave that
as it is and i'm going to let this join
the others in its drying time oh i
didn't do these edges here it just looks
better with those edges does it not all
right now i'm going to let this dry and
i already have some dried ones because i
was well prepared so i'm now i'm going
to show you how to actually peel it off
okay here is one that i did last night
and this one is now completely dry and
i'm going to show you how to peel it off
so i do have to admit
that the peeling is so much easier when
you do that to the edges
when you scratch them up like that it's
very very easy to pick it up and to
start peeling so this this one's going
to be easy i can even just use my
finger because
those sides are already scrunched up and
they're easily coming off just like that
but previously when i didn't do that to
my
sides or edges i should say i used an
x-acto knife to do this and you know cut
that kind of glue off there at the edge
i hope that's making sense once that
whole side is lifted like this you can
just very easily peel it off i'm going
to zoom out so you can see there we go
and it's just easy you just
so satisfactory you just peel that whole
thing right off
i'm going to show you these the glue
there but
you don't have to throw this away you
can just keep reusing this so now you've
seen as we are peeling this off you can
see all of these little bits of glue
it's almost like a plastic bag that is
now sealing both top and bottom of our
napkin so i just kind of pick it off
and it is in fact the glue that's making
this so you know
amazing
so sturdy and pliable and and
durable you can still rip this so it's
not that durable i have tried one of
them and yes definitely you can still
rip it just like you can rip rice paper
so here it is
absolutely beautiful and one thing to
note is you will have the top side that
you've done look at these beautiful
creases it's gonna feel rough and it's
gonna have a lot of texture and the
bottom side is because it was drying
against plastic it's gonna look
plasticky like this and another question
that you may or may not have is well
that was a question that i was wondering
in my head if you leave it folded like
this if it's sitting in a journal for
example against other pages is this glue
in any way going to activate and glue
itself to other things or to itself so
what i did as an experiment i saw the
video that i mentioned about
four or five months ago i'm not sure and
that's when i did this one i did it
straight away so what i did it's exactly
the same method exactly the same only i
used clear glue i didn't use any coffee
in it and what i did is i folded it and
left it under heavy books to see if it's
gonna glue itself to itself right and
we've been through summer and it's been
hot and it's been humid and all sorts of
things and
it is not so that is one less thing to
worry about oh i have to say perhaps
i know that mod podge sometimes can be
very sticky so i'm not sure if you're
using mod podge maybe do a little
experiment first all right so that's
that one i want to show you this one
next because i didn't scrunch up the
sides on this one so you can see
when i go to pick it up like how am i
going to do oh it's
okay it's coming off easy but you know i
have had issues with napkins and it
definitely wasn't coming up easy
so let's say this one's coming up easy
and okay it's feeling easy all right
it's feeling easier than the napkin
would if it's this easy for you perfect
it's what you want well here it's
starting to rip look at that so here we
go so you just kind of
oh just
i was looking at my phone and not at the
at the project
and then you know you're just very
gently lifting this up
it most definitely can get frustrating
and tedious which is why
i started scrunching up the sides
because it was just this whole thing of
peeling it after all that work involved
and then you have to do this
and it was just annoying me so much
and i thought if i experiment with those
sides and scrunching everything up i
want wonder if it's going to be easier
and sure enough
that solves that problem
but this is i guess just to demonstrate
that it can be done
as annoying as it is
and then you will just start
once the whole one side is lifted you
can just peel to the side
we want things to be easy and quick so
there's that glue
just get rid of all of that what is it
about us humans i don't know if it's
humans in general or just us crafters
but why do we love this
so much
like what is it with the crinkle and
with the sound and with the shear and
why do you love it so much maybe it's
just me
but i don't think it's just me
so there's that one that's that shiny
side and that matte side
and one last one i want to show you is
the cheesecloth one so let me just say
that previously when i was experimenting
i have to say
i made this one years ago years ago and
i didn't even glue it onto cereal
liner i actually glued it onto really
shiny book you know how some books have
that shine i think it even might have
been this one
and i just glued it on there and then
peeled it right off anyway i'm getting
sidetracked so basically uh you can see
that the edges here i really didn't like
how you can see this glue and then you
have these strings hanging about this to
me looks much nicer when those edges are
scrunched this one i've done recently
just a few days ago it didn't scrunch up
the edges and yeah you can definitely
tell
a difference between this one and this
one here anyway stop blubbering let's
start peeling oh look how easy this is
gonna be just pick it up
and now it's not gonna be oh maybe it is
pick it up
and peel right off
who here
thinks this is not satisfactory lift
your hands up oh here i think this is
not i mean i can't see your hands but
check it out i believe there are no
hands rising up because how can you look
at this and not think it's simply i
don't know let's see what happens what
would happen if i scrunch it up i
haven't tried it
am i going to ruin it
i hope not did i ruin it no
i mean nothing really happened it's just
crunched up i don't know what i thought
would happen some type of
magic i think i like the better not
scrunched up but here we go that's the
cheesecloth one
so now i just wanted to show you some
variations and then we'll move on to
maybe some project ideas what can you
actually do with this thing so it's all
about experimentation right just like
what i did now it's crunching it up
oftentimes when you think what would
happen if i do this you come up with new
ideas so that's what happened when i did
this one here so basically all i did
here is i put down my napkin just as i
did on this one that i just did now
that's still drying i put down my napkin
and then instead of putting the
cheesecloth separately i put the
cheesecloth right on top of the napkin
and this is the result so i have two
sides i have that
napkin side
and it looks like plastic because one
it's got glue too it was drying against
the plastic bag and i think this looks
like i might have used some watercolors
i know honestly the coffee effect looks
so much better in my opinion and this is
the
cheesecloth side very texturey and
you know feels completely different to
this side and with this type of thing i
mean you know there's just so many
things that we can do with this this
alone can even be a really cool journal
cover
and not to mention pages in a journal
cutting off little bits and making some
embellishments with it
making envelopes solar pouches
little bags all that sort of stuff so i
at this point i'm just enjoying it as it
is without actually making something out
of it even though i have already made
some things okay another thing that you
can do which is what i've done here is
once you glue that napkin on instead of
peeling it off
leave it on the bag which is what
happened here i just left it on there
and i use my x-acto knife and i cut
those edges and it looks
just like this so the only thing with
this type of thing is now of course you
you are able to go and peel this off
because that's what we've done with all
of these and you saw how easy it is to
fill them up this one's got straight
edges so it might be a little bit
difficult to go ahead and peel but
you know you can go ahead and make
anything out of this and especially if
you're going to sew around then you're
sealing those edges and the napkin is
not going to peel so that's another
thing you can play around with
and that's what i've actually done on
this one here i had to double check
because i wasn't sure i left it
the the napkin right this is acrylic
paint that i used with the glue
love the rusty look of this and
basically i didn't peel it off i left it
on the plastic bag cut it out and i made
this
little envelope
bag pouch it's very sturdy because it's
actual plastic inside and it's been sewn
around
so if you're not sewing it around you
know it's gonna peel and generally
gluing plastic to plastic
like if you were to glue this instead of
so i don't know i don't i don't really
trust any glue on plastic i'm not sure
actually
i shouldn't really say that because this
is a pretty good good glue so perhaps
this one would glue plastic to plastic
but it's also quite
on the dearest side of the pricing range
and then i made some other things i've
popped them on book pages you know this
is just going some extra steps and i
made some journaling spots and stuff
like that but i wanted to see if maybe i
can make something with these that i
made today there's a part of me that
feels quite
bad about hacking into this in any sort
of way because i love it so much a part
of me doesn't want to use it
apart from this one this one i'm not a
fan of because you can't really see it's
not really you can't really see anything
on that one just looks like napkin but
i'm gonna go ahead and perhaps i don't
know maybe i can think of something to
make out of these i feel like these
would make really good glassine bags and
blasting bags is something that i always
want and i can never find here in
australia so
i often times make my own it is
something that we can make out of this
i'm kind of thinking on the fly here so
i had that map kind of an idea in my
mind so maybe something like this
putting it over the top of a some sort
of of a map and making a little
something out of that even this cheese
cloth i i don't know
i have no goal in mind so basically so
far what i've done is i sandwiched
that map piece between
the rice paper for rice paper and some
tea dyke paper
so i'm just kind of going with it you
know
not planned anything
i don't even know if it's going to work
out but
anyway
and now i'm going to actually try and
rip the rice paper i want to see how
easy it actually rips so here we go
as easy as it is to rip paper pretty
much
which is to be expected
i mean if i really wanted to do this
particular thing that i'm doing then i
could have really just glued the napkin
straight onto the
the mac piece so really i don't know i
just had a map in my mind and i wanted
to try it out and now i can make this
perhaps into some type of like a scroll
thing a scrolly map kind of thing or i
would simply have it as a page in a
journal that's what i would do
and in all honesty i'm inclined to have
most of these as a page in a journal if
you could only
sort of feel that texture
there we go all right let's do something
with just this so now that i have one
uneven edge here i kind of want to do
the same over here so i'm just going to
try and
get that uneven edge happening
this looks cool look at this i messed up
a little bit here but that's okay the
whole thing is wonky and uneven edges
and kind of wiggly sowing and it just
look at it it looks almost like an onion
skin like actual onion skin
you know it's very mysterious kind of
looking like if you
got this in one of your journals and you
haven't seen a video you would be
thinking what is this what is this made
out of look at it
if you were to pop some ephemera in
there oh look at this
so cool
maybe have a little something up there
as a closure but i'm just going to put
it in here for now
i like this image so a little package in
a journal something like this
you know clipped on the side of the page
maybe that doesn't even have to have a
flap it can just be like this like a
little glassine bag
all wrapped with a little bit of twine
just like that
look i don't know man i just
love this
a lot more than i
would have expected
and then it's oh you know if i got this
in a journal it's just
imagine making a little package of all
things this type of thing i do have to
say because i've used that coffee
solution i can really smell coffee so
that's a thing to consider oh how i wish
i can hear all of your ideas right now i
bet you have so many
flowing through your mind of all of the
different things that we can do with
this rice paper business
these are of course all ideas that take
time to
you know be realized i'm kind of working
on the fly now just to get your creative
juices going and i know that they
already are i am inclined to really use
these as i've already said as pages in
generals but you know this whole look i
mean if you're making a little pack you
can have a theme going it's perfect
which is what i'm kind of making here i
know that this vintagey feel is not
everyone's vibe but i am most definitely
feeling it today
so as you can see i'm using that cheese
cloth as a cover here it's only a little
mini booklet it's not an actual
three signature journal of course i
wouldn't be able to use it for that kind
of thing
and initially i was thinking of sewing
an image onto the actual juice cloth i'm
not a fan of the cream of the you know
how i scrunched it up it doesn't matter
but i thought it would be nicer to have
that image underneath a little grungy
notebook on the fly i'm gonna open up
this oh it's open here the envelope is
open here i was gonna open it here but
there's no point because it's open there
so we're just leaving it as it is
and you know all that fun embellishing
that can be done in there at another
time maybe it'll be nice to have a twine
closure over here
now that i'm starting to get in the zone
i'm getting so many ideas now all of the
things that i can do but my battery is
running low so i'm gonna have to speed
it up a little bit i'm loving this so
far just i just love it so much look at
these two together it's perfection i
love this look okay i'll stop now so
what do you think what are your thoughts
even this so i should have should have
actually bound this in
here as a page oh well doesn't matter
and look how good this looks with this
kind of a theme that i've got happening
over here it's just so good so what i'm
thinking now is that making things with
our full rice paper could be a whole
separate video right
there are so many ways that this can
take us and all these sorts of
variations that we can do and it is
definitely something that i'm going to
ponder because now i have all of these
beautiful papers to use and i have to
say i'm inclined
to hold on to them for just a little bit
longer look at it
okay i need to stop saying that i think
you've seen
enough so far i hope that you are as
inspired and excited about this project
as i am if you have any questions please
let me know if you have any issues any
problems also let me know i think a lot
of the problems come up when we are
trying something for the first time and
that's the best way to learn so try it
out see how you go i will perhaps do
some more experimenting and see what
else we can do let me know what you
think what is your favorite one do you
like the printed napkins more or do you
like like a tissue paper i think they
all look great in any case thank you so
much for watching and i will see you in
my next video bye