DIY SHIPLAP FIREPLACE | WALL TRANSFORMATION
Published June 5, 2023, 7:20 a.m. by Bethany
Thanks for watching! Hope this video helped if you too want to build a fireplace!
To see our inspiration check out The Blooming Nest blog: https://www.bloomingnest.com/installing-a-fireplace-our-new-samsung-frame-tv/
ITEMS WE USED
Fireplace Insert: https://amzn.to/2XftwVv
Impact Driver: https://amzn.to/2U7Y89u
Miter Saw: https://amzn.to/2U2c1pn
Circular Saw: https://amzn.to/2U2cdF7
Home Depot shiplap: https://rstyle.me/cz-n/ds9rwschu97
Tv Mount: https://rstyle.me/cz-n/dzmcbfchu97
If you like this video please SUBSCRIBE!
You may also like to read about:
all right hey guys welcome back to my
channel so today we're gonna be doing a
little bit of a DIY I'll tell you what
that is here in a second as you guys
know I like to do a lot of sporadic DIYs
a lot of sporadic projects it's like 6
o'clock in the evening just got home
from work not too long ago and one of
the things that have been wanting to do
for a while is just to build a fireplace
and so I got Brittany on board she's
excited I'm excited so what we're gonna
be doing today is just building that
outline of the fireplace that we want to
build and we actually got this
inspiration off of somebody that Britney
follows on Instagram and she has a blog
post about it and so we'll put that link
below and so we're excited to get this
started and we hope that you guys are as
well and so you guys would like to
follow along on this DIY journey then
just keep watching
[Music]
[Music]
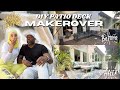
alright hey guys so today me and my wife
have started our project of building our
electric fireplace as you can see we've
taped it out just so we know where the
fireplace is gonna go and we went and
picked up a couple items so what I've
got so far is ten two by fours and then
I grabbed 4 1 by 8 about 6 feet long
because that's how wide we want our
fireplace as you can see I already
screwed one in the wall right there
seeing the studs and it's really a good
idea to just kind of mark your wall up
you know the walls gonna be covered so
mark it up with where the studs are you
see I drew the lines where the studs
were all the way up that way whenever
I'm nailing boards onto the wall or
screwing boards onto the wall I know
exactly where the studs are it just
makes it a lot easier when we actually
get the supplies a couple of other
things I got I didn't have already was
just a electric nail gun because I don't
have an air compressor a couple Chargers
I got a skill saw and then I got an
impact driver to go with my screwdriver
alright guys so we have the four anchors
up and ready to go now we just need to
cut the two by fours to link and build
the skeleton and then put it up these
anchors are important because this is
gonna be basically the foundation of it
all we're not gonna be nailing any wood
to the floor or to the ceiling
just to the wall where where I set these
anchors at so once you get these strong
anchors in then you can go ahead and
start building the skeleton and I'll
show you guys what that looks like
[Music]
alright guys so after we get the anchors
on the wall the next step is to put
these frame walls up what we did was
just took four two by fours and cut them
to length you want to measure from the
floor all the way up to your ceiling and
then subtract I subtracted a
quarter-inch just so it wouldn't be
fully touching the ceiling and we'll
cover that crack up when we put the chip
flap up and the trim up so you won't
even see it so just two two by fours cut
to length side-by-side with some more
two by fours okay so that the hole depth
is about a foot is what we measure and
then you want to go ahead and secure
them to the anchors that you secured on
the wall so you need to do some research
on how deep your electric fire pit is
going to sit ours says about five and a
half inches so we went ahead and cut
this to about 10 inches just so we would
have some play with cords and whatever
else we needed to do we can make it
recess a little bit more so we've got
about 10 inches here just do some
research and see how deep your fireplace
sits and then the next step after this
is to build the front part of the
skeleton the front frame and that's what
we're going to be giving out and so to
do that you want to basically grab some
two by fours again you almost want to
cut it to length but you're going to
subtract about an inch and a half just
because when you buy two by fours they
normally come in one and a half by three
and a half inches so they kind of skimpy
right there but subtract a one and a
half inches from what this one is that
and then you're going to go ahead and
secure it to this side that side and
then I'll show you what we do that for
that we'll put it too much or on top
just to secure this front frame let's go
ahead and do that okay my assistants
come to help now we are going to nail
the frame together just so we can hold
it in place before we screw it in
[Music]
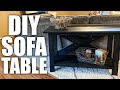
alright guys so we got the whole front
skeleton on as you can see side part of
the skeleton top in the middle and the
floor so something that I did that I
would suggest you do a little bit
differently is I went ahead and put me
outside of the front skeleton first and
then I kind of cut all the guts in while
this was already up and made it a little
more difficult go ahead and somewhat
like fiddle your your front frame pieces
make sure it fits good and then take it
down and assemble it on the floor and go
ahead and once you have it assembled on
the floor then you can lift it all up as
one piece and then I nail it into the
side frame that's the easiest way to do
it because this you know it like this I
can't go above and and screw this piece
in from the top so I have to screw in
from the sides which didn't have as
strong as a whole so but yeah I got the
whole front skeleton done the only thing
left after this is to get the fireplace
in and then put the drip flap on it's
actually a really easy project this part
I don't know about the shiplap I've
never put shiplap on I guess we'll see
but so far so good
[Music]
[Applause]
[Music]
[Applause]
[Music]
[Applause]
[Music]
[Applause]
[Music]
alright guys we're just about ready to
put the title on right now what we're
doing is building kind of the structure
where the tile is going to sit on
so the tiles gonna extend about three
inches from the fireplace it's matte
black tile so you guys here's matte
black three by twelve inch tile we
wanted to go with matte black because
our fireplace is not black edges and
around our TV is matte black as well so
it would just match and the top putting
tile around the blacks all around the
fireplace is just gonna make the
fireplace look a little bit bigger so
that the dimensions kind of match with
our TV so it's kind of even and then
once we put the mantel in it'll kind of
look symmetric so that's kind of what
we're going for now
so now we're just putting up this thin
three-eighths and board just so that we
can lay that tile on it so yeah that's
what we have so far so right now is
about three weeks past when we did all
this stuff we've been waiting on this
tile for a very long time Home Depot
didn't have it in stock those didn't
have it in stock but we finally got the
tile in so now we're gonna resume work
and hopefully this project gets done in
this well this weekend it's Friday today
so hopefully we get done with it by
Sunday or Monday at least alright guys
so we got the border around it done now
we're gonna lay some tile alright guys
so we finished our fireplace we haven't
gone stain the mantel yet but we're
gonna do that a little bit later on it's
a little late I'm about to have a pretty
busy work week so we're going to do that
later but we got peanuts all of it done
we stuck the painted white and cover up
some of these nail gun holes but overall
we're pretty much done obviously this
this project should have only taken two
weekends but we're waiting on this tile
to come in there's a lot of places I
didn't have it in stock so we had to
wait for them to get it in stock and
then once I got it in stock we need
pretty much got that mean we got the
ball rolling so this was our first
fireplace build
know what to expect when we went into it
but it looks exactly how we wanted it to
look in in that other beginning so I
guess that we have that normal course
altogether without excluding the TV was
about five hundred dollars roughly the
fireplace cost us roughly three hundred
dollars and then all the other woman's
buys cost us roughly two hundred dollars
so very cheap for a beautiful fireplace
again it puts out at that comforting
feeling in your living room and that's
what we were going for so I hope you
guys have enjoyed this video and I hope
that helps you out if you plan on
building a fireplace please give this
video a thumbs up and subscribe to my
channel and we'll see you guys in my
next video
[Music]