Making A Dedicated VPN Home Router Using A Regular Router TP Link WR940N Private Internet Access PIA
Published June 7, 2023, 3:20 a.m. by Arrik Motley
tp-link wr940n router (Upgraded) At Amazon: https://amzn.to/2NodxPu Ebay: https://goo.gl/DJEqCT
tp-link N750 Wireless Wi-Fi Dual Band router (TL-WDR4300) At Amazon: https://amzn.to/2Vrcxyx Or Ebay: https://goo.gl/8vm9U9
tp-link AC900 WiFi router At Amzon: https://amzn.to/2pm0Ie3 Ebay: https://goo.gl/f65q15
tp-link N300 router (TL-WR841N) At Amazon: http://amzn.to/2gdL8h8 At Ebay: https://goo.gl/wTW2tg
tp-link TL-WR841ND Wireless N300 Home router Detachable Antennas: http://amzn.to/1GUSvRS Or Here At Ebay: https://goo.gl/FwoCRW
Cable Matters 160021 5-Feet Cat6 Snagless Ethernet Patch Cable, Pack of 5 (Black/ Blue/ White/ Red/ Green) At Amazon: http://amzn.to/2gdUg5k At Ebay: https://goo.gl/XAGhmJ
Various Storage Devices:
Seagate Portable 1TB External Hard Drive At Amazon: https://amzn.to/2SzXCQw Or Ebay: https://goo.gl/JeqiF4
Seagate Portable 2TB External Hard Drive At Amazon: https://amzn.to/2Asn3fT Or Ebay: https://goo.gl/FQ9QX1
SanDisk Cruzer 16GB USB Flash Drive At Amazon: https://amzn.to/2Vp4qm8 Or Ebay: https://goo.gl/AH9dAe
Sandisk Cruzer 32GB USB Flash Drive At Amazon: https://amzn.to/2CKIwCd Or Ebay: https://goo.gl/1hxZnX
Sandisk Cruzer 64GB USB Flash Drive At Amazon: https://amzn.to/2RsaSJD Or Ebay: https://goo.gl/m9T8mv
Sandisk Glide 128GB USB Flash Drive At Amazon: https://amzn.to/2s67V3d Or Ebay: https://goo.gl/wAatgZ
Sandisk Ultra Fit 256GB USB Flash Drive At Amazon: https://amzn.to/2s5x3Hn Or Ebay: https://goo.gl/fqUNpM
Toshiba Canvio 1.0 TB USB 3.0 Portable Hard Drive At Amazon https://amzn.to/2SEh0fd Or Ebay: https://goo.gl/vUzGcT
STANLEY 94-248 65 Piece Homeowner's DIY Tool Kit At Amazon: https://amzn.to/2SR7ZzS Or eBay: https://goo.gl/FYvMuy
Amazon Prime Membership Sign Up: https://goo.gl/ewmAV
●▬▬▬▬▬๑۩۩๑▬▬▬▬▬▬●
Facing Cam: https://amzn.to/2P9bazV Or eBay: https://goo.gl/7WkzYb
Overhead Cam: https://amzn.to/2E4kiF8 Or eBay: https://goo.gl/kqeoVv
Handheld cam: https://amzn.to/2Qmh2e5 Or eBay: https://goo.gl/KAiZyX
Video Software: https://amzn.to/2SjNKdf Or eBay: https://goo.gl/CdWBwG
Desktop Capture: https://amzn.to/2SgVaxQ Or eBay: https://goo.gl/LYNC3f
Mic: https://amzn.to/2KFj43r Or eBay: https://goo.gl/yC8uMC
Mic Wind Filter: https://amzn.to/2ScZdes Or eBay: https://goo.gl/HruSsJ
Lens: https://amzn.to/2Sj4S2G Or eBay https://goo.gl/C1z9vE
Lens Filter: https://amzn.to/2P2zN1n Or eBay: https://goo.gl/U3psNL
Wind filter for handheld cam: https://amzn.to/2P7TYuA Or eBay: https://goo.gl/wwRtEk
Selfiestick dslr: https://amzn.to/2TUR4gn Or eBay: https://goo.gl/Rtzrrd
Tool box: https://amzn.to/2E3r8dQ Or eBay: https://goo.gl/houqn4
Laptop stand: https://amzn.to/2E24dzH Or eBay: https://goo.gl/ZfXhT3
Studio mic: https://amzn.to/2Q2FO3w Or eBay: https://goo.gl/bHnT8Z
Tripod Neewer Professional 61 inches: https://amzn.to/2VnotkL Or eBay: https://goo.gl/GfNGGT
Neewer Lightweight Portable 66"/168cm Carbon Fiber Camera Tripod Monopod At Amazon: http://amzn.to/1rsQN5l Or eBay: https://goo.gl/AxonTQ
Tripod Neewer Alluminum Alloy 62": https://amzn.to/2LIbEwW Or eBay: https://goo.gl/ao5nss
●▬▬▬▬▬๑۩۩๑▬▬▬▬▬▬●
02/28/19
192.168.0.1 Home router IP Address
192.168.1.1 vpn router IP Address
Wan Connection Type
L2TP
DC vpn Server 70.32.0.132
vpn User (7 digit #): x1234567
pia password (10 characters and digits case sensitive): s2JHdk1y32
WAN IP Address 192.168.0.85
Subnet Mask 255.255.255.0
Gateway 192.168.0.1
Static DNS1 84.200.70.40
Static DNS2 84.200.69.80
Static DNS1 84.200.70.40
DNS watch 84.200.69.80 and 84.200.70.40
https://dns.watch/index
https://dns.watch/why
https://dns.watch/how-to
Making A Dedicated vpn Home router Using A Regular router TP Link wr940n Private Internet Access pia
You may also like to read about:
hello everyone Richard here again today
I'm going to show you how to create your
own dedicated VPN router from a standard
router I've done it on a neck ear router
this old basic router I have here this
is a wnr 2000 version 3 and I've done it
on two tp-link routers without any issue
at all all the routers connected to VPN
without a problem so in this video I'm
going to show you how you can do the
same I'm gonna get this question on this
video quite a bit why do I want VPN and
what is VPN anyways alright so let's go
through a quick introduction to how the
internet connects you to all these
wonderful things out there in the world
here we have me I'm the I'm the person
standing here and I'm at home with the
connection to the Internet I have an IP
address this is the IP address let's say
theoretically that's my IP address ok
and the IP address is like your phone
number it basically tells the internet
where you are and how to send data when
they send data to you like say you go to
CNN or let's say Amazon and you ask for
something like I don't know a cat photo
a well they need to know where to send
that and they send it to your IP address
ok so the IP address is like your
identifier on the internet and when you
connect you connect to something called
a service Internet service provider and
that could be like Time Warner or you
know Sprint or whoever you have so you
connect through your internet service
provider and then they connect you to
the internet and then the internet
connects you to whatever you want ok the
the this is basic connectivity to the
Internet the problem with this is this
and I'll show you what happens is that
everything that you do from this IP
address going through this internet
service provider time-warner whoever and
then in out into the into the internet
is traceable in other words if you go to
I don't know FBI dot-com then basically
your internet service provider contract
that you've done that and say you search
for that on Google well Google can track
you and say oh well you know Richard III
well this whoever is at I P address 7-0
four or five one eight to sixteen just
looked for FBI put that in the database
and then they start tracking you right
and then when you go from Google to say
Amazon Amazon goes oh well that person
came from Google and they came from this
Internet service provider provider in
Texas and this is their IP address and
they track all this stuff and eventually
they have a huge database about this
sort of stuff that you like to do on the
internet and then they target your
advertising to you then when you've
wondered how that advertising is so so
well targeted well this is a portion of
it okay there's more to it than that but
this is basically saying the Internet
service provider is tracking every
single thing you're looking at on the
Internet in a log file okay they could
see it they can say oh he searched for
this he searched for that he went here
he went there they can see all of it and
they track it so you know and if the
government shows up and says hey show me
everything that you know Richards gone
looked at in the last two years they go
okay there you go they have it okay so
there is no expectation of privacy in
what you're doing on the Internet at all
zero okay zero like don't think you're
doing anything privately on the Internet
zero it's you know shored up let's say
going to your bank but even then they
know what bank you're going to they
don't know what you're doing in your
bank because that's an encrypted
connection but they know that you let's
say your bank is a Bank of Montreal they
know that your bank is that is that Bank
when you because you are asked to go
there to login so nothing in this
communication chain here between you and
the Internet is private zero okay so
let's go next here's the other thing
let's say you take your laptop and
you're sitting down at your local coffee
shop on the Wi-Fi and you're logging in
and you're typing away blah blah blah
well the same situation happens again
you have to call aughh into the coffee
shop Wi-Fi and then from there you go
through a service provider and then from
there you go out into the internet well
there's one more step here anybody in
this
coffee shop Wi-Fi network can actually
snoop at what you're doing they can they
can look at what you're doing they can
actually try and break into your laptop
and if you're sharing files and and and
data to the internet from your laptop
anybody in this coffee shop Wi-Fi can
look at it too so there's no security
there at all okay so this is where VPN
comes in and the whole reason why I have
VPN is because when I travel and I
connect to a hotel Wi-Fi or a coffee
shop Wi-Fi or an airport Wi-Fi I don't
want you know I don't want to expose
myself to that kind of data breach so
this is what I do this is what VPN does
all right
what VPN does is it establishes a secure
encrypted connection between you and the
Internet okay so this green arrow I'm
gonna is the is the secure connected VPN
connection and it goes through it
connects through the Wi-Fi at the coffee
shop connects through the internet
service provider and then connects to
your private internet access or VPN
service which is Who I use P ia it's
what is called private Internet access
and basically what happens here is it
creates an encrypted tunnel it's so
nobody in the coffee shop nobody in the
Internet service provider nobody until
after you go through your VPN service
can see where you're at you can look at
and say oh this guy's in you know Texas
and he's surfing with Time Warner and no
none of that happens what happens is you
get a private connection all the way to
this point and this point is the the VPN
service provider and the VPN service
provider promises that a they don't log
your IP address B they won't give that
information out to anybody and C they
will they don't like let any data go
past this point so basically what
happens is once you go out from the the
VPN service to the Internet and they try
and trace it back they trace it back to
the VPN service and that's as far as it
goes
it's like hey that person surfing from
the private Internet access
let's say Virginia that's what I think
this is what no I think this is
Washington anyway doesn't matter it
basically stops there and doesn't go
back to you so that gives you that makes
you a private that gives you privacy and
it makes you private in other words
these guys can't trace you back anymore
right now it's not a hundred percent
because there's vulnerabilities and so
on and so forth but that's what VPN does
it secures your your privacy and your in
and your data connection to the internet
against people who could use it in
nefarious ways okay that's why I like it
that's why I use it and what we're gonna
do today and okay just to back this up a
little bit on my laptop I have a little
client a little connection piece of
software that connects me to the VPN
service from wherever I am so I connect
to Wi-Fi then I open up that my client
and I connect the VPN and I disappear
from those networks altogether because
I'm encrypted all the way to the VPN
service provider okay but what I'm gonna
do here is show you how to create that
connection in a router all by itself so
anything that connects to that router
will be automatically connected to the
VPN service and surfing privately
through the Internet
that's the whole point of having a
dedicated VPN router now what you can do
with that router is plug it into your
current network and then anybody that
logs into that will be protected from
you know any snooping or prior to have
privacy and a lot more security that's
why we're why I'm showing you how to do
this okay so I'll show you how to do
this on a standard router in a simple
way well in a simple way but I'll walk
you through all the steps and why I'm
doing it and how it works and the whole
point will be to have a 24/7 connected
router to your VPN service there's a lot
of pluses to this number one like for
instance private Internet access only
allows five connections right and
and by the way this is not a free
service this private VPN service costs
money I pay like 3 dollars and 30 cents
a month to have the service more than
happy to pay that money to have the
service because it gives me a great deal
of security and peace of mind when I'm
traveling in anymore and I'm at home but
I do have a dedicated VPN router it is
my Wi-Fi router which makes it even more
secure for me and it allows me to you
know browse the internet privately which
I like now basically it is a paid for
service I use private Internet access
that's who's who they're called one of
the big I think they're the biggest VPN
service out there but you know you do
your own research on that so that's what
VPN is that's how it works and that's
what we're gonna do in this video all
right I want to reiterate this for
everybody who's watching this video
because it's very important that none of
this will work without this one thing
you need a VPN account ok now I use
private Internet access and you can see
it here on the screen and it's it's a
paid for count it's very cheap for me
I'm using the service that costs three
dollars and 33 cents a month you can go
for whatever you want here's the pricing
this is the web page and you can see up
here it tells me my IP address my ISP
and that I'm protected by PIAA so
basically this is really not my IP
address this is really not my ISP but it
I'm currently connected to VPN through
my VPN router here right so and you see
that it's dd-wrt again it doesn't have
to be the third-party firmware that I'm
using you can use whatever you'd like
actually you can use the stock firmware
in your router and that's what I'm gonna
show you how to do I may do a further
video on putting that third-party dd-wrt
firmware in your router and using that
instead but right now we're sticking
with the stock stuff so just a plain
off-the-shelf router how to configure
that to be a dedicated VPN router but
once again you need a paid-for
our VPN service now you can go with
private Internet access or you can go
with several others I just find that
these guys are the best
so that's who I went with and if you
look at the bottom you see that all the
VPN features you get right but the key
feature you're gonna get from them is an
account you need the username for that
account and you need the password for
that account in order to configure this
router to do what it's going to do ok so
let's move on to that before we start
configuring the router we need to find
out a little bit about your network and
this is why because we need to know
where your current router is at in other
words one that we're going to connect
this router to we need to know what its
IP address is so that we can set up this
rat the VPN router that we're going to
connect to it on a different network
we're going to have two separate
networks we're going to have your home
network which is what you currently have
right now then we're going to have your
VPN router network which is going to be
connected through your home network but
not part of your home network now the
reason for that is number one privacy
right it's going to be a separate
Network for VPN traffic only number one
number two when you're on this if you
made both routers part of the same
network what would happen is if the VPN
connection to the VPN router dropped
then you wouldn't know it it would just
keep you it would just take the traffic
and go okay well we're not going through
a VPN anymore we'll just go through your
home network and you would be connected
to a VPN router thinking that you're on
VPN and you're not ok so what I'm going
to do is set up the VPN router as a
separate network that goes through your
home network that way when you connect
to the VPN router you know you're
connected to the VPN and if that
connection drops for any reason
whatsoever and you're connected to the
VPN router you will no longer surf and
you'll know when that happens that oh I
must have lost my VPN connection for
some reason ok so and then you
troubleshoot that but basically what I
wanted to do is isolate the VPN
network by itself so that a you get that
privacy and security number one number
two when you if it ever drops you'll
know because it will no longer connect
you to the internet so let's go get the
information about your home network
right now so that we can set the
secondary VPN router dedicated VPN
router to a set to a different IP
address okay and I will put links for
this stuff in the video description
below for you know the hardware and and
and so on and also the configuration
that I use to make this happen because
there's a bunch of numbers and stuff
that you need to remember I'll put it
all in a video description below also if
you wish to leave me a comment a
question or you know even a suggestion
again you need to put them in the
comment section below the video alright
so let's go get the information we need
so over here you see my network icon and
then right-click it now I'm hardwired
you may be Wi-Fi connected it doesn't
matter just right-click it choose open
network and internet settings scroll
down to network and sharing center click
on that then click on change adapter
settings over here and then you'll see
that you know I got Wi-Fi but I'm not
connected to anything I'm connected
through Ethernet now it doesn't matter
which one you're connected to whichever
one you're connected to your home
network through just right-click it and
choose status okay and then go to
details here alright and in the details
what you're looking for is your default
gateway the default gateway is tells you
two things number one it tells you where
your home router is number one number
two it tells you what network you're on
so in my case is 192.168.0.1 so I'm
going to take notepad and put that in
there
it's one nine two one six eight dot zero
of dot one okay that's you know not I
can't even just put it and you can save
this information you want home router
helps if I spell it right here
IP
okay so that's the home routers IP
address 192.168.1.1 our VPN router to be
part of that Network now you can
definitely you know not go your own way
and configure it the way you want but
I'm telling you the way I think is best
so you know take that with a grain of
salt now so now I know what my home
address is my home IP address and my
home I outers IP address I'm gonna set
my VPN dedicated VPN router to something
outside of that network right I told you
the reasons why because hey you know if
the VPN drops or whatever it's part of a
separate network and you'll know it all
right number one number two people can't
go from the VPN router to the home
network or from the home network to the
VPN router it's separate okay and that's
normal by the way so let's go here to
what we're gonna set the VPN router now
the VPN the the network portion of the
IP address is the first three octets or
the first set of three numbers on this
list okay now this applies to this
network it's changes on different
networks but trust me on this the first
three numbers is the network number okay
so by changing the 192 168 0 2.1 I put
it I put the IP address of the VPN
router on a different network ok so
we're gonna call this VPN router now
here's the thing the reason I'm doing
this is because let's say you have a
different IP address let's say your your
main IP address was was you know
192.168.1.1 quite possible ok then you
would have to use something other than 1
0 or 2 would do just fine just basically
whatever your third number is or
whatever the net
name number is you need to change it to
be something different than the one
you're on or else you're gonna be on the
same network and you're gonna have a
whole bunch of vulnerabilities don't do
it okay so in my case it's 0.1 so the
VPN router is gonna be one not one if
yours was what if your home router was
on one not one and it would say well
then just choose 22.1 right and then
it's on a different network it could be
three could be for it could be 54 it
doesn't matter that just as long as that
number is not the same as the home
routers a network name now our number
sorry so now we've got this information
let's go physically I'm gonna show you
how to physically connect this router to
your to your computer or how I'm gonna
do it it's up to you actually yeah we're
gonna physically connect it I'll show
you how you should connect it to avoid
any trouble with your home network since
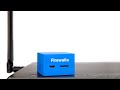
I'm configuring a tp-link router in this
video I'm going to show you the tp-link
router of course and what I'm gonna do
is use just the patch cable and this
patch cable is a LAN cable that came
with the actual router itself and we're
gonna plug it in and physically connect
it to my laptop so what the port's we're
going to use to connect to our any of
the orange ports or the LAN ports or
Ethernet ports as they call them and
pick the one you want it doesn't matter
which one you pick just as long as it's
in the orange ports then the other side
of the cable we're going to plug into
the LAN port on this laptop if you have
a computer you choose the the LAN port
on the computer either way you're going
to physically connect to the router this
way so again cable to the LAN ports and
on the LAN port on your computer so
we've got our VPN account we've got a
username and we've got a password
perfect we've got we're ready to go to
the next step now in order to set this
up we need to know the IP address of the
server that the VPN account is on so
what we're going to do here at the PIAA
private Internet access web page and now
if you're using somebody else I don't
know where you would need to go to find
this information but
PIAA is simple you go to network all
right and for me it's best to choose a
server in the country that you want to
appear to be surfing from so if you will
if you for some reason want to look like
you're surfing from the UK then you
choose the UK and and would go there if
you want to choose like your if you want
to look like you're surfing from United
States for whatever reason then you go
to the United States Canada so on and so
forth all the way through like all these
countries they have a hundred and thirty
three to pick from so or sorry they have
33 to pick from so you choose the one
you wish I'm gonna go back to the
country I'm in which is the United
States and here it's up to you which one
you choose there's you know 14 locations
to choose from
usually the closest one is better but
not always I'm gonna choose I could
choose Texas but I don't want to do that
because I want to appear to be in a
different state than I'm currently in
primarily to show you guys that it's you
know that it works so I'm gonna choose
Washington now you see here that they
say run tests on all of these okay so
you can choose run a test on any one you
want and see how fast it is and then
choose that one okay and you can change
this any time you want using the same
procedure I'm going to show you right
now so what we're looking for here is
the VPN server IP address you can see
that they have a domain name address
here right at qdn that's what it's
called and we don't want that we want
the IP address so here we're gonna hit
run test I'm gonna use Washington US
Washington DC and if you want to run the
test just hit the start button you can
do that I'll do that but what I what's
really important is that you copy this
information the US if this lets me do it
I don't know why it doesn't chase lovely
let's try this again
run the test and yeah okay some reason
now I can highlight copy it's a
right-click it
highlight it all right click it copy it
if you want to run the test just hit the
run test and if it will go through and
it tells you the kind of connections
that you can have here and the speed and
so on and so forth the ping speed
you know download speed so when you're
connecting through a VPN server there
your internet service provider and VPN
is encrypted and therefore it's a slight
it's slower than regular Internet
traffic so this is this performance that
you're going to get from this server not
bad I'm just gonna minimize this out of
the way so again what's really important
here is knowing how to choose and number
two getting that that fqdn address of
the server where it's at I don't know
why they don't put the IP address up
there probably because it changes but it
doesn't matter what you need is that so
we copied that then go over here to type
into your search box and just in here
we're just going to type in CMD and
enter that brings you to a command
prompt okay and here we're going to type
in ping and we're going to paste that
right click on this CMD box you don't
get the option to paste when you
right-click it just paste it and then
we're gonna hit that and then you can
see an IP address okay so the IP address
of the US Washington private blah blah
blah is seven zero three two zero one
thirty six so this is the IP address we
were looking for okay so you know
highlight that right-click it I know it
didn't say anything but when you
highlight and right-click it it copies
it so back to our notepad here here we
go
and you can see that I already have that
IP address here so again that's how you
get the IP address for that server and
that applies to any server in the world
any-any if you want to know where Google
is you can do the same thing you know
it'll tell you the IP address the reason
we need the IP address is because the
router requires it number one to set up
this configuration so we've got the IP
address of the DC
VPN server you know Washington DC so
let's just close the command window here
close this up so part of the information
required for us to set up the router is
knowing an IP address of one of the
server's we're going to use and like I
said you can change this use whichever
one you want from wherever in the world
you're gonna plug this into okay you
choose you know how to choose now
so let's minimize this so we're still on
the internet obviously we're connected
because we were just surfing so we want
to undo that you've connected the router
the way I told you to do it so okay I'm
going to just click on the Wi-Fi button
which disables Wi-Fi takes me off the
internet I'm going to turn on the router
and we're gonna go find out where the
router is now your router may be in a
different IP address than the one I have
but I'll show you how to find out what
IP address it's at so right now it's
booting you can see that the icon is
changing back and forth that's because
I've just turned on the router so
right-click it choose open and network
internet open network and Internet
settings I go up here to start scroll
down to network and sharing center
change adapter settings and then here
you'll see that you know Wi-Fi is on but
it's not connected to anything because I
shut it off and you can see that the
Ethernet port were the the router is
connected he's identifying a network
because I just turned it on so I'll let
that happen
okay there it's identified it so right
click it
choose status and then details and you
can see that the the default gateway is
192.168.0.1 which is you know the same
as our primary router so we're going to
need to change that but right now all
you need to know is that 192.168.0.1 is
where the router currently is because
that's the default gateway you're
connected to and you're only connected
to the router so we know 192.168.0.1 is
our router IP address so we're gonna go
back to our browser here and
open up a new tab type in that IP
address 192.168.0.1 and hit return ok
and here we're at the default login web
page for the tp-link router I've reset
this router to the factory default so
the factory default username and
password are going to be on here so
let's do that in the case of a most DP
link routers I believe it's the same
username is admin all lowercase it and
the password is admin again all
lowercase and this is the first thing
we're gonna change because you don't
want to keep the router on the default
username and password it makes it super
easy to hack anybody can hack it just by
googling what's the default password for
a tp-link router so we're gonna log in
and because I've logged in after
resetting the router to the factory
defaults we get the quick setup screen
from tp-link we're gonna click exit on
that first thing we're gonna do I'm
gonna show you how to do the factory
reset on your router in case you don't
know so that you can be you know follow
step by step and have the router in the
same configuration as I have it in which
is a factory default reason being we
want to start with a clean router
without old configurations in it or
anything else when you do the factory
resets it wipes it to the day you took
it out of the box and you start again
now if you want to save your
configuration files as opposed to you
know if you want to save the
configuration your router prior to
resetting the router which will race all
your configurations you can do that as
well so let me show you both things here
first we'll go to system tools I hit
exit on that you know a quick set up and
go to system tools we're gonna go to
backup and restore and here you can
backup the configuration you've recurred
router now this is a good thing to know
because after you're done configuring
this for VPN and it all works you may
want to backup your configuration and
say that so that you know in case it
ever gets messed up or anything you can
always restore it and come back to the
day that you set it up which is right
now I actually do that every time I do a
new configuration I save it
and you know in a place where it's I
know where it is and then I keep going
so in case that my configuration doesn't
work out for me so you know hey
yesterday's configuration is better than
today's let's restore back to that day
and get what we need okay so here you if
you backup your configuration simple you
hit the backup button you get a file the
files config bin you save it to wherever
you wish now you can rename it as well
but I just keep it the same and and save
it and then you've got a configuration
backup of your if your router I don't
have to do that because right now it's
reset to factory defaults there's no
need to retune to do that but it if you
wanted to save yours you click on this
and then you go afterwards browse to
where the file was saved and hit restore
and that restores your configuration to
the original configuration so if you're
worried about your configuration if your
router prior to doing any of this then
definitely do a backup of the config
file and save it somewhere where you
know it's going to be and then you can
always restore it but after you're done
if you want to go back to prior to this
configuration so that's step one step
two is going to the factory default so
we're going to go here to the tab under
system tools factory defaults then we
just click on restore it asks you if you
want to do it you say ok and then it
goes through the process of doing it
which is okay we're starting it's going
to go through the process of you know
basically resetting the router and
rebooting it it doesn't take very long
but you know there's a little bit and
then after this what we're gonna do is
come back in here after we just after we
set the factory defaults we know that
it's using the factory default password
which is admitted min your site username
and password admin and men we're gonna
reset that first thing off as soon as we
come back in so that we don't have that
vulnerability to the Internet right off
the bat and we don't forget to do it
through it first to get that
vulnerability out of the way and you
know then we move on from there and I
can't suggest I can't recommend strongly
enough to change that default username
and password right off the bat unless
you want somebody hacking
router okay so wait for this to reboot
there we go
and it takes us right back to this home
screen here again default password admin
although our case default sorry default
username I've been all over case
password the same all lowercase of men
login and again we get the wizard that
it wants to go through we're gonna hit
exit here I'm gonna go to system tools
and here we're gonna go to password
we're gonna change this okay here we're
going to enter the old username and
password which of course is the default
one that you get when you restore the
router which is admin this that's the
username and the password again will be
admin as that is the default is where as
well here you can enter in whatever
username you want all enter and that and
continue on here and a special password
to avert people from coming in with the
default password okay and when you do
that boom and knocks you back out it
says okay now I need to log back in
again
so here we're gonna log in with the
password we just put in a forward stuff
there we go and we're at the Status page
now at this point were I want to point
something out to you right here you can
see right here
we're on 192.168.0.1 now if that is not
the default gateway of your primary
network then everything is cool you
could leave it there but in my case it
is so I need to change that from
192.168.1.100 land
and here well I thought I hit LAN LAN
there we go
and here we're gonna change this from
192.168.0.1 to 1.1 and this is going to
require a reboot so let's do that save
it and modification of LAN settings
would result in a reboot so I'll reboot
it and pick it up after the reboot and
it may or may not bring you back to the
default web page so if it does not just
type in the IP address you put in there
whether it's 0.1 or 1.1 or 3.1 whatever
it was choose that IP address put it
into the address bar up here hit enter
and you'll end up back here so we're
gonna lock in and login again and that's
going to be under whatever username you
used and whatever password you changed
it to to secure the router and now we're
at 1.1 which is what we need right so
the next part we're going to go to is
back to network again and here we're
going to start configuring this for VPN
so here we're out of all these choices
you're going to choose l2tp or russia
l2tp same thing either way l2tp stands
for layer 2 tunneling protocol it's it's
more secure than any other option on
here and it's actually the only one that
works anyway so at least with private
Internet access so I'm going to choose
that here we're gonna have to put a
username and password and confirm the
password I'll show you what that should
be under P ia or private Internet access
VPN and the the username will be a seven
digit number with an X on the front of
it that X at least as far as I know is
on every username that me that P I uses
so it'll be the lowercase X and then a
seven digit number of some kind I'm not
putting mine in here because I don't
need to edit that out you know it's not
something I want to put on video so
there's a bogus one for you
let's go back to this again then the
password will be a ten digit character
string like this and it's case sensitive
so there's a uppercase H in there or J
or a lowercase K or D it all has to be
exactly the same so I'm just going to
copy it you can do the same with yours
and just paste it in there so let's
control V you can't right click here and
paste you but you can do control V and
here we're going to go to the next step
and here we're going to change this from
dynamic to static IP okay so that's
where it has to be next we're going to
put in the server IP address or name
that is the Washington DC server that I
got earlier by pinging it on the command
line so let's go back to that over here
and where did I save that in here
somewhere I'll hear this
so it's 70 3201 32 so I'm just gonna
copy it ctrl V it over here there we go
and next it's asking for an IP address
the IP address you're going to put in
here is 1 on your network so in my case
my main network is 192.168.0.1 is the
network name but here it's we're going
to put in 0 dot let's say 85 any number
other than your default gateway on your
main router will do usually just fine
now if you're if you know what you're
doing with networking and you know where
your DHCP server addresses start and end
you can put 1 choose an IP address
outside of that but regardless if you
just choose a random number
usually you'll be ok I'm choosing 85
that should be ok so 192 that wants to
say that 0.85 so that's an IP address on
my home network not my VPN network so
that's what I'm doing here so yours
should be the same this should not be a
1 in here it should be well it depends
if your home network is on 0 then it
should be a 0 number if your home
networks on 1 it should be a 1 number so
and now for that so to the subnet mask
subnet mask will be the
same 255 255 255 0 and the Gateway will
be the same gate where you use on your
home network okay so this establishes
the connection to VPN and in order to do
that it's got to be on it on your home
network so that's happening there once
you get connected it disappears from
your home network so DNS this is
important the domain name service
there's our server is something that you
need to be careful about now you could
use Google's domain name servers or you
could use whatever your ISP is using for
a domain name server but those servers
track your activity on the Internet so I
it out of that I what I'm gonna use is
something called DNS watch it's a it's a
company that is free this anybody can
use these IP addresses these DNS servers
and they're there so they're more secure
they don't log anything they're private
and they don't censor anything either so
use this IP address for your DNS
searches or your DNS server and I
strongly recommend you do that and I'll
put all the all this information that I
have here on the screen in the video
description below so I'm gonna use this
number okay and then just don't think
dumping it in here so right so I right
clicked it over there and copied it here
we're gonna and there's the primary the
secondary would be 69 80 on the last two
digits but doesn't matter just use that
trust me on this the whole point here is
to be private so after you know that's
why I'm using that DNS server because it
ensures privacy it's fast it works great
no problems so hit save and I may do a
video on that as well so I'm gonna hit
save here and it will more than likely
try and connect this I'm gonna hit save
one more time there just to make sure
there we go okay and I'm going to go to
let's go
status see what happens all right so
under status the land address has got
nothing I P address is 192 168 exactly
what it should be when when when we
connect right when we connect you'll
have me see house that has the option to
connect here it will display data here
but right now it doesn't that's cool
because we're not connected so back to
network you can see that it kept my
settings hallelujah
next thing we're going to do is okay so
and that is the configuration that I use
to on my current VPN router which is
using dd-wrt firmware third-party
firmware but it'll work the same way on
this stock firmware from tp-link and I
may do a video on that as well so here
we're going to go down to well we've got
the land portion and the land portion of
this setup okay and it says disconnected
because there's no way we haven't
connected it to the main network yet so
here we're gonna go to wireless next
thing you're gonna want your gonna want
wireless access to this router right you
know you want to be able to connect to
it with just not just with the hardwired
but also through Wi-Fi so let's call
this something that makes sense VPN
router alright and leave the right left
left
the rest alone hit save okay I'm gonna
assume that took so I could go to
wireless security and come back here and
it took it right now it's called the
SSID or the VPN the wireless network
name is now VPN router perfect now under
wireless security we're gonna change the
wireless password to something that
makes sense to you whatever you want it
to be you know that that can be anything
so I like using wpa wpa2 do not use WEP
not secure don't use this at all they
shouldn't even include this anymore but
if you you know whatever you do don't
use this as security you don't have wpa
wpa2 enterprise access at least most
people don't at home so and definitely
don't disable it always have some sort
of security here put in a wire
password call it whatever we want I
don't know some number you choose what
you want and you know I'm not going to
keep this here I don't know okay so I
chose that you choose whatever you want
here we're gonna hit save and now your
Wi-Fi is set up to connect so the VPN
router will connect to the internet no
problem and once it's connected you can
hardwire into it with a LAN cable into
the back of the LAN ports till before
those for online maybe there's different
ones on yours and then not only can you
connect hardwire it through a LAN cable
you can connect through Wi-Fi so you
know if you want to secure VPN Wi-Fi
connection all you need to do is connect
to this router and that router will
connect you to the VPN through Wi-Fi so
at this point I'm going to stop here I'm
going to move on to connecting this
physically to the main router and show
you that next and then we'll test that
now that we have the router configured
for VPN it's time to test it and in
order to test that the we need to
connect it to our main router and what
we're going to do is disconnect the
patch cable from the laptop and from the
Ethernet ports or the LAN ports on the
back of that router and we're going to
connect to the internet or LAN port on
this router so like so it's plugged in
to that and now this other end of this
the other end of that cable is going to
go into any of the LAN ports on the in
on your main router so I'm assuming that
I'm just pretending that this is my main
router here so the main router would
take it would go from the the LAN or
Internet port or the blue port on the
VPN router into one of the LAN ports or
Ethernet ports orange ports on your main
router okay like so so then we've got
two routers connected like this this is
a VPN router that's the internet port
the blue one and then from there into
one of the LAN ports
on the main router now that we're
physically connected to the main network
using a LAN cable from the LAN port of
the router then it can easily now
connect to l2 VPN now I put my username
and password in there at this point so
that you know basically you don't see
that and it's a valid VPN username and
password so at this point I'm back to
the Status page also I'm still hardwired
connected to the router the VPN router
so I still have a LAN cable going from
my network card on my laptop to the LAN
port on the router I connected another
patch cable from the the LAN port to my
main router LAN ports without any issue
at all
and the reason I did that is number one
so that you can see this thing
connecting and number two I'm going to
show we're going to connect to it
through Wi-Fi next but right now I just
want to show you what happens when you
do that it will connect right like this
so I'm gonna hit connect
alright and now I'm connected it says
I'm connected if you go to status back
to status you see that I have an IP
address and it's not anything that we
put in there so right at this point I'm
gonna go and disconnect the cable from
the back from the LAN port and see what
happens
and it should disconnect when I hit
refresh on the status because it's no it
can't any longer be connect it see there
it is so you know again I'm disconnected
so I'm going to plug the LAN port or the
internet port back cable back into the
internet port on the VPN router and it
should automatically connect you'll see
dah dah dah just as it should so now
it's reconnected again okay so next
we're going to connect to this through
Wi-Fi so I'm going to disconnect the LAN
cable from the laptop and in
the VPN router and then connect to it
through Wi-Fi at this point we have a
VPN configured router should be
connected through VPN currently we've
disconnected the LAN cable from the
computer that configured it so now the
only cable connected to that router is
the one from the internet port or LAN
port to our home network on the LAN side
of the router so this router is
currently connected to the Internet
through VPN next what we're gonna do is
connect to it using Wi-Fi since we're no
longer connected through a hard cable we
want to be able to connect to it through
Wi-Fi so let's go down to our network
icon down here and there's I'm gonna
tell it to forget that just in case
okay there's VPN router it's a brand new
connection to me obviously connected to
it before but I'm pretending it's brand
new and automatically wants to connect
automatically I'm gonna choose not to do
that I want to be able to pick when I go
on to that Wi-Fi VPN router and you know
pick and choose so I'm gonna say not to
connect automatically if you want to
connect automatically every time the
computer sees it then keep that
checkmark there here we're gonna keep
hit connect and here we're going to type
in the SS ID password which I remember
there we go
hopefully you remember what you put into
those Wi-Fi parameters and we'll let it
connect and says you're connected now
you want to verify that you're connected
just hit the connection go to properties
and the IP address should be on the
192.168.1 network and it is as you can
see and the second way to verify is to
go to the home routers web page so we'll
do that that is 192.168.1.1 there we go
let's login to it and with the username
and password we put in bang it says
we're connected well it doesn't say
we're connected but you can tell we're
connected because you have
disconnect button not a connect button
so that's cool let's go over here to
well actually we're done with this we're
on Wi-Fi we're connected to it so that
means we're cool next thing we want to
do is test this out a little bit this is
where it gets fun and I'll show you why
so let's go to pi/8 which is private
Internet access my my VPN route my VPN
server or service and you can see that
I'm connected and the nice thing about
this is it tells you your IP address
right there right and it tells you your
ISP which is P ia and you were protected
by PA so it knows we're connected to it
right now right I should because we are
now this IP address is not our Pia our
IP address that's this is not where I am
at so I'm gonna hit copy on that let's
see if we can what we get when we go to
that IP address nothing perfect right
this is your IP address this is what
happens nothing so that's kind of cool
but that's not the test let's go here to
let's do some VPN testing so first thing
we're going to test for is it goes
something called a DNS leak so here I'm
going to type in DNS and leak and you're
gonna get the DNS leak test here DNS
leak test comm and it gives us the same
IP address which is not mine it says
it's an Ashburn so I live in Temple
Texas so you know this proves that I'm
not using my IP address I'm using P I
ASP address IP address now what a DNS
leak is is that it says okay you may be
VPN protected but if you're using a
tracking DNS server then you're not so
protected you're sort of protected but
you're not fully protected so here
standard test
uh-oh what's all this right we've got
one two three four five six
Google IP addresses for DNS so somehow
my computer has managed to hook up to
DNS servers from Google how did I do
that
let me show you how that happened
this is something I didn't show you
initially when we set up the network
card but here we go I'll show you now so
right click the network icon choose open
network and Internet settings ok so
click on that so this is a some special
stuff for you guys so you know like I
said I like to add value and I'll show
you where I am where I'm gonna add value
here ok and this is this is big because
I'll tell you right here in a second so
so back to this we went to network and
sharing center then we went to change
the dafter settings and there's our VPN
router Wi-Fi connection ok
I'm gonna right click that and we're
gonna choose properties alright and in
here you'll see all our networking
properties so the only one we're really
concerned about is right here Internet
Protocol version 4
now I disabled 6 because I don't use it
so it's up to you whether you do or not
but this is where we're going double
click on that and you see that
everything is set to obtain oh pete IP
address automatically well somehow you
know obtaining the IP address
automatically it obtained Google's DNS
servers automatically so in order to
avoid that ever happening in the future
you need to change it ok and I change
all of these on these connections autumn
from automatic to the DNS watch IP
address on every computer I have in
every device I have because
automatically for some reason you always
end up at Google so let's change that to
the IP address is from DNS watch which
are 84 whoops 274 T for the primary the
secondary is 84 200 hello let's do that
right so it's 84 dot 200 dot 6 9 dot
eight-zero and here we're just gonna hit
apply notice that the IP address is
still automatic we'll leave that alone
we want that to be automatic but the DNS
server will always be the DNS watch
private or privacy DNS server okay so
we're gonna hit OK on that then we're
gonna hit OK again
that will reset that connection and
maybe you notice that when I showed you
the connection properties for the
Ethernet cable and I'll show you this
here again you saw that TCP IP 6 is
disabled but see there it is already
right I automatically do that to all
that all the network connect
configurations just to make sure that
whether I'm on VPN or not this works
anyway so this gives me a set a bit of
prep more privacy even when I'm not on
VPN ok because I'm still using the DNS
watch server for DNS okay so hit OK and
you can like I said Google DNS watch and
see what they're all about I love it
works great they're fast ok no problems
so now we've got that set so remember
back to this right go to properties
tcp/ip 4 put those numbers in again I'll
put those numbers in the video
description below as well for DNS watch
and then save it and you'll be fine
ok so let's do this test again close
this all up the way notice all the
Google servers right this is what we're
trying to avoid we're trying to avoid
this we're trying to get private here ok
so let's go back let's do a refresh here
and yeah that should do it it's going to
do the standard test oh look at that
look at the only IP address we get now
the only one we get is the DNS watch IP
address right so that confirms that VPN
is working for us it's using a privacy
protected DNS server and everything's
cool right I know some people who are
more security conscious will boot
you say well what about web web RTC RTC
alright now this is getting into more
crazy security stuff it's a little
higher level but what what this is is
something that's built into your browser
that can actually reveal your IP address
even if you're on VPN okay so let's do
the web RTC leak let's go here and see
what they say about VPN and web RTC like
I said this is high level you don't
really need to worry about it I'm just
showing it to you so let's click on that
go to it and see what it says right so
it's capable right it's capable of
showing my internal IP address and what
web RTC is is something between this
webpage and this computer that are
connecting and and sharing data it's not
it's part of the browser it's not part
of the network so it shows here nolleke
right then it says public ipv4 this IP
address well that we know is P is
Washington DC server okay
so we don't have any leak so this thus
proves that we've got a very secure VPN
connection to the Internet it's private
it's not leaking any information and if
you configure your router the way I
showed you to configure your router
that's if it's a tp-link router this is
what you're gonna get for a result so at
this point we have private Internet
hooked up to our own dedicated VPN
router it can have as many clients as it
wants just all you do is connect to it
it has Wi-Fi enabled on it and VPN
through that Wi-Fi as well so at this
point if you want to connect your phone
to it let's say your smartphone to this
Wi-Fi router they will be protected by
DPN once again on your phone I would
strongly suggest that you change
the DNS IP addresses from automatic to
DNS watches so this is the company that
does that private DNS I privacy protect
the DNS and you can come here to DNS
watch /y and it'll tell you the you know
everything that they do and why they do
it and you might want to contribute in
these guys if you use them and again the
IP this is a totally free service works
great all right
it's anonymous so there you go outside
of this that's all the setup that I have
for this router I'm a do a follow up
video on the net gear because the net
gear has a totally different user
interface for the internet than this so
sorry then the tp-link so I may do a
video on that so that's the lowdown on
connecting and creating your own
dedicated VPN router using a tp-link
router this is the WR 940 and by the way
this is a version 3 but it'll work with
most tp-link routers alright I wanted to
put a disclaimer out there there's
nothing that can guarantee you 100%
privacy and certainly not me I'm just
saying this is a good setup for a
dedicated VPN router using a cheap
router this tp-link router is under $30
on Amazon and I'll put links for all
that stuff in the video description
below so you can get it where I got it
from but again for under $30 it's a
fairly decent solution especially if
you're using VPN and if you're using VPN
at home now you have a dedicated VPN
router again is there any guarantees
certainly not from me all I can say is
it works for me and this is what I use
that's it for my video on how to create
a dedicated VPN router from a standard
router if you liked this video and it
helped you out in some way do me a huge
favor click on the like button in the
bottom right hand corner and give me a
big thumbs up that helps my channel
it helps my video and I greatly
appreciate it also up here in the corner
you'll see a picture of me that is a
subscription link if you click on that
picture you
subscribe to my channel as part of the
process of doing that you'll see a bell
icon when you see that click the bell
icon and then you'll be notified every
time I put up a new video that way you
can watch it at your own leisure once
again and like always I want to thank
you for watching and for your time