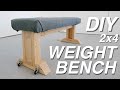
DIY WEIGHT BENCH from 2x4's | Modern Builds
Published June 25, 2023, 12:20 a.m. by Courtney
How to build a sturdy weightlifting bench with wheels!! This is a part of my diy Home Gym that I'll be sure to leave links for below along with free plans. Thanks for the support and stay tuned :)
Head to https://squarespace.com/modernbuilds to save 10% off your first purchase of a website or domain using code modernbuilds
MY SQUARESPACE TUTORIAL: https://youtu.be/6Ywu-1Q4Aew
FREE PLANS: http://www.modernbuilds.com/dis-weight-bench
diy HOME GYM: https://youtu.be/Gs6uo2K8_PU
Materials and Supplies (Affiliate):
Circular Saw: https://amzn.to/3GDwzNC
Circular Saw Finish Blade: https://amzn.to/3Evv3eJ
1 1/4" Wood Screws: https://amzn.to/3pjqHl9
2 1/2: Wood Screws: https://amzn.to/3p4jKE2
Wood Glue: https://amzn.to/3lbVMWm
12" Speed Square: https://amzn.to/32oABtE
Foam: https://amzn.to/3lbzNyV
Fabric (tons of colors): https://amzn.to/3DTmE53
Casters: https://amzn.to/3laHyoH
5 Minute Epoxy: https://amzn.to/3xmTskr
Stapler: https://amzn.to/3xmqAc2
Staples: https://amzn.to/310cZuC
Water Based Poly: https://amzn.to/2Zxp7Th
Ben's Bench Press: https://youtu.be/wuKh9YGRdfE
Modern Maker Podcast: https://open.spotify.com/show/10o65pbMCfnnRL0XOE3gKd
Where I Get My Music (Free Trial): https://www.epidemicsound.com/referral/osroq1/
Thanks for watching!!
http://www.modernbuilds.com/
___________________________________________________________________
ADD ME ON:
Instagram: https://goo.gl/UgEpJs | @modernbuilds
Facebook: https://goo.gl/KiI1cX
TikTok: https://www.tiktok.com/@mikefrommodernbuilds
Subscribe: https://goo.gl/pgDSS8
Website: http://www.modernbuilds.com/
Merch: http://www.modernbuilds.com/store
___________________________________________________________________
Thanks for watching!
-Mike Montgomery
MODERN BUILDS
Hi, My name is Mike Montgomery and I'm a MAKER; a designer, builder, and full-time content creator. Accessibility is my focus with Modern Builds, not simply accessibility of designs, but accessibility in materials, information, and projects themselves. I've focused on creating furniture and diy projects that are simple enough that any beginner maker can accomplish, yet interesting enough that any expert might be inspired. Building and making is becoming less and less of an exclusive hobby and profession. My goal is to reduce that separation even further.
You may also like to read about:
hey everybody my name is mike montgomery
and in today's video i'd like to show
you how i built this diy weight bench
for my diy home gym with built-in wheels
on modern builds
[Music]
i was shopping online and i was really
surprised to see how expensive or flimsy
just a basic weightlifting bench was so
today we're going to use this leftover
material and build one that is extra
sturdy i started this project by
breaking down a piece of plywood to 12
inches wide with my circular saw and a
straight edge after that i cut that
piece in half so that i had two four
foot long pieces
i decided to use two pieces for the
bench platform although i'm sure one
would work fine i used quite a bit of
wood glue and then once everything was
aligned i held it together with spring
clamps and then screwed it down with
inch and a quarter power pro screws i'll
leave a link to these screws down in the
description i like them because you
don't have to pre-drill a hole for
connecting plywood
next it was time to break down the two
by fours for the base
the two pieces i'm cutting are 45 inches
long that way there's an inch and a half
overhang on the base and platform on
each end i'm also going to be gluing and
screwing these pieces and doubling
everything up i used quite a few two and
a half inch long wood screws and i made
sure to countersink each screw that way
the next board could sit flat
this is where i should mention i've got
free plans for this project link below
if you're interested in building this
for yourself and if you do be sure to
tag me at modern builds i love seeing
viewer projects
each side of the base has two 13-inch
vertical posts and i cut those out using
my speed square along with that there's
a center beam that's the same height
minus the thickness of three two by
fours
and last but not least you'll need a
couple three and a half inch by three
and a half inch squares
so i bet as you watch the assembly
you'll really understand how it all
comes together but i was really careful
to make sure that i screwed in each of
my pieces as square as possible to the
platform
i'm using the same two and a half inch
wood screws as earlier and i made sure
to pre-drill a hole before screwing in
each piece with a healthy amount of wood
glue this whole project is pretty
similar to the diy bench press that my
buddy benuetta built on the channel
homemade modern it's where the 2x4 beam
idea came from for the legs we're also
two-thirds of the modern maker podcast
that we host with our buddy chris
alimony from 4i's furniture i'll leave a
link to all of that down in the
description as well
now that one side of the base assembled
perfectly i just needed to repeat those
steps on the second and a rubber mallet
really came in handy wedging these
pieces into place oh and it's always
good to have a pack of shims laying
around for a situation like this
my boards were pretty flush but i got
them perfect with the belt sander i just
wanted to make sure i was as square as
possible on the ends of each leg
oh that's awesome
if i left the bench like this it would
be too wobbly the base needs to have a
t-post to the bottom so i cut a couple
of pieces that are 16 inches long with a
45 degree bevel on each end now the
bevel is not necessary i just thought it
would look cool
i glued and screwed these pieces to the
bottom just like everything else i made
a mark in the center of the board for
reference that way i could line
everything up
and i cut these little wedges that way
the base would be double thick across
the board
i'll admit this is the first time i've
used this style of can opener in my shop
but i was at the store and i saw this
wood filler and i figured i would give
it a try i used it to backfill any
recessed screw heads and a glove made a
pretty decent lid
then i sanded everything with 120 grit
sandpaper on my random orbit sander and
applied a coat of water-based
polyurethane in satin finish
i made sure to round over all of my
edges that way it wouldn't hurt if i
knocked into anything i also wanted to
protect the upholstery and fabric which
is the next step
but first i'd like to give a big thanks
to the sponsor of today's episode
squarespace if you need a website an
online store or just a custom domain
squarespace is your one-stop shop and
the best part is you need zero website
building experience if you can drag and
drop files and edit text blocks you are
well on your way to a one-of-a-kind
website and squarespace's designer
templates are designed to look great on
desktop tablet and mobile no matter
where your customers find you plus
they're packed with great features like
unlimited products in squarespace stores
built-in seo and really great analytics
and right now if you follow the link
down in my description that's
squarespace.commodernbuilds
you can build out your entire
squarespace site without entering any of
your credit card info and then when it's
time to make your site live make sure
and use my code modern builds for 10 off
thanks again to squarespace now let's
get back to this build
i ordered this three inch thick foam off
amazon and it worked great for me i'll
leave a link down below it's got a
little bit of give but not too much that
you fill the plywood underneath
now i've seen those really cool foam
cutting hot knifes but i don't have one
of those and i cut everything down using
a straight edge and a utility blade out
of my own curiosity if anybody has
helpful tips for cutting thick foam like
this leave a comment down below thanks
i applied a really thick coat of spray
adhesive to the foam because it's very
porous and then i did a normal coat on
the plywood after that i let it set for
about five minutes and then i connected
the two pieces together for a permanent
bond
also picked up this piece of gray uv
resistant fabric from amazon they've got
a ton of different colors and this is
one yard i used a whole bunch of half
inch t-50 staples and i just wrapped
everything like a christmas gift i've
got no idea how to do upholstery but
this worked out pretty well i worked
each end and then the two sides trying
to pull as much as possible before
stapling it down and it's awesome that
one yard of fabric is the perfect amount
for this project
now you could absolutely leave the
project right here but i want to add
some casters and as you can tell the
ones that spin have a wheel that is
offset from the center of the mounting
plate so instead of using fixed casters
where they are on the center line i used
some 5-minute epoxy to lock these
spinning ones in place
i made sure that this epoxy worked its
way into the ball bearings and then i
let it set on this tape to cure then i
sanded everything back and pre-drilled
holes so that i could mount it back onto
the base
and with that this diy rolling 2x4
weight bench is complete
now i absolutely love this project and
for the price it couldn't be better oh
and it's a part of this diy squat rack
bench press combo that i'll leave a link
for in the description be sure to check
that video out
so thanks again for watching i really
hope you enjoyed this video and if you
build something inspired by this make
sure and tag me at modern builds down in
the description i'll leave a link to the
full diy home gym make sure and
subscribe like comment all that sort of
stuff oh and the notification bell and
we will see you next time on modern
builds
[Music]