3 LEVELS of Cornhole Boards -DIY to PRO Build
Published July 19, 2023, 5:20 a.m. by Naomi Charles
We're back with another 3 Levels of cornhole Boards where we build DIY to PRO Level boards. Sponsored by SKILLSHARE The first 1000 get a free trial of Skillshare Premium! https://skl.sh/johnmalecki03211
We show off a ton of different techniques and tips that help us make 3 awesome projects. This Video is packed with awesome goodness for the cabinet maker! We show off a ton of different techniques and tips that help us make 3 awesome projects. This video shows 3 very different ways to create awesome boards, and a wild new technique for using LED's in your boards.
SQUIRRELLY STICKS ARE BACK - https://bit.ly/JM_SquirrellyYT
PLANS AVAILABLE
JORDAN: DIY cornhole BOARD - http://bit.ly/JM_cornholeDIY
SAM: INTERMEDIATE cornhole BOARD - http://bit.ly/JM_CornholeIntermediate
JOHN: PRO cornhole BOARD - http://bit.ly/JM_CornholePRO
cornhole BUNDLE SVE $5- http://bit.ly/JM_CornholeBundle
If you like this video you're going to love these.
-3 LEVELS of Cutting Boards - Beginner to PRO Build - https://www.youtube.com/watch?v=RAFWnPXB4Rk&list=PL6r_4s0L34MPohtNEC3mkQ03kzIZuG7td
- 3 LEVELS of Cabinets -DIY to PRO Build - https://www.youtube.com/watch?v=WE_RBHIU-iE&list=RDCMUCVUSDq6-oSpWAAPUppHFtZQ
- 3 LEVELS of Sawhorses: DIY to PRO Build - https://www.youtube.com/watch?v=9-sEO81RkdM&list=PL6r_4s0L34MPohtNEC3mkQ03kzIZuG7td
- 3 LEVELS of Shop Carts - DIY to PRO Build - https://www.youtube.com/watch?v=hMc4-VjeC1o&list=PL6r_4s0L34MPohtNEC3mkQ03kzIZuG7td
-3 LEVELS of Bar Stools: DIY to PRO Build - https://www.youtube.com/watch?v=TmRel0rZ-LY&list=PL6r_4s0L34MPohtNEC3mkQ03kzIZuG7td
You may also love these:
- 10 Must-Have Tools For Beginner Woodworkers - https://www.youtube.com/watch?v=2eFeB2fTiQY&list=PL6r_4s0L34MOatqBrrme7V4ckTsh5ZQm6
-5 EPOXY Tips I Wish I Knew As A Beginner! - https://www.youtube.com/watch?v=OG9mr95od24&list=PL6r_4s0L34MOatqBrrme7V4ckTsh5ZQm6
- 10 Cutting Boards from Scrap Wood Build - https://www.youtube.com/watch?v=VatSii2CGBY&list=PL6r_4s0L34MPP0OrFEE6vtjcQL1Bomsyw
MERCHANDISE - https://shop.johnmalecki.com/
PLANS - https://www.johnmalecki.com/digital-plans
SAFETY GLASSES - https://geni.us/4h6xaM (Amazon)
Proudly Supported By:
Woodcraft - http://bit.ly/JM2021_Woodcraft
Timberland PRO - http://bit.ly/JM_TimberlandPRO
Total Boat Epoxy - SAVE 5% : https://www.totalboat.com/MALECKI5
BITS & BITS - https://bit.ly/JM-Bits CODE - MALECKI15 = 15% Off
My Top Tools and Product Affiliates
woodworking Tools - https://kit.co/JohnMaleckiBuilds/woodworking
Metalworking Tools - https://kit.co/JohnMaleckiBuilds/metal-working-tools
Favorite Finishes - https://kit.co/JohnMaleckiBuilds/finishes
My Camera Gear - https://kit.co/JohnMaleckiBuilds/camera-gear
#3Levels #cornholeboards #LEDCornhole
You may also like to read about:
[Music]
cornhole boards are a super fun
easy summer project and i've built
thousands of them
so i thought why not bring the people
three levels
let's go i'm jordan i'm gonna be
building the basic cornhole set
uh all you need is half inch plywood
some two by fours and
what are those bolts called carriage
bolts yeah let's get it
[Music]
got all my pieces cut it and then off
camera i went ahead and sanded them down
it's a lot easier to sand them when
they're all separate so now we're going
to assemble the base what we're going to
do is basically just a simple butt joint
make a nice frame it'll be like that
will go on top of it legs will do a
little more to the legs but you'll see
what we do there
let's do it
[Applause]
we got framed yeah
so now we've got to talk work legs work
paint it throw bags
let's do it
so you're probably thinking whoa jordan
what the heck this is beginner bill why
are you using the tracks on a 5 000
table saw well you can buy these at any
of your local box stores already cut
down if you don't have access to the
tools
so relax people of the internet they're
gonna be like really beginning you need
gonna attach the top just kind of face
screw it down quick and dirty
um there's different ways you can do it
you can probably glue it and brad nail
it but
i'll just probably put a screw like one
in here one in the middle
in the end same thing just around and
then the reason i'm doing putting this
on first it's gonna be easier to cut
the circle and the plywood because it's
gonna be elevated that way
i don't have to like hang it out here
it's going to give me a nice sturdy work
surface
we'll do that attach the legs paint it
and yeah
[Music]
so
[Music]
what's going on we got a hole
so much dust anyways
got a hole we're gonna make the legs now
we gotta nick off some of this because
i don't work like that you know
voila we got a cornhole board so now all
i gotta do is just paint it
um a little sanding touch up work there
and then we'll be good to go
so you'll see this at the end of the
video let's check on what sam's doing
for the intermediate project we're going
to take the same materials that jordan
used and just step it up a little bit
with some of the techniques we're going
to plane and joint those boards first
then we're going to do a couple little
joinery techniques just to clean things
up a little bit
and before you know we'll have a corner
on board so
for my project i'm going to be using the
plan that john
and brad made god it must have been like
three years ago now brad
and john hung out and they made this
they also made oh
nipsey come on man i'm filming anyway
john
went down to brad's house and they made
cornhole and ladder golf there's some
videos they're really weird they're
really old i recommend you go watch them
and see how cringy they are
they're fun but we have the plan from
that i'm just going to do the exact same
thing as that because it's a great
intermediate project so the first step
we need some two by fours right there
all right let's cut some wood
[Music]
[Applause]
so the next step in this process is we
have to put a rabbet or cut
the corner off of the pieces so to do
that we need that depth of that rabbet
to be the exact thickness of the plywood
that we're going to use for the top
here's a cut off of that piece it may
actually be the piece i used
it's theoretically half inch but
sometimes plywood's like
you know it might be like 21 30 seconds
or like
something weird so i always like to just
hold the piece up next to it and then
you know while the while the saw's off
completely
you can run it up next to it and just
make sure that you're perfectly in line
with that before you go ahead and start
your cut
[Music]
just
all right as you just saw we did some
mitering we did some awesome stuff
so i did a little dry fit off camera
with this strap clamp these things are
great for this kind of stuff just to
hold everything together
and uh let's see where you're at
it's basically just a ratchet strap so
as you can see
i'm pretty happy with my miters there
they look nice and tight now we're going
to glue them together and then we're
going to put
some screws in plans i believe call for
a two and a half
so we'll find some two and a half screws
and put those in i laid out little marks
on the sides already
for where i'm going to pre-drill them
i'll pre-drill everything now take it
apart
put glue on it put it back together and
i'll screw it together
[Music]
okay so we've screwed together the
rectangular bit
and uh just saw me do the round overs
for the feet so
they can fold i just laid out the marks
to cut off the
angle for the legs it says where you can
plan how to do it i don't know what the
angle is but it gives you kind of a
better way in my opinion
to set that angle so if you guys want to
make this plan make sure you're down in
the description checking out the plans
anyway let's cut these down and then all
that's left is to put the panel in
cut the hole in the panel we're going to
use a big hole saw bit for that so that
should be fun
and then i think we're going to paint
some stuff on it spice it up a little as
fast
[Music]
that's not right how do i screw this up
don't answer that
i thought the angle looked a little
steep remember i said that looks really
steep and you're like that's what the
plan
goes it is what the plan says
is it 12 inches from the top now
where is it
under oh damn it i didn't do it exactly
as the princess it's ten and a quarter
from the center of the hole
not both measurements aren't from the
end is it salvageable or did i think it
completely
it completely this is why we need
reading lessons
we could just lie and say it's a feature
that that way they dig in when the
bags hit it the remember kids the best
part hi john
those are grown they are also looks like
yinz needed to
work on some more skills so projects
like this
the three level series are something
that is meant to show off
multiple levels of skills if you haven't
noticed we've got a bunch of these
because we love to be able to hit
everything from beginner intermediate to
professional
skills which is why i'm super pumped but
skillshare
is once again sponsoring this video if
you're not familiar skillshare is an
online learning
platform with thousands of courses in a
variety of different
types you can learn everything from
photography to videography to graphic
design to music production myself
and my team use the platform a lot
especially the guys that are working on
the back
end of stuff there's so many useful
courses and different
topics that we find ourselves always
finding the answers we need for our
stuff
on skillshare recently one of the
courses that we're loving right now
is video for instagram how to tell an
engaging story
in one minute it's helped us recently
grow our ig following
and because skillshare is so awesome
they want to give the first thousand
people to use the link in my description
a free trial of the skillshare premium
membership which is amazing
after the free trial it's only about 10
bucks a month which is super affordable
and definitely worth it
if you want to continue working on being
awesome you're getting better being
awesome and awesome stuff
check out skillshare i got a link down
in the description and now let's get
back to these uh slightly above
awesome cornhole boards let's go
what are you doing over there changing
the blade
because it's time my friends
to make the panel the top part so
put a plywood blade back in the table
saw and then we'll cut down the channel
and get it
[Music]
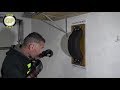
damn we have to drill a hole in it now
i feel like you need a driver's license
to use this thing
it just has so much fun oh my god almost
died
all right
[Music]
so
the last thing to do to wrap this thing
up is add your favorite sports team logo
all right so for my board we're gonna do
what's absolutely necessary to be called
a professional right
excessive joinery incredibly over used
materials
um a bunch of obscenities and it's gonna
go ah
let's go hola amigos enemy guts
this is my new jointer there she is so
because we're going pro level on my
build we're going to be using two by
tens i always find it comical because
absolutely nothing about what i do is
pro the whole point of the series is
show
three variations of the same project to
three different levels but everyone gets
all fussed up with the name pro
so as much as i hate and despise using
pine
in any regard for anything it's the
right thing to use for this project so
that's what we're going to use
i got two by tens so i can get a four
inch apron around the entire outside of
my board um and that'll be in a plan
there's plans available for everything
platinum pan now listen i just bought
this joiner on craigslist and it didn't
have the guard
we're getting it but i still need to
join things don't run your jointer
without a guard
do as i say not as i do let's go
[Applause]
[Music]
[Applause]
[Music]
[Applause]
[Music]
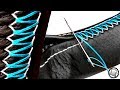
as i stated earlier we are going to use
an incredibly unnecessary joint
the box joint why you ask why the hell
not people that's why
[Music]
all right so i am going to glue up
my bottom we're doing an inset panel i'm
going to cut that panel with a router
after get it together come together
if you're wondering why i'm using a box
joint it's cause a king cane can
it's stronger but john lighter joints
force the fuse
so we're out of clamps are only a little
bit squirrely i'm gonna sand these up
really fast
and then we're going to route our panel
groove chisel them out and then i'm
bringing in the big guns to help with my
top
because we're getting pretty wild with
this concept that i have
and by big guns i mean the cnc cowboy
[Music]
[Applause]
howdy
[Music]
so we're down yonder in the cnc shop i
got the cnc cowboy on this
like i said we're going over the top
with unnecessary
methods materials and all kinds of stuff
for this cornhole board
miss piggy take it away
[Music]
i would embed the leds first
um but because we don't have them we're
going to go ahead and add the colored
parts
to the logo and then we'll do the cn
the damn leds when they come in
[Music]
making america it's both super sad
it got really hot really fast all right
so i went out and found a bunch of very
expensive leds that run on batteries you
would think that that would be something
that the world would have much more of
so we're now
going to get these embedded into all the
grooves we put in here and then pour
some
with the opaque white resin around them
so
they'll they'll come to life with
awesomeness so we're gonna feed these in
there
[Music]
[Applause]
great success so
what i'm going for here is i just want
this we just need a barrier and a wall
so we're using tyvek tape i'm just
sitting on something for now
i can come back and then tape off the
rest
to keep a nice dam in there it's a
little squirrely
[Applause]
but not the squirreliest and then i'll
be able to flip it over and work on
[Music]
[Applause]
[Music]
[Applause]
[Music]
so we let the epoxy dry overnight
everything's looking pretty solid it's
not
soft so we're gonna try to get this
metal off in some clean way
make sure my stupid ass doesn't slice
through this
cord here
[Music]
that went so much better
[Music]
so
[Music]
all right to mount the legs this is a
system i've used for a long time
i've got an oversized leg here i went
and found center
and i drilled an inch and a half down so
it was i made it rounded the top as you
just watched
i line it up at the bottom and this is
about a one inch spacer from the top
that'll give me clearance and then mark
it
drill my hole swing perfectly now
without hitting into anything
now to get my height
i use this trick paint can puts me right
about 12 inch mark
to the back of the board which is right
here
which is exactly what we want i then
take
the bolt hanging out over the edge of
the table then i can just mark it there
take it off and match the rest it should
all be perfect to that
all right we're gonna hit the lettering
with some spray and then we'll roll the
outsides this should uh hold down the
tape and give us nice crisp lines
as well as give us a barrier to roll up
against and then we'll get these boards
done
[Music]
and by the power invested in me let us
spray
[Music]
[Music]
let's see how they work i'll give you
the honors
[Music]
hi so this turned out awesome i
appreciate you for tuning in if you want
to see more three levels projects we got
a bunch queued up for you right here
or you can leave a comment down below
and we might build yours next