How to Make a Duffle Bag - DIY
Published July 19, 2023, 5:20 a.m. by Naomi Charles
Purchase a Duffle Bag kit from Sailrite and watch this video to complete a versatile and attractive duffle bag that you will love. This is a great kit for new sewers and owner of the Sailrite sewing machines. You will put into practice and learn many of the skills that are typically required for upholstery and canvas application and you will be left with a great looking duffle bag!
Click here for the kit: https://www.sailrite.com/Sail-and-Canvas-Kits/Bags-and-Totes/custitem_facet_kit_type/Square-Duffle
HOW TO MAKE A DUFFLE BAG CHAPTERS LIST:
Intro - 0:00
Patterning – 1:30
Creating Zippered Side Pocket – 3:04
Fashioning End Pocket – 8:45
Attaching Side Pocket to Main Body – 12:40
Making Pleated Foam Bottom – 20:04
Attaching Webbing to Main Body – 25:38
Installing D-Rings & Handles – 30:30
Sewing Zippered Top – 33:51
Attaching Duffle Ends – 37:16
Creating D-Ring & Swivel Hook Webbing Zipper End Stop – 43:13
Making Adjustable Webbing Strap – 50:45
Materials List – 53:56
MATERIAL LIST (all included in Duffle Bag Kits):
Top Notch® 9 60" Fabric from Sailrite
Seamstick 3/8" Basting Tape for Canvas - Item # 129
V-69 Polyester Thread Black from Sailrite
YKK® Continuous Zipper Chain #10 Black (Vislon) - Item # 100030
Webbing Polypropylene 2" Black 800# - Item # 204420
Sailrite Woven Sew In Tags - Item # 121604
YKK® Snap Hook Swivel & Rotate 2" - Item # 104414
Foam Luff Tape 12" (Not Adhesive Backed) - Item # 103036
D Ring Sewable Nylon 1" Black - Item # 95507
YKK® Tri Bar Adjustable Webbing Slider 2" - Item # 104422
TOOLS LIST:
Chalk Pencil Cartridge Set - Item # 121669
https://www.sailrite.com/Marking-Chalk-Cartridge-for-Fabrics
Clear Acrylic Ruler 6" x 24" - Item # 102400
https://www.sailrite.com/Clear-Acrylic-Ruler-6-x-24
Sailrite® Edge Hotknife Package (110V) - Item # 103800
https://www.sailrite.com/Sailrite-Edge-Hotknife-Package-110-Volt
Sailrite® Canvas Patterning Ruler - Item # 107040
https://www.sailrite.com/Sailrite-Canvas-Patterning-Ruler
Comfort Grip Rotary Cutter 60mm - Item # 9655
https://www.sailrite.com/Olfa-Deluxe-Rotary-Cutter-60mm
Sailrite® Ultrafeed® LSZ 1 PLUS (110V) Walking Foot Sewing Machine - Item # 300602
https://www.sailrite.com/Sailrite-Ultrafeed-LSZ-1-PLUS-Walking-Foot-Sewing-Machine
Deluxe 5 1/2" Magnetic Sewing Guide - Item # 103597
https://www.sailrite.com/Deluxe-5-1-2-Magnetic-Sewing-Guide
Sailrite® Ultrafeed® Industrial Sewing Table & Workhorse™ Servo Motor (110V) - Item # 120931
https://www.sailrite.com/Sailrite-Ultrafeed-Industrial-Sewing-Table-and-Workhorse-Servo-Motor-110V
Gingher® Scissors Right Hand Lightweight 8" - Item # 101017
https://www.sailrite.com/Gingher-Scissors-Right-Hand-Lightweight
Straight Edge, Tape Measure
You may also like to read about:
this video is brought to you by sailrite
visit sailrite.com for all your project
supplies tools and instructions
our original how to make a duffel bag
video had a small measurement mistake
this new video has that issue resolved
we hope you enjoy it
purchase a duffel bag kit from sailrite
and watch this video to complete it
versatile an attractive duffel bag that
you will love this is a great kit for a
new sower and owner of the sailrite
ultrafeed sewing machine you will put
into practice and learn many of the
skills that are typically required for
upholstery in canvas applications skills
like patterning using double-sided tape
to aid in sewing creating hymns sewing
pleats in foam installing zippers
working with webbing sewing box in
90-degree corners and much more the bag
includes a reinforced pleated foam
bottom a number-10 bisland zipper at the
top with swivel hooks on the inside to
hook keys and other objects to a
zippered side pocket with swivel hook
and a dual pocket compartment also on
the end of the bag is another pocket
2-inch polyurethane webbing handles and
a two-inch polyurethane strap with
swivel hooks make this duffle bag
yourself you'll learn a lot and you'll
also be left with a great duffle bag you
can purchase the duffel bag kit at
sailrite now let's get started and show
you how to make it the material provided
in the duffel bag kit does not have a
straight cut edge so we'll use a
straight edge and strike a line there to
create a straight edge along the cut
edge of the fabric now we begin
patterning we'll use this illustration
to pattern the fabric for all of the
pieces that need to be cut out for the
duffel bag we'll be marking the top
notch 9 fabric with a chalk pencil
cartridge set that's available from
sailrite
here we're taking measurements following
that pattern illustration that we showed
earlier you can use a clear acrylic
ruler to measure the fabric and mark the
fabric
that's what we're doing here if you do
not have that simply use a tape measure
and a straightedge the beauty of using a
chalk pencil is that the marks can
easily be removed with a wet rag it is
wise to label each one of the pattern
sections with what they will be used for
like body end pieces pockets and so
forth again here is that illustration so
that you can label each one of your
patterned pieces the sailrite recommends
using a hot knife to cut the top notch 9
fabric to size this seals the edge of
the fabric and keeps it from unraveling
here we're using the sailrite edge
hotknife package and we are using a
metal ruler on the underside to prevent
damage to the table top below all of the
pattern pieces are now cut out we're
ready to construct the duffel bag the
sarai devil bag kit includes a zippered
side pocket this pocket includes a hook
in which you can attach keys or other
objects and a dual pocket compartment we
are now working with the 2 side pocket
patterns along the long side folded
directly in half increase it well on the
inside edge of the 11 and 3/4 inch side
placed double-sided tape
this is seamstick basting tape for
canvas that's included in the kit
peeling off the transfer paper reveals
the glue now baste it in half so that
it's secured well using the sailrite
canvas patterning ruler we can be
assured that the double-sided tape will
hold well apply another run of the
seamstick basting tape along the second
side pocket and baste it along the 11
and 3/4 inch side as well but here a
half inch hem is created along that edge
it is not folded in half bill carefully
folds the material back 1/2 inch and
base it there so one end pocket is
folded in half as seen here and basted
and the other one has a 1/2 inch hem
along the 11 and 3/4 inch side on the
side pocket
that has the half-inch hymn measure up
from the bottom edge seven and a half
inches in place a few marks then strike
a line from mark to mark at that
location now this side pocket will have
a zipper so along that line that we just
struck down we're going to cut the
fabric here we're using the rotary
cutter in a cutting mat on the bottom
side you could simply use scissors the
double-sided tape should be applied to
both edges that were just cut on the
hemmed side of the smaller one and on
the bottom piece doesn't matter which
side since no side has a hem yet on the
panel that we just cut off we'll peel
off the transfer paper and on that edge
we will create a three-eighths inch hem
the finish size after the hems are
created of this strip should be one in
five eighths inch by 11 and 3/4 inch now
the opposite piece peel off the transfer
paper and create a half inch hem there
double-sided tape sticks well but using
this Eric chemist patterning ruler or
something similar in applying pressure
to the top of the double sided tape
makes it stick very well we highly
recommend using the sailrite canvas
patterning ruler we're a heavy object to
crease well the fabric and to apply the
basting tape well we'll cut the
number-10 Mizan zipper that's included
in the kit to size slightly bigger than
the size of the pocket we are cutting it
with scissors to approximately 12 and
1/2 inches in length the double-sided
tape should be placed on the flange of
the zipper as far away from the teeth as
possible that means the edge of the
double-sided tape should be basically
flush with the edge of the flange of the
zipper we placed it on both sides peeled
off the transfer paper and now we'll
base the bottom portion of the pocket
with a 1/2 inch hem facing the flange
down that folded him edge is
approximately 1/4 inch away from the
zippers teeth now for the smaller
section that we cut away we place it
also on the opposite side the hem side
facing down the 3/8 inch him is on top
of the zippers flange
the half-inch is above it when basting
be sure that the edges are lined up with
the fabric that's is basted on
underneath we've hidden the double sided
tape left the zipper exposed for a
gorgeous-looking duffel bag zipper to
ensure that everything sticks well use a
heavy object we're using the sailrite
canvas patterning ruler to do that the
folded portion of the side pocket will
be basted here when it comes time to
apply this assembly to the duffel bag so
your pocket will have a two pocket
compartment duffel bag kits may come
with hem Bob's if they do one is used
for the upper thread here and the other
is used in the bobbin area below let's
set that folded portion aside and take
the zipper portion to the sewing machine
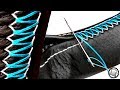
and sew the zipper in place we start
here at the edge of the fabric and did
some reversing we're sewing a straight
stitch with about a five to six
millimeter stitch length the stitch is
placed 3/8 inch away from the zippers
teeth when we reach the end we do some
more of reversing then we'll sew the
opposite side of the zippers flange
again the stitch is about 3/8 inch away
from the zippers teeth when sewing
zippers always try to sew on the same
side of the presser foot when doing the
opposite side after the zipper is sewn
in place we'll take the side pocket
that's folded directly in half and we
will place it in the sewing machine and
sew along that folded edge this dish
will be about 5/16 inch away from the
folded edge here we're using the deluxe
five and a half inch magnetic guide to
help guide our project so it keeps our
stitch exactly in the right spot by
lining up the fabric along the edge of
the magnetic guide we did some reversing
at the beginning and we'll do some
reversing here at the end now we can set
these two side pockets the internal part
and the external part aside and we'll
move on to the next step one of the
duffel bag ends will contain a pocket in
this chapter we're going to fashion that
pocket we are now working with
one end pocket pattern along one of the
edges that's nine and a quarter-inch
apply double-sided tape here a double
hem will be created at first we need to
create a half inch hem we peel off the
transfer paper revealing the glue and
then fold the material down about a half
inch
now that our single hem is basted down
we'll apply double sided tape directly
on top of it then we'll create our
double hem so we'll fold it back again a
half inch using a heavy object on top of
double sided tape helps to adhere the
double-sided tape well and make it stick
to the fabric we use the sailrite canvas
patterning ruler for that now we can
take this pocket over to the sewing
machine and we will sew a straight
stitch about 5/16 inch away from the
folded edge of that double hem do some
reversing at the beginning again we're
using the deluxe five and a half inch
magnetic guide to guide the edge of the
pocket so the stitch is consistent and
at the end do some reversing there as
well now on the underside where the hem
was created we will place double-sided
tape on the sides here we will create a
half inch him
fold the material back approximately 1/2
inch and we'll do the same for the
opposite side the bottom edge will be
left raw this will not be a double hem
only a single hem along the bottom edge
we will measure and find the center
location you could also just fold the
assembly in half and crease it along the
bottom edge we marked both inside and
outside surfaces with a mark
now double-sided tape is placed on the
hem that we just created the half inch
hem on the sides this will be used to
baste this pocket to the end panel in
the next step we are now working with
only one of the 13 by 13 inch end panels
find the center location on one side of
this 13 by 13 inch panel so that would
be six and a half inches and Mark it we
will take the end pocket that we just
created in the last chapter and place
its Center location directly on top of
the center location of the end panel we
will baste it in that location peel off
the transfer paper that we applied to
the back side of the pocket and baste it
over those Center marks directly even
with the bottom edge of the 13 by 13
inch panel
now we can take this end panel and the
end pocket over to the sewing machine
and sew the pocket in place we will
start at the top edge though it doesn't
matter in do some reversing there whoa
hold on
builded not so all the way to the edge
of the pocket at the top he should have
done that he will sew all the way to the
bottom edge and he'll do some reversing
there as well
he started sewing directly on top of
that stitch that secured the double hem
along the top edge of the pocket
he should have soin past that stitch and
to the edge that was him all the way to
the folded edge up next we'll be
attaching the zippered side pocket to
the main body panel next we're working
on the main body and we'll be sewing the
zippered pocket on to it
fold it in half along the longest side
so it's now 24 and three-quarter inches
by 21 we marked the two outer edges on
the fold and also the center location on
the fold with the chalk pencil open up
the main body panel and Mark the
opposite side in the same manner you can
use the crease in the middle to find the
center location then measuring from the
center mark that we just made at the
center location measure up and Mark the
fabric at seven and a half inches the
bill measures again along that crease
about five to eight inches from the mark
in the center and places one more mark
at seven and a half inches then he uses
a clear acrylic ruler and places it on
the 21 inch mark to find the center the
center is ten and a half inches from the
edge then we're gonna take the zippered
pocket this is the side pocket and we're
gonna find the center of it to long on
the bottom edge it should be five and
seven eighths that's when measured from
the edge we've placed the mark on the
outside surface of this pocket in other
words the hems of the pocket are facing
down this pocket will be placed on our
seven and a half inch mark and in the
centered location
main body panel why not strike a line at
that location that is a little bit
smaller in width than the actual pocket
that way it's easy to line up the pocket
accurately we're gonna place
double-sided tape on the pocket now this
is the strange thing the double-sided
tape is going on the outside surface of
the pocket that's because it'll be
folded under in a future step so this is
accurate the double-sided tape is placed
on the outside now bill folds a half
inch him to the underside of the fabric
before removing the double-sided tape
bill takes the pocket and places on on
top of the main body panel at the center
location he then takes a chalk pencil
and marks the outer edge of the bottom
edge of the pocket on both sides the
half-inch him at the bottom has a crease
mark he will place the crease mark on
that seven and a half inch line that he
struck on the main body panel then he'll
peel off the transfer paper and then
he'll base that pocket at that location
on the main body panel once it is soand
down then it'll be turned so the outside
surface is facing up like this on the
opposite end of the main body panel
measure down from that edge 9 inches and
strike a line at two different locations
so that the pocket can be folded up to
that point when you fold the pocket up
to that point you'll notice there's some
fullness at the bottom of the pocket
that is expected and desired we'll
strike a line there so that we can
eventually base the pocket at that
location before we do anything else
let's take this over to the sewing
machine and sew that bottom edge so
we're sewing about an eighth inch away
from the raw edge of the bottom of this
zippered pocket or the side pocket we do
some reversing at the beginning and we
will sew all the way down the link till
we reach the other side and we'll do
some reversing at the other end this
secures that bottom edge only remember
that this zipper pocket has a dual
pocket so we're gonna find that half
pocket and place basting tape on one
side at the bottom edge
now we'll baste it to the bottom edge of
that zippered pocket going in the
opposite direction we place the bottom
edge of that 1/2 pocket or inner pocket
so that it is directly on top of the
score line or the 1/2 inch hem and on
top of that stitch that secured this
outer pocket in place inside of the
zippered pocket there'll be a clip that
you can clip keys or other things to
we're gonna cut the webbing that's
included in the kit that's 2 inches wide
to 7 inches in length we use the
sailrite edge hotknife to help prevent
the webbing from unraveling if you don't
have that you can use a wood burning
tool or a soldering gun now feed the
snap hook that's included in the kit
onto the end of the webbing we'll fold
the webbing over the snap hook but we
will leave one inch of exposed webbing
beyond the folded portion
in doing this that'll make it easier to
sew that one layer of webbing to the
pocket rather than two layers of webbing
now we'll take it over to the sewing
machine and sew one row of a straight
stitch reversing several times this
stitch is about 1/8 inch away from the
cut edge of that webbing that's about an
inch away from the opposite cut edge
it's taking it to the side pocket or the
zippered pocket we will open up the 1/2
inch hem at the top of the pocket and
push the end of the webbing into that
1/2 inch hem area then refold the half
inch him over top of it this webbing
should be positioned about 2 to 3 inches
from the end of the pocket doesn't
really matter which end it's positioned
then we'll place basting tape directly
over top of the half inch hem we are not
going to baste it to the main body panel
yet first we're gonna take it to the
sewing machine and sew that bottom edge
we're just showing what it will look
like let's unfold it and take it to the
sewing machine and sew to the bottom
edge so again we're sewing the bottom
edge the pocket is folded so the outside
surface is facing up and we do some
reversing at the end of our pocket and
we will sew all the way to the other end
and do some reversing there as well now
we're catching the outer pocket and that
inner pocket as we sew this straight
stitch about 1/8 inch from the folded
edge and build did not do a lot of
reversing there though I would do a
little bit more webbing will encase it
so you don't have to worry about it much
now we peel the transfer paper off of
that him and you can barely see our
chalk line you probably see yours a
little bit better
ours is rubbed off and we will baste it
in place right along that chalk line
that we drew I believe it was 9 inches
from the edge the opposite edge or the
top edge where the zipper is basted the
pocket is not meant to be perfectly flat
it should bulge out a little bit
this is intended so that when you put
big objects in there they will
he'll fit now we will sew along that top
edge reversing at the beginning and
reversing at the end just like we did at
the bottom edge don't worry about sewing
the sides of the pocket webbing we'll
cover those and when we saw the webbing
in it'll secure that included in the
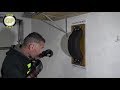
duffel bag it is what's called foam luff
tape we need to cut it to 20 inches by
12 inches it already comes 12 inches so
we just need to cut along one edge to
make it 12 by 20
we used a rotary cutter but scissors can
be used to cut the foam as well this
foam will be placed at the bottom of the
bag between two layers of fabric and
then pleats will be sewn through it to
give a great support we're now working
with the bottom panel it's 21 inches by
13 inches on one side of the fabric we
will strike a line that's a half inch
from all edges of the fabric here we're
using the clear acrylic ruler but you
can use a tape measure to do this as
well and a straight edge this 1/2 inch
line will indicate where that foam will
be sewn to the bottom panel on the
opposite side that doesn't have the
marks a half inch around the perimeter
mark the center location on the 13-inch
sides that's six and a half inches do
that on both of the 13-inch sides then
flip the panel back over to your half
inch lines that were struck along all
sides and place double-sided tape on the
inside of the lines that you struck on
the fabric this double-sided tape will
help to hold the foam in place as we
take it to the sewing machine and sew it
we're going to place three rows of the
double-sided tape two on the sides and
one about in the center location we'll
peel off the transfer paper on one side
one of the 13 inch sides about a third
of the way then we'll start to position
the foam on the side that still has the
transfer paper in place so that we can
position it accurate
once it's positioned accurately in other
words on top of the lines that we struck
a half inch away from the raw edges of
the fabric we can peel away the transfer
paper revealing the double sided tape
and base the foam firmly in place on our
bottom panel once it's basted in place
we will then take double-sided tape and
place it along the edges the long edges
of the foam this will be used so that we
can fold the half-inch edge back over
top of the foam but that's only on the
two long edges not on the 13-inch sides
will peel off the transfer paper
revealing the glue and then fold the
fabric the half-inch portion of the
fabric back on top of the foam and stick
it in place do this on both long edges
and now we'll take it to the sewing
machine and sew the 21 and a half inch
sides this is the half inch hem that's
full to go over the foam and replacing a
stitch just in that fabric edge to
secure it all the way to the ends and
doing a little bit of reversing we'll do
that on both of the 21 inch sides
now on the bottom side of the main body
panel this is the side without the
pocket sewing on we will place
double-sided tape at the center location
you'll notice that the bottom panel is
directly above the main body panel we
want to place double-sided tape well
within that area where it will be stuck
to the bottom of the main body panel so
he's just using it as a reference to
determine where the legs of double-sided
tape will be placed approximately close
to the edge of that bottom panel and he
will stick the bottom panel on the
bottom of the main body panel so that
the center lines are directly on top of
each other and feel off the transfer
paper and baste it in place now the foam
is encased with fabric on both sides at
the center location on the bottom of the
bag strike a line this will be used as a
guide for sewing so be sure you use a
pencil or marking utensil that marks can
easily be removed like this chalk pencil
the bottom of the bag should now measure
12 inches so we will strike two more
lines three inches from the center line
on both sides we'll take the main body
panel with the bottom panel basted to it
to the sewing machine and we will sew
directly on top of those lines that we
struck down with the chalk we're gonna
start at the center line just so that
we're assured that the panel stays right
where we want it we're gonna do some
reversing at the beginning and now we
are sewing directly on top of that chalk
line with a straight stitch about six
millimeters in length we are sewing
through the foam the bottom fabric and
the main body panel on the underside we
want to do that on top of all of the
three chalk marks and also the stitch on
the sides that secured our half-inch
into the foam
so five straight stitches through the
foam to help reinforce the bottom of the
bag and it also stiffens it as well up
next the webbing that wraps around the
main body panel now flip the main body
panel down so the outside surface or
under side is facing up now
measure over 18 inches bill initially
starts on 18 inches then moves it to 19
inches and marks it at 1 inch and then
Mark along the edge of the fabric 18
inches on one side and 18 inches on the
other not 19 then do the same with the
opposite side now on the bottom side of
the bag measure in 4 inches on the long
edges and strike a few marks several
inches apart about 6 to 8 inches apart
along both long edges of the bag on the
bottom side 4 inches from the edge
these 4-inch marks will be the location
where webbing will be sewn into the bag
next we'll find the 2 inch polypropylene
webbing that's included in the kit and
measure it to 36 inches and cut it with
a hot knife if you don't have a
professional hot life like the sailrite
edge hotknife you can use a wood burning
tool or a soldering gun or you can use
scissors and use a lighter just be
careful not to burn it we need 2 strips
that are 36 inches in length before we
secure the webbing to the bag we need to
install the slider the webbing will be
placed over top of the edge of the bag
we're gonna cut the end of the zipper
off so they're even and now we're gonna
separate the zippers teeth and install
the slider to install the slider push
the fat end of the slider on to the
zippers teeth and hold the two edges of
the zipper and pull on the slider a
second helper can be useful and that
they can pull on the slider as you hold
the two ends of the zipper then just
leave the slider in the middle position
as bill did there place double sided
tape along the two long edges of the
webbing and we will prepare to baste it
in place be sure to place the double
sided tape on both of the 36 inch runs
of webbing we didn't show it but we
measured up two and a quarter inches
from the top edge of the pocket and
marked the fabric we will start the
webbing end at that location the outer
edge of the webbing should be placed on
the four inch marks that we struck on
the material remember that the pocket
has some excess material it's not laying
flat we want that excess material to be
at the bottom of the pocket as seen here
so there'll be a slight wrinkle there
then on the opposite side we have also
placed a mark two and a quarter inches
from the top edge of the pocket and we
will baste the opposite 36 inch leg of
webbing there
Bill's pushing the excess fabric to the
bottom of the pocket as he base the
webbing in place on top of it
duffle bag kits come with the sarai tag
logo the bags look excellent with these
logos in place so we highly recommend
you put them in it also tells the world
that you did it yourself
we put the tags about five inches down
from the ends of the webbing on both
sides of the bag at this in there is no
pocket but the tag should go there as
well
we'll now take this over to the sewing
machine and sew a straight stitch along
the long edges of the webbing this
stitch is placed about 1/8 inch away
from the outer edge at the webbing do
some reversing at the beginning and also
at the end of your run when we get to
this airight tag
this stitch secures that tag in place
here we are at the opposite end and we
will do some reversing there as well
when we sew the inner leg of the webbing
this will secure the pocket in place and
we will sew right through the zipper so
go slowly when it's time to sew through
the zipper because sometimes the needle
can deflect off the teeth bill didn't
sew very slowly through the teeth the
accident didn't Lee pushed on the
treadle
and the machine took off but he did so
through the teeth without breaking the
needle and that's good here at the
bottom of the bag that excess fabric is
sewn in as a wrinkle that is expected
and we'll follow that exact same
procedure for the opposite side securing
the webbing in the pocket and the tag
let's move on you're probably saying hey
wait a minute there's no handles well
that's next
ERI duffel bag kits come with a d-ring
that's so bold this is a nylon d-ring we
will sew one at the top of the webbing
at all four ends we will apply basting
tape to the flange of the syllable
d-ring and secure it in place at the top
of the webbing as seen here sewing one
row of straight stitches reversing once
is all this necessary to secure each one
of the Rings at the top of the webbing
later on we'll be sewing another length
of webbing at this d-ring location when
we sew that this will help to secure the
Sobel d-ring even more for the handles
themself we need to cut two lengths of
two inch webbing to 27 inches in length
we'll use the sailrite edge hotknife
again to cut the webbing here we are
cutting the second leg of that 27 inch
length webbing on both ends of the
webbing bill likes to place slight
dog-eared notches this is an optional
step on both ends of the webbing place
double-sided tape and we will fold it
back to create a three-quarter inch him
this should be done on both legs of
webbing so the ends are folded back to
three-quarter inches we will not show
doing this on all of the ends ensure
that the hem is folded to the same side
of the webbing once the hem is made
placed double-sided tape on top of that
3/4 inch hem do this for all four of the
ends cutting off the corner of the
webbing means that the webbing will not
stick out when the hem is created now
we'll take one of those legs and take
the main body panel with its assembly so
into it over to the sewing machine peel
off the transfer paper and baste that
hemmed edge directly on top of the
syllable d-rings
the hemmed fold is right along the
bottom edge of the d-ring then we will
sew a straight stitch from edge to edge
securing the webbing in place and also
risa curing that D ring that's already
been sewn in place with one stitch we've
sewn in forward now so in Reverse all
the way to the other end then we will
place a second row of straight stitches
right on top of the end of the webbing
on the bottom side so that you really
can't tell there's a transition between
one length of webbing in the second if
the webbing were folded back and if you
look on the underside so try to secure
the last row of stitches right at the
top edge of the webbing that lays on the
bottom side do this for all four
locations being sure that the handle is
laying flat no extra twists in it there
should be no twists at all here's how it
should lay when you're done we will not
show sewing on the other side it's done
in the same manner in this chapter we
sew on the zipper to the top of the bag
next we'll be working on the zipper for
the main opening of the bag lay the
zipper on the top edge of the bag and
ensure that you have at least two inches
going over the edge of the bag if it's
long cut the excess off so there's two
inches on both sides apply basting tape
to the flange of the zipper
make sure the basting tape is as far
away from the teeth as possible we like
to use the Sarah I canvas patterning
ruler to secure the basing tape well to
the zippers flange if you don't have
that use a heavy object separate the two
halves of the zipper by pulling them
apart at the end with the main body
panel and all of its assembly is laying
up other words the handles are on the
top side baste the zipper as shown here
in the video being sure that the two
extra inches hangs over the edges baste
the flange so that it's even with the
top edge
of the panel this zipper is fairly short
if it were long you want to be sure to
baste without pulling on the zipper
because a zipper can stretch fairly
easily just by applying pressure but
since this zipper is very short
stretching it is not much of a problem
on the backside where the excess
double-sided tape is we suggest peeling
it off all the way up to the fabric
assembly and then pulling it off now
we'll take it over to the sewing machine
and sew a straight stitch securing the
zipper to the top portion of the bag
this stitch is 1/8 inch away from the
edge of the zippers flange so the needle
isn't in the center position and the
left walking foot is up against the
zippers teeth as we sew repeat that same
procedure for the opposite end of the
bag where the bag was up together
the bag has been clips of the outside
surface is facing the tabletop we will
place double-sided tape along the top
edge where we secured the zipper and we
do that on both ends of the bag and now
we will fold the zipper back and baste
it in place at this location we will not
create a cover for the teeth as we do on
typically outdoor applications but
instead we will fold it right up against
that first stitch that we created in
other words we're folding on the stitch
this place is the fold away from the
zippers teeth which actually makes the
bag look great we don't have to worry
about UV exposure so the fold does not
have to cover the zippers teeth then we
take it to the sewing machine and we sew
a straight stitch securing that fold in
place the right portion of our walking
foot is up against the teeth the needle
is in the center position so this place
is this stitch about 3/8 inch away from
the zippers teeth
we'll follow that exact same procedure
for the opposite end we will not show
that remember this hint when sewing the
opposite side of the zipper always try
to sew it on the same side of the
presser foot as you sewed the first the
next we'll work on the duffel bag ends
we are now working with the end panel
this one has a pocket sewing on to it on
to the side that has the pocket sewn on
to it place double-sided tape on all
four edges very close to the raw edge of
the fabric we struck half inch lines
along this outer edge that is not
necessary however on the underside of
this in other words we will flip it so
the pocket is facing the tabletop we do
recommend placing marks a half inch from
all four sides so the pocket is now
facing the tabletop and bill is
measuring four half-inch locations of a
line that he will now strike down all
four sides of this end panel these lines
will be used to help you sew the bag
ends in place onto the main body panel
now let's go to the main body panel flip
it so that the outside surface is facing
up the webbing is facing up the bottom
of the bag has the foam in it we want to
place a chalk mark directly along the
bottom of the bag where the foam rests
so we placed marks there we already have
a mark placed at 18 inches from the
center location we just want to
highlight that location with our chalk
pencil one of our end panels has a
pocket the other does not it doesn't
matter which side of the bag and that
end panel with the pocket goes it's up
to you we're doing the same thing on the
other side of the main body panel
marking where the foam is on the
underside with our chalk pencil the
double-sided tape at the bottom edge of
the end panel has been exposed and we
flipped the end panel so outside
surfaces are facing each other and it is
centered at the bottom edge of the bag
the marks that we made on the main body
panel alongside of the foam will be
approximately a half inch inside the
edges of the end panel then we start
sewing on top of our chalk lines doing
some reversing at the beginning all the
way down the bottom edge till we reach
the second chalk line that's a half inch
away from the edge of the end panel stop
sewing right when you reach that chalk
line that goes horizontal of our
position and do some reversing there now
we will take this assembly out from
underneath the sewing machine and we
will baste one of the sides of the end
panel to the main body panel bill starts
at the mark that he made 18 inches from
the center location on the main body
panel and lines it up with a chalk line
that's a half inch from the edge and
then the bastes to the corner I like to
start at the corner and then baste up
that's a preference when bill reaches
the corner there will be excess fabric
there mainly because the fabric has to
make a 90 degree turn at that corner you
can cut a slit not going deeper than a
quarter-inch because we don't want to
see this led after we're done sewing in
the main body panel and in the end panel
this will help to relieve the fabric at
that 90 degree turn so it sits better as
you sew at the corner if by chance
you're patterning was a little bit off
and there's too much fabric at the
corner don't worry about it unless it's
excessive it won't really show up in the
end results now bill will start to sew
from the corner doing some reversing and
he will sew all the way to that mark or
the next line that described on the end
panel outside surfaces again are facing
each other you don't necessarily have to
start sewing from the corner because we
used basting tape everything is pretty
much held in place so you can start from
the corner or you can start from the top
and go to the corner when we reach the
chalk line that's a half inch from the
edge do some reversing there do not go
past it so directly to it and stop now
based the opposite side in the same
manner we will not show all of this
since the process has done in exactly
the same way here's what the corner
looks like now we'll take it to the
sewing machine and sew it this time bill
starts at the top edge of that side
panel buries his needle at the junction
of the half-inch mark and sews to the
corner the sailrite ultrafeed sewing
machines are the world's best portable
walking foot sewing machines this
ultrafeed is set up in the industrial
sewing table in the workhorse servomotor
package extreme slow speed control and
power after sewing this end panel in
place if we look on the inside of the
bag which is wrong side out here's what
it should look like now we'll take the
second end panel which is 13 inches by
13 inches apply double-sided tape to all
four sides of that square strike lines
on the opposite side that are 1/2 inch
away from the edge and then baste it in
place just like we did before with the
outside lines that are 1/2 inch from the
edges on the outside surface in other
words outside surfaces are facing each
other and the lines that we struck down
are the inside of the bag so the bag is
wrong side out follow that same
procedure remember that making a relief
not no deeper than a quarter inch at the
corners can help the fabric to relieve
itself as the fabric takes a 90-degree
turn since this process is done in
exactly the same way
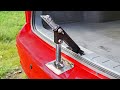
we are going to move on the zippered
opening of our bag needs to have a
reinforced zipper stop at both ends we
also need a d-ring to attach an
adjustable webbing strap we're going to
show you how to do that next finding our
2 inch webbing we will cut two strips to
eight inches in length we will show
constructing one
we need two of these take your syllable
d-ring and attach double-sided tape on
both sides of the flange then on the
eight inch length of webbing apply
double-sided tape on both long edges
going only halfway down the length of
that webbing so basically double sided
tape on four inches of the eight inch
leg run the end of the webbing through
the opening on the snap hook swivel and
rotate remove the transfer paper of the
two legs of the double sided tape and
also remove the transfer paper from both
sides of the syllable d-ring now attach
the syllable d-ring on the end of the
webbing as shown when the duffel bag is
done the snap hook will be on the inside
of the duffel bag and you can attach
keys or other things to it
fold the webbing in half so the d-ring
is on the end and the snap hooks swivel
and rotate is on the opposite end press
down firmly to secure everything so it's
basted firmly in place now take it to
the sewing machine and sew the d-ring in
place and the ends of the webbing in
place with a straight stitch reversing
once and then going forward again
so three rows of a straight stitch all
on top of each other
and bill will bury his needle at the
corner and lift the foot rotate the
assembly and sew down the long leg of
the webbing until he reaches the snap
hook upon reaching the bottom bar of the
snap hook he will bury his needle lift
the presser foot rotate the assembly
lower the presser foot and then he'll
sew right directly underneath the bar
and he will also reverse once and go
forward again to the opposite corner
then he will sew to the edge bury his
needle lift the presser foot rotate the
assembly and sew down the opposite leg
the snap-hook may come in contact with
the backs portion of the walking foot
try to keep it out of the way as you sew
the first stitch when he reaches the
portion where he did the preliminary
stitches he will do some reversing there
to lock the stitch in place we will only
show making one of these though you do
need to make to measure from the end of
the webbing with the d-ring down one and
a half inches and used your chalk pencil
to place a mark on that place a length
of double sided tape directly on top of
that mark so the mark is on top on the
top edge of the double-sided tape as
bill is facing the d-ring the bag has
been turned right side out and he
inspects the zipper on the side pocket
to see which way the slider polar is
running he wants to install the polar on
the main opening of the bag in the same
direction follow the same procedure for
installing the slider do not forget this
step if you forget the slider you have
to take the bag apart once it started it
should zip on nicely the bag needs to be
turned wrong side out
before we base the top portion of the
side to the top portion of the bag we
will cut a slit a quarter-inch into the
main body at that corner this helps to
relieve the fabric as it takes a
90-degree turn here we're doing it to
the second corner this slider is already
installed on the zipper don't forget
that step now we'll take that webbing
assembly and insert the d-ring inside
the opening of the bag before we insert
that we need to remove the transfer
paper from the double-sided tape on the
end panel once that's removed we'll
reinsert it again remove the transfer
paper from the basting tape on the
webbing then insert the end with the
d-ring inside the opening of the bag the
webbing should be centered directly on
top of the middle of the zipper the mark
that we made one and a half inches from
the end of the webbing is flush with the
end of the bag and now we take the end
panel and carefully lay it on top so raw
edges are flush and base that in place
if there is any excess fabric it should
be worked out or worked away from the
zipper so the excess fabric lays
directly at the corner it will not cause
the bag to look bad if there's excess
fabric so just work it out towards the
corner if any
when you're happy with the way it looks
we'll take it to the sewing machine and
we'll sew the duffel bag end shut and
we'll also be securing that webbing in
place as we sew through it we will also
be sewing through the zipper so be
careful when you get to that transition
you're sewing through quite a few layers
of assembly including the webbing and
the zipper and the fabric sew sew very
slowly here now the ultrafeed sewing
machine can easily sew in Reverse over
this assembly so yeni is going to sew
slowly over top of the location of the
webbing in the zipper so there are three
rows of stitches there if you do not
have the world's best portable walking
foot sewing machine you may want to
actually lift your presser foot and sew
in forward over the zipper portion in
the webbing portion several times
instead of sewing in Reverse when you
reach any corner be sure that you're not
sewing through excess fabric on the
underside sometimes there's a wrinkle on
the underside so you want to kind of
lift the assembly and look that's what
bill did before he reached the corner
then be sure to do some reversing to
lock that stitch in place we will repeat
that same procedure for the opposite end
of the zipper and for the end panel we
will not show all that since it's done
exactly in the same way
here we are completing that other side
that we did not show all the way now we
will unzip our bag and turn it
right-side out the sailrite double bag
kit is now complete one last thing is
the shoulder strap that's coming up next
to make the shoulder strap find the 2
inch webbing this left over and cut it
to a length of 48 inches onto the length
of that webbing feed the tri bar
adjuster webbing slider to inch proper
feeding of the tri-bar means that the
fold of the webbing is on the ridged
portion of the center bar place a run of
double-sided tape on the end of the
webbing so when it's folded back it
could be adhered to itself cutting away
the corner of the webbing creating dog
ears is optional we'll peel off the
transfer paper revealing the glue of the
double sided tape and we'll fold it back
upon itself we will fold it so the end
of the webbing and the end of the tri
bar adjuster webbing slider equals about
4 inches after basting it to that
location we'll take it back over to the
sewing machine and sew a straight stitch
with a stitch directly under the Tri bar
adjuster reversing a few times to lock
the stitch in place and to secure that
webbing well we will sew three separate
rows of a straight stitch reversing
several times for each row to secure the
end of the webbing at that location on
the opposite end of the webbing run the
snap hook swivel and rotate to inch onto
it then feed that into the webbing
through the Tri bar adjuster webbing
slider as shown the end result is an
adjustable webbing strap
moving to the opposite end we will feed
yet another snap hook swivel and rotate
2 inch onto it the corners of the
webbing on this end have also been cut
off slightly that's optional will apply
double-sided tape to that end and we
will fold it back over the snap hook
swivel and rotate to approximately 3
inches when measuring the fold of the
webbing to the end of the webbing now it
too will be taken to the sewing machine
and 2 to 3 rows of a straight stitch
reversing several times for each row
we'll be sewing on to the end of the
webbing securing the snap hook swivel
and rotate in place and now the shoulder
strap can be snapped on to the d-rings
on our duffel bag and now you have an
adjustable shoulder strap so you can
carry the bag via the strap or the
handles it's your choice
when looking inside the duffel bag you
can choose to cut off the excess zipper
if you'd like just don't cut off the
webbing with the swivel hooks on it the
snap hooks swivel and rotate rotates
beautifully so your strap actually moves
with you don't go away
the materials list and the tools list
that we used in this videos coming up
next all of the materials are included
in the sailrite duffel bag kit the only
items that are not included in the
sailrite duffel bag kit are the tools we
will place a star next to the tools that
we highly recommend obviously a sewing
machine scissors straightedge a tape
measure is required if you don't have a
sewing machine you can purchase the
sailrite ultrafeed at sailrite
to order the duffel bag kit click the
icon at the top right corner be sure to
subscribe to the youtube channel and
click the bell to be notified when new
sailrite videos become available click
on a link here of other videos that may
be of interest to you i'm eric grant and
from all of us here at sailrite thank
for watching