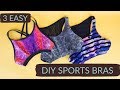
3 Easy DIY Sports Bras
Published June 2, 2023, 4:20 p.m. by Bethany
This tutorial is for all my active subscribers. Enjoy xx
Check out my previous tutorial- DIY Palazzo Pants Full Tutorial- https://youtu.be/Aw8hczrgAxI
SUBSCRIBE HERE-- https://www.youtube.com/channel/UCyI1LZdll3eLRJ6n2wqirEw?sub_confirmation=1
Items used in this tutorial:
-Pink Diamond Knit Fabric (.5yds)- https://goo.gl/s2bSNp
-Silver Diamond Knit Fabric (.5yds)- https://goo.gl/NbXYCD
-Watercolor Mesh Knit Fabric (.5yds)- https://goo.gl/6tNDFS
-Black Knit Fabric (.5yds)- https://goo.gl/qE2KhM
-Black Mesh Fabric (.5yds)- https://goo.gl/2Z9Sgy
-1" Fold- Over Elastic- https://amzn.to/2A2ziCi
-3/4"Non-Roll Elastic- https://amzn.to/2Lr1nrg
-Straight Ruler
-Polyester thread
-Pins
-Pinking Shears- http://amzn.to/2FJIVal
-Tailor's Chalk- http://amzn.to/2zi87Bc
-Scissors- http://amzn.to/2CmDdd2
-Tape Measure- http://amzn.to/2zOmgTl
-Industrial Iron- http://amzn.to/2gJFK4u
-Juki Industrial Sewing Machine- https://amzn.to/3xkQZZ1
----------------------------------------------------------------------------------------------------------------
For More Shenanigans and Fun. Follow Me Here
-Facebook- https://www.facebook.com/damilare.adenaike
-Instagram- https://www.instagram.com/damiadenaikex/
-Twitter- https://twitter.com/DamiAdenaikex
-Snapchat- damilare
For inquiries and information: damiadenaike@gmail.com
NOTE: Intro Music- Sunny "www.bensound.com"
Music I Use- https://goo.gl/IMZC9A
Disclaimer: I am not affiliated with any of these products and not being paid to use them.
You may also like to read about:
[Music]
they are some people welcome to another
facility so addicts today's episode is
all about active wear and sports bras so
this week I decided to actually DIY my
own sports bras now you guys know I'm a
pretty active person like I go to the
gym and all that crazy stuff and you if
you active like me you're probably
spending a lot of money or quite a bit
of money on sports bras in gym wear so
this week I decided to actually make my
own sports class and I was super excited
I got carried away I wanted to make one
for you guys but then I actually made
three so yeah it cost me everything cost
me all the materials were like
thirty-five dollars which is not bad for
three sports bras I mean I think so a
sportswear like $30 I'm not sure well I
buy the cheap ones but don't tell
anybody
yeah so I'm super excited about this
week's video if you need to my channel
welcome and thank you for joining me or
us the so addicts family today if you
haven't hit the subscribe button already
please make sure to hit down that red
subscribe button to see more awesome
videos for me and let's just get started
so the first thing we're gonna do is to
actually get started with the draping
process so as you guys can see I already
have my fabric pinned to the form and uh
yeah this is a knit fabric so you want
to use a new fabric this stretches both
ways so you can drape your sports for
appropriately so I have this open to the
front as you guys can see on the center
front and the side seams and even the
shoulders now when you use a knit fabric
you can stretch it you know so it can
towards the body really nicely so I'm
measuring down now three inches now this
is where our neckline is gonna start and
I'm also tracing right below the bust of
the form now obviously because this is
force bright that's where the line is
gonna go right under the bust so now
that we have that I'm just making sure
that it is even all the way around by
measuring from that line through the
bottom of the torso of the form so now
I'm also marking my shoulders at the top
and just create
nice scoop on the neck and also creating
a nice scoop for the armhole as well so
as you guys can see I've already kind of
just traced out what my sports bar
supposed to look like now this is a
sports bar for the first thing second
design the third design is gonna be a
little difference and I'll show you guys
later on in the video so now I also have
my back all draped up exactly just like
we did for the front and we're just
gonna trace out basically the same lines
you want to make sure to trace out your
shoulders your side seams you in your
armhole now the only difference with the
back in the front is the way the back is
actually curved so again I'm measuring
that same inch from the top to the
bottom making sure it's nice and on the
same
I'm also curving the neckline it's not
as deep obviously as the front and now
I'm actually curving my back as you guys
can see my back actually has a nicer
deeper curve into the arch of the bat so
this gives it a nice looking racerback
look and so now we're actually gonna on
draw the design for the third sports bar
so all you got to do is just draw a line
across the back as you guys can see and
you also want to draw a nice point there
on the front now I'm gonna be showing
you guys how we're gonna actually cut
this on the fabric later on but you just
want to make sure to draw a line across
there and also the point on the front so
now we have a front or a back pattern so
now we're actually gonna just true up
our front make sure that everything is
nice and neat and it also like has
really good lines so I'm just tracing
that line out making sure it's nice and
neat but then one thing I noticed is my
sports bar was actually a little too
long so I shortened it a little bit by
one inch as you guys can see and now the
only thing that's left to do is to
actually add the same allowance all
around the fabric so this is gonna be
the pattern for our front so again do
not worry about those lines that we
created I'm gonna explain that later on
in the video so the same thing for our
back you want to add seam allowance all
around as well but remember I shortened
my front so I'm also shortening my back
1-inch as well so the back has a little
curve is you guys notice also you want
to make sure to maintain that curve when
you cutting out your back
so after cutting out the back and the
front
everything should be looking good again
you want to make sure to trace out that
line that we traced on the dress form
just so we use it later on in the video
so the first thing we're gonna do now is
to actually talk about the materials I
use so exactly I went around and just
bought a whole bunch of fabric for my
sports bras and you want to make sure
that these fabric actually stretch both
ways the next thing I also got is the
one-inch fold over elastic I'm gonna
show you guys later on where we're gonna
put this elastic on and also a non Roll
elastic as well this was about three
quarters of an inch I also got a elastic
thread but then I didn't actually end up
using this so you can just ignore this
part I also got some lingerie straps but
I didn't also use this but you could
definitely come in handy for you guys if
you do decide to use it now the first
thing we're gonna do is actually the
first force brush so the first sports
bra I'm actually doing a little bit of
layering so I got this black solid
fabric and I'm gonna lay it on this
see-through colorful fabric that I have
so the first thing you want to do is to
place your fabric on fold and this is
where we're gonna cut out our front so
as you guys can see I'm cutting out my
front on the black fabric so you want to
make sure to cut out two of this for
your lining and also as you guys can see
I'm cutting it out of the colorful
fabric as well so I have self and lining
and also the colorful fabric because I'm
actually layering if you're not layering
the only pattern pieces you would need
is just the main fabric and the lining
but since I'm layering I need the main
fabric the lining and obviously the
fabric that I'm laying it over so we
have our front and we have our back so
the next thing we're gonna do is to
actually attach the front in the back
together at the side seams and also the
shoulders now I'm just going to have
matchy pin in this where I'm gonna sew
on the sewing machine again like I said
you're gonna sew at the side seams and
also at the shoulders now you also want
to make sure to sew the lining as well
basically the same thing that you do for
the main fabric so after sewing this all
up now we're actually going to finish
the edges of the may fabric with the
lining so you want to put your lining
over the main fabric making
sure that the right side of the lining
is also touching the right side of the
main fabric so when you have it just
like this now we're gonna go ahead and
actually sew up the neckline so I'm just
going to head and actually pinning
around the neckline we're gonna be
sewing this at a half-inch or a similar
ones and I'm just pinning around the
neckline because this is actually going
to finish up that raw edge so after
sewing this around you want to go on the
sewing machine make sure that your
stitches are nice and tight and not too
tight because this actually is supposed
to stretch over your body so you want to
make sure that this is not too tight
when you sew it down so after sewing
this on the sewing machine we're also
gonna trim away all the excess seam
allowance and then the next thing we're
gonna do is to actually just go ahead
and add stitch that on the lining fabric
so this allows the lining fabric to stay
down inside and doesn't ride up when you
actually put the sports bra on so I have
to finish in this process we're also
gonna finish up the armhole now again
we're gonna use the lining to finish up
our armhole so we're just gonna go right
in between the may fabric and the lining
and pinch both edge together and bring
it out into the sports bra so I'm just
pinching those edges together and I'm
pulling them out so this is gonna be the
point where we're actually gonna sew the
armhole together so basically the right
sides of your fabric should be touching
the right sides of your lining and you
want to sew this all around the armhole
from one edge to the other so this is
gonna finish up the armhole neatly and
nice so after sewing this down as well
we're also gonna trim away all that
excess fabric to reduce any bulky mess
in there and when you're done with this
you could just you know flip it over and
it's gonna have a nice flat armhole and
it's gonna be really neat you also want
to make sure to actually press every
step down as well so it doesn't give you
any puckering or any bubbles and then
lays nice and flat so I went ahead and
actually pressed everything down but one
thing I also did is actually top stitch
around the edges of my armhole and
neckline just to give it that extra you
know something
for this forest bribe but it's actually
looking really good so now we're
actually gonna do our waistband now the
waistband you want to measure around
your under bust to get the size of your
waistband measurement so mine was about
30 inches and they're also measuring 3
inches wide now when you have this we're
gonna sew our this across each edge and
a half inch so after sewing it down it
should look something like this neatly
pressed now this is gonna be what we're
gonna use for our waistband so again you
just want to grab your sports bra and
now we're actually gonna pin this
waistband to the sports bra now this
waistband is actually supposed to be
folded in half so when you fold it in
half it gives you the inch and a half
width waistband so the edge where is
folded is actually gonna be at the
bottom in the raw edge is gonna actually
attach to the sports bra so now I'm just
going ahead and pinning this down to my
sports bra making sure that it's nice
and neat so I'm pinning this all around
this horse right now if your waistband
is a little smaller than the sports by
itself that's totally fine all you got
to do is just stretch it a little bit
where it fits around the sports bar this
actually really helps because it helps
you know keep the sports bar nicely in
shape so I have it everything all pinned
down and I'm just gonna go ahead and sew
this on the sewing machine but then you
also want to make sure to leave about an
inch opening so we're gonna put the
elastic so I saw this all around again I
do have an inch opening as well so the
elastic and I also top stitch right
there at the edge just to give it a nice
clean finish so now we're gonna put in
our waistband so my waistband I measure
22 inches which was about 8 inches less
than my actual waistband when I cut it
out in the fabric this is elastic so it
is gonna really stretch a lot so you can
put the elastic around you just to
figure out how long you want yours but I
put mine around me and it stretched
around me pretty nicely so now we're
actually gonna insert it into the
waistband so yeah you can use this trick
with the safety pin just to put this
around your waistband and when we've
done you just want to make sure to sew
your waistband right there making sure
that it's nicely attached
together and then we're just gonna put
that into our actual waistband and we're
just gonna sew that right up
so after sewing it right up as you guys
can see everything is nice and neat and
your sports bra is done
so the second sports bar is actually a
different fabric so I have the same
patterns cut out in the second sports
bra
now as you guys can see the second
sports bra for the back is actually a
different fabric so I have my main
fabric and my lining for the front but I
don't have a lining for the back now I
don't have a lining because I wanted
that mesh look now because of the way
we're gonna be finishing up this mesh we
do not need to sim allowance on the back
of ms so as you guys can see I'm cutting
out the seam allowance for my arms oh
and I'm cutting out two seam allowance
for my neckline you don't want to cut
out two seam allowance for your side
seams just the armhole in the neckline
now I'm taking our one inch fold over
elastic and I'm just pinning this all
around the armhole and I'm gonna be
pinning this around the neckline as well
now this thing is frickin amazing it
really just formed the matching just
really was able to clean up the edges
really nice and neat and all you got to
do is just top stitch this so I went
ahead and actually sewed this down this
one machine is you guys can see it looks
really really great
I just top stitch this on the sewing
machine and it finished up that raw seem
nice and neat so now we're gonna be
attaching our back to her front so the
front fabric is there and we're
basically gonna repeat the same process
that we did before we're gonna be
attaching at the side seams and the
shoulders as well you want to make sure
to put right size to right sides and
we're also gonna be sewing down on the
side seams like I said and the shoulders
now one thing you want to keep in mind
when sewing this down remember we did
not cut the seam allowance off for the
front fabric just the black pattern so
you want to make sure to keep this in
mind when you're sewing it because you
still want to have seam allowances at
the edges of the fabric as you guys can
see I do have that 1/2 inch seam
allowance at the top and also at the
shoulders as well so now we're gonna
just line this all up so you want to put
your lining again right sides to the
right side of your main fabric and the
back is actually gonna be like a
sandwich
between both of them so we're just gonna
sew this all around now we're showing
this again on the neckline on the
shoulders in the armhole and the decide
seams as well the only part you don't
want to show it's the bottom of their
sports bras so I'm just pinning this
exactly how I'm gonna stow this on the
sewing machine so you have that
half-inch it was leftover from when we
previously attached our back to a front
and everything is all sewn up so as you
guys can see when you sew it all down it
should look something like this so I'm
just gonna go ahead and also trim this
down to get that excess bulkiness away
so it lays nice and flat and really neat
again you want to make sure to keep
pressing so everything lays nice and
flat so we're just gonna flip this over
making sure the right side is facing us
and we're almost done with this bra so I
went ahead and also top stitch this
again just like I did for the other bra
to give it that nice looking finish and
look and the next thing we're gonna do
is to actually attach the waistband so
again I measured the same thing how wide
I wanted my waistband to be just like
the first one and three inches wide
we're gonna pretty much attach the
waistband to this part just like we did
from the first one so I went ahead and
actually attached a waistband just like
we did for this first sports bra and
everything looks really really good I
love the way the sports bar came out and
we're just gonna move on to the third
sports bra so the third sports bra is a
little different now I have this
unfolded down as you guys can see now
we're actually gonna be only using this
part of the sports bar which is about
three inches down from our shoulder
seams and now you want to make sure to
actually make your shoulder seams a
little smaller now for this sports bar
we're actually gonna be getting rid of
the seam allowance all together so I
didn't want to have to cut away the seam
allowance on my actual pattern so I just
traced the shoulders as you guys can see
I traced it on the main fabric but
without the seam allowance so I'm just
going ahead and actually cutting this
out so when you do obviously your
shoulder or strap should be a lot
shorter because this is what we're gonna
do for the third sports bra and it
should not have some allowances on the
neckline and
shoulder seams but make sure to not cut
the seam allowance at the side seams you
want to repeat the same step for the
back as well this whole part of the back
we don't need we just need this section
so I'm going ahead and I'm just squaring
that off you want to make sure to also
add seam allowance for this section but
we're going to be taking off the seam
allowance in this other section so I
know it's a little confusing but one
thing you want to make sure to still
have your seam allowance for your side
seams but we're taking off the seam
allowance for the armhole curve right
here but I also have a similar islands
for this back line here so I'm just
going ahead and tracing everything out
with or without the seam allowance and
you want to make sure to cut it out nice
and neat so as you guys can see I'm
cutting this arm hoe without the seam
allowance but then I'm also cutting this
part of the back with the same allowance
and of course you also want to cut the
bottom as well with the seam allowance
so the next thing we're gonna do is to
actually cut this out of our lining as
well so you want to have two pieces for
each pattern so I have my front on my
back so obviously next thing again which
is gonna go right ahead and attach our
fronts and backs together make sure to
do the same thing for the lining as well
so after attaching this now we're gonna
actually sew this all together now you
want to make sure to put your fabrics
together making sure that the left side
is actually matching the left side now
we're not doing right side to right side
we're doing actual wrong side to wrong
side so the next thing we're gonna do is
to actually finish this up with our
one-inch fold over elastic so you want
to start from this edge now because we
do have a similarity at this edge we're
going to come down about a half inch
which is our sim allowance so we're
gonna get started from that edge a half
inch below because of our seam allowance
so this photo very elastic is actually
gonna serve as some sort of piping for
our actual sports part now you want to
do this all the way to you reach the
edge of the shoulders now this I want to
be able to measure how long I
my band to be because you're gonna use
this to actually create the straps at
the back of the sports bra so I went
ahead and actually kind of put this on
to figure out exactly how long my straps
um we're supposed to be but I kind of
also guess and just measured it to about
20 inches so regardless it is elastic so
it's definitely gonna stretch over the
body so once you have measured this out
you want to keep piping what your
elastic throughout the actual sports bra
so again I'm measuring this other strap
and we're gonna attach this across the
neckline and you also want to measure
the 20 inch strap when you get to the
other shoulder seam as well so as you
guys can see you want to make sure to
have two straps on one side and two
straps on the other side so this is
actually gonna be stitched on the sewing
machine we're gonna top stitch this all
around making sure that we have two
straps on each side of the shoulder and
all the parts of our armhole and our
neck line is all piped with the photo
for elastic so I went in the machine and
actually sew this all up as you guys can
see it looks so good like I was really
happy about how it came out
so the next thing we're gonna do is to
actually clip in the half inch seam
allowance that we had left over at the
beginning and we're just gonna clip that
in so this is gonna allow us to finish
up that edge nice and neat but before
that we're gonna actually measure how
long of the strap we actually need so I
put this on again and I was able to
measure how much I needed and when you
mark that you also want to create some
kind of similar and so a half inch seam
allowance and you want to measure that
for both sides of your strap so after
cutting this down now we're just gonna
bring that strap all the way to the back
now you can do yours where it goes in
the same direction from front to back
and we're gonna be putting this right
there into that seam or I decided to
actually do mine a little crisscross to
give it something different at the back
so I'm gonna be putting mine on opposite
end so you want to make sure that both
straps are sitting neatly and tightly
together on opposite ends
so I'm just placing the pin there for
now making sure that everything is
laying nice and flat so again for the
other side we're also gonna be doing
criss cross and then one thing I also
decided to do was like a weave so you
want to make sure if you do want to do
this you just create a nice weave for
your strap so you know you can do like a
up and down and down and up just a nice
pattern for your strap so we're gonna be
putting that on the opposite end as well
now to finish this up I'm just gonna go
between my lining and my actual fabric
and I'm gonna be pulling this out so as
you guys can see I'm just pulling out
the main fabric and the lining but I
have the straps in between the middle
now we're actually gonna sew this across
from one edge to the other edge so you
want to make sure that this is laying
nice and neat you also want to make sure
that your straps are indeed tightly
placed together and not spaced so we're
gonna just go ahead and sew this from
one end all the way to the other on the
sewing machine so after sewing it down
it should look something like this
everything is nice and neat also make
sure to keep pressing so in order to
finish up the edges for our straps we're
just gonna go ahead and just stitch this
nice and neat on the sewing machine so I
went ahead and stitch this on the sewing
machine and it looks something like this
so now we're just gonna finish up the
waistband now for this I didn't measure
any fabric at all I just decided to
actually use the elastic itself as my
waistband just because I really liked
the fact that it complemented the fold
of elastic that we used to finish the
sports bar so now I'm just going ahead
and actually sewing each side of the
elastic down together so it creates this
nice waistband for my sports bra and now
we're actually just gonna be top
stitching this exactly on the bra so
we're not unfolding anything over which
is gonna push our elastic throughout the
bottom of the bra and we're just gonna
top stitch this as you guys can see so
I'm going around and obviously you want
to make sure to actually stretch your
elastic as you're sewing so it actually
fits the whole bra so when you're doing
that it's actually gonna be gathering up
a little and when you're done it should
look something like this it absolutely
looks beautiful and I was so pleased
with the results
so that is our third sports for our done
we have the third one the second one
with the racerback and looks really
really cute with the mesh and we have
the first one which is like a
multicolored sports bra as well
[Music]
[Music]
so we at the end of this tutorial
again three different sports bars like I
was on fire everything looked great and
turned out great and thick gray even and
I mean I don't carry it away like I
bought so many fabrics from Joanne's I
couldn't even decide how to mix match
everything but I think I did a pretty
good job now you can decide what sports
body you want to make or even if you
want to make all three like that would
be kind of cool right so if you don't
make any of these items or from any of
my tutorials please make sure to share
your pictures with me on Instagram and
Tommy and say 19x if you like this video
please give this video a big thumbs up
and if you have any suggestions comments
or anything you just want to tell me
please make sure to scroll down and
leave me a couple of words I'm
definitely reading those as well and one
more thing if you haven't hit the
subscribe button please make sure they
hit down that subscribe button to see
more awesome videos from me and I hope
to catch you awesome so Attucks next
week


![Canon in D 's Versions - [Relax Music] | JUN image](https://i.ytimg.com/vi/mzFbjHK_Xdo/default.jpg)


![Canon in D (Pachelbel's Canon) - Cello & Piano [BEST WEDDING VERSION] image](https://i.ytimg.com/vi/Ptk_1Dc2iPY/default.jpg)


![DIY Weekend Bag 빅사이즈 가방만들기 | How to make a duffel bag travel bag - sewing tutorial [sewingtimes] image](https://i.ytimg.com/vi/u4XYL2R2duA/default.jpg)