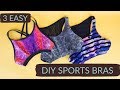
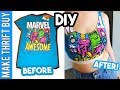
DIY Sports Bra Crop Top (Customisable) | Make Thrift Buy #53.5
Published June 2, 2023, 4:20 p.m. by Bethany
Download the Clue App: https://xq5r.app.link/AN40SHPxaD
Merchandise here: http://bit.ly/2mVRYbv
Support me on Patreon! https://www.patreon.com/annikavictoria
Episode 53: https://youtu.be/qrbdHe3fSxk
🐶 P.S. my earrings are handmade by the cutest Etsy store, find them here! https://www.etsy.com/shop/corjin 🐶
🔔 Turn on notifications next to the "Subscribe" button to be notified when new videos are uploaded! 🔔
💛 PATREON SUPPORTERS 💛
↓Business Supporters!↓
Little Gun Tank
http://bit.ly/1PmHCYr
http://etsy.me/1ng4Vgt
♡Producers♡
Rachel Oakman
Cindy Ibanez
Maci Harrison
Mum & Dad
Special Thanks go to:
Elizabeth Pleksun
Tara Major
KaleidoSophie.
Hayley Shimizu
****************************
THE project
Difficulty: Confident beginner - intermediate
Time to finish: ~2 hours
Episode 53: https://youtu.be/qrbdHe3fSxk
****************************
CREDITS
CHANNEL ICON
By Andrea http://keetan-art.tumblr.com
MUSIC
"Early Riser" by Incompetech
http://incompetech.com/
Glide by Ampyx
https://youtu.be/FijbmQVEXKw
LMAO by Ampyx
https://youtu.be/ocwUom5Gv_Y
Stardust by From The Dust
https://youtu.be/mRBat426QHo
Cloud 9 by Valesco
https://youtu.be/nRa-eGzpT6o
Tony's Belated Breakfast by Biocratic
Music by Chillhop: http://youtube.com/chillhopdotcom
https://soundcloud.com/birocratic
****************************
CAMERA: Canon EOS60D
Microphone: Zoom H5
Editing software: Final Cut Pro 10.2.1
sewing Machine: Bernina Bernette Oxford 6 and Bernette 610D (overlocker)
Find me elsewhere on the internet!
► WEBSITE http://www.annikavictoria.com
► MERCH https://store.dftba.com/collections/annika-victoria
► INSTAGRAM http://instagram.com/littlepineneedle
► TWITTER https://twitter.com/annikavictoria_
► FACEBOOK https://www.facebook.com/annikavictoria
► PINTEREST http://www.pinterest.com/littlepinetree3
► BLOG http://www.pineneedle-collective.blogspot.com/
► SNAPCHAT annikavictoriah
► POLYVORE http://annika-victoria.polyvore.com/
Help us caption & translate this video!
https://amara.org/v/hXME/
You may also like to read about:
[intro music]
This video is supported by Clue.
Hello! Welcome to a special half-episode of Make Thrift Buy. So I mentioned in episode
53 that I’d be doing a more customisable sports bra: “And then, I will also do an
episode 53.5 which will show you the harder, but much more customisable way to do this”.
Welp, this is that video! And that’s what I’m going to be doing today!
So, let’s jump right into it!
So today I’m going to be turning this t-shirt here into a sports-bra style crop top.
First we need to start off by making a pattern.
Now I used a tight-fitting singlet top to base my pattern off – this singlet top here
eventually became the rainbow crop top you saw at the end of episode 53 – but before
I cut it up, I made a pattern out of it!
So with this singlet top and some butchers paper, I folded the singlet top in half like
this, so that the front was facing outwards.
Then, I laid it flat down onto the paper, with the fold matching up with the straight
edge of the paper here, and I traced around these edges. Because I wanted it to be cropped,
I didn’t copy the bottom of the singlet top, instead I drew a straight line across
here, 14 inches below the top of the shoulder, to make the pattern shorter.
And I traced it out in pencil whiiiich you can’t see on camera, so I’m just going
to go over those lines in marker now.
I then added a seam allowance of ½ an inch around the armhole, top of the shoulder strap
and the neckline. And I added a seam allowance to the side of the pattern as well.
And then, I drew this arrow here, on the straight edge, because it will indicate where I will
place the pattern on the fold of the fabric later on.
Then, I cut around the outside lines with some scissors and that’s my front pattern
piece done.
I did the exact same thing for the back pattern piece, so I folded the singlet the other way,
so the BACK was facing out, laid it flat on the paper, with the fold matching the straight
edge of paper, and I traced around it like this.
I actually used the front pattern piece to make sure that the straps were the same width
on both the front and back pieces, and that they were both the same length as well.
Also, I added the same seam allowances as I did on the front piece and then I cut it out.
So now I have both the pattern pieces that I need, the front and the back piece – and
it’s time to get started cutting out fabric!
So this thrifted t-shirt is what I’m going to be using for my fabric. So first I cut
the front and the back pieces apart by cutting up the side seams, and around the arm holes.
Starting on the front, because I want this logo to be on the front of my sports bra,
I folded it in half right-sides together like this, making sure that the fabric was all
flat underneath, and then I placed the pattern piece on top, with this FOLD arrow pointing
towards the FOLD of the fabric.
Then, I cut around this.
To cut it out, I just put a bunch of heavy items on top of the paper and fabric to hold
them down and I went around the edges with my rotary cutter.
So initially, I wanted to keep the original neckline, as you can see me doing here – but
in the end that got too complicated, so I did cut it off.
I then did the same for the back – folded it in half, right sides together, placed the
back pattern down on the fold, and cut it out.
So here’s my cut out front and back pieces.
To sew them together, I placed the back piece down facing right-sides up, and I put the
front piece on top of it, right sides-down.
And I sewed them together at the shoulders
and the side seams.
Now you want to use a thread in a matching colour for this – this was the closest colour
thread that I had on hand, but this one here, if it hadn't almost run out – would have
been better.
So, I sewed the shoulders and side seams together using a standard zig zag stitch, like this.
Next, I’m applying elastic to the top’s armholes and the neck hole.
So with the top inside out, I roughly measured out how much elastic I would need to go around
the armhole, so I wouldn’t go drastically over or under this amount and have a loose
or a too-tight armhole, which I did by placing the elastic at the bottom of the arm hole
and then stretching it gently to the top, then doubling this measurement.
Then to apply the elastic, and I’m just showing you the armhole application however
it’s the same for the neckline as well, I put the armhole underneath my sewing machine
like this, then I put the elastic on top at the edge of the fabric. I put the sewing machine’s
foot down, did a little backstitch to keep them in place. Then, I gently stretched the
elastic, like this, and I slowly did a zig-zag stitch right in the middle of the elastic,
attaching the elastic along the fabric’s edge.
I continued gently stretching the elastic as I went, all the way around the armhole,
until I got back around to the start.
When I got back to where I started, I clipped the elastic off, and I sewed the two ends
of the elastic together, on top of the armhole, like this.
To finish off the armhole, I folded it over once like this – so this is kinnnda like
doing a hem except there’s elastic inside, and I sewed around it once again using a zig-zag
stitch. I also continued to stretch it gently so that there was no bunching in the fabric
– you’ll actually be able to feel how much you’ll need to stretch it this time
around, this only really makes sense once you’re actually sewing but yeah. Stretch
it the same amount all the way around the armhole – and you’re done.
Now once I’d done that for both armholes and for the neckline, I just needed to attach
an elastic band at the bottom. So I showed you all how to do this in better detail in
episode #53, so I’m just going to go through it very quickly here.
I quartered both the elastic band, which I'd measured to fit my waist, and bottom of the
top with pins, and then I sewed them together, right-sides together, all the way around the
top’s bottom edge, stretching the elastic so that the pins met up.
Then I unfolded the elastic and I’m done. Now you can also top-stitch the elastic down
like this, but that’s totally up to you. I find that it doesn’t really matter whether
its top-stitched or not.
Soooo time for the reveal! How did I go?
[Fun electronic music plays]
I actually made 3 sports bras in this way! This orange one, this Marvel one and this
green one, all from old t-shirts, but you don’t have to use an old t-shirt – you
can use any fabric that you want (as long as it's stretchy).
Now, here’s some tips on making it more supportive if you want to use this more as
a sports bra, or if you wanna go bra-free underneath.
So you can make it tighter-fitting at the sides. So, when you’re making your pattern,
don't add a seam allowance at the sides, and bring it in a little bit.
You can also use a thicker elastic band, and also make the top SHORTER so that the elastic
band is just underneath your bust, kind of holding everything up.
You can also copy your pattern off something with a T-back.
Or you can make thicker straps while you're making your pattern, and you can also make
the straps a little bit shorter.
And you can also use power mesh or something else similar like that for your fabric. You
don’t need to use an old-tshirt, or, if you want to use an old t-shirt, you could
line it with power mesh fabric as well.
But if you’re above a C-cup, or you wanna do some really intense workouts with this
thing, you’re probably still better off with an actual sports bra because they’re
made with these fancy materials that wick moisture away, and are also made this super
fancy equipment which is beyond the scope of home-sewers.
Still, give it a go! Worse comes to worst, you'll end up with a cute, fashionable crop
top. And if you’ve got any more useful tips, leave them in the comments below!
I hope you enjoyed this video, sadly it’s coming to the end of the warm season here
in Australia so I’m packing all of my crop tops and sports bras away for the next few
months – but I know that a lot of you watching are from the Northern Hemisphere, so I hope
you can make good use out of this tutorial! If you do, I’d love to see the results,
tag them with #diyannika on Instagram to show them to me.
Now it’s time for some period talk! Uh - what Annika? What? This video took a left-turn.
Yeahhh, but if you’re a person who gets their period, I recommend that you stick around
for the next part. This video is sponsored by an app called Clue. Clue tracks your period
and I’ve personally been using the app myself for almost 2 years, and I think that it is
such a useful application, which is why I’m going to tell you all about it right now.
Now Clue – C-L-U-E – is a FREE app, that you can get on the iOS and the android app
stores, and since I started to use it almost 2 years ago, I actually don’t know how I
would live without this app. I have a lot of unrelated health stuff going on, if you
follow my social media accounts you know all about that – but knowing when my period
is going to turn up is pretty useful because it’s just one less thing that I have to
worry about. I also take a lot of medications that mess around with my hormones, so having
this information for myself and for my doctor is just really useful. And it’s free. Guys,
it's free. I fricken love this app.
Okay so I wanna show you all how this actually works so… we can’t really avoid this - you’re
all going to know my cycle now.
Cool.
Oooh boy. Okay so I actually didn’t realise how close I was to my next period, and now
I know to be prepared. Now there’s actually reminders you turn on so that you know when
your next period is coming - I'm going to turn these on now.
Now I find THIS reminder here really useful – these clouds are telling me, from tracking
my cycle for the past 2 years, that I’m probably about to start having PMS. So when
I’m randomly crying at babies on TV and I don’t know why I check the app and then
I’m like, oh yeah, PMS, cool cool cool. I’m not losing my mind, it’s just Aunt
Flo.
So this app has been rated #1 by a bunch of doctors and top researchers, and I’ve used
it in my own doctors appointments as well – and it can also show you: when you’re
most fertile if you’re trying to get pregnant, and it also now comes with a pill-tracking
feature as well if you’re on the pill. One of the best things that I’ve found with
the app is it that gives you a lot of good quality information about what’s considered
normy... normy?? [laughs] about what's considered normal and healthy with your period – I’ve
actually learnt some stuff on here that I never got taught in health classes in school
– so when I’m freaking out that something isn’t normal the app usually tells me that
it is – but it also does say when you should probably go and see a doctor as well.
OH YEAH and I don’t use this feature myself, uh because I’m generally a private person
- says the girl who is sharing this with literally hundreds of thousands of people -
But you can share your cycle with other people as well, so, you know, the people you live
with or your partner, your best friend, whatever - which can be pretty useful!
So yeah, I have a link to download Clue in the description box below, or you can find
it on your app store by just typing in CLUE. Thank you for supporting the companies that
support my channel, I’m very selective with my sponsorship opportunities and I always
believe in the companies that I bring to you guys, so you know that my promotion of this
app is LEGIT. Clue rocks. The end.
Thanks for watching and I’ll see you all next time. Bye!
Thank you to all of my supporters on Patreon for making these videos possible.
To become my patreon supporter, go to patreon.com/annikavictoria!


![Canon in D 's Versions - [Relax Music] | JUN image](https://i.ytimg.com/vi/mzFbjHK_Xdo/default.jpg)


![Canon in D (Pachelbel's Canon) - Cello & Piano [BEST WEDDING VERSION] image](https://i.ytimg.com/vi/Ptk_1Dc2iPY/default.jpg)


![DIY Weekend Bag 빅사이즈 가방만들기 | How to make a duffel bag travel bag - sewing tutorial [sewingtimes] image](https://i.ytimg.com/vi/u4XYL2R2duA/default.jpg)