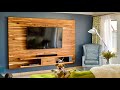
Easy DIY FLOATING SHELVES No bracket | DIY CREATORS
Published June 1, 2023, 3:20 a.m. by Arrik Motley
floating shelves can enhance any area. For less than $10 you could make 3 all of these. The beauty of this is you can make them with no hardware.
shelf Dimension: (31inL) X (7.25inD) X (1.5inH)
View all my plans: https://gumroad.com/diycreators
Find me on Social media
Instagram: https://instagram.com/diycreators2015/
Facebook: https://www.facebook.com/diycreators
Help us make more videos here: https://www.patreon.com/diycreators
Materials Used
******Affiliate Links******
2in X 8in X 8ft Southern yellow (You can use larger or smaller lumber)
1/2in dowel (36in rod)
(3) 1in wood screw for safety
Minwax Gel Stain - http://amzn.to/2yGlA3x
Minwax Pre- Stain wood Conditioner http://amzn.to/2xXjUAI
Minwax Spay on polyurethane http://amzn.to/2zrKnr9
Spray paint Grip - http://amzn.to/2xUQacx
(6) 3in wood screw to mount wall
Tools Used (not all required)
******Affiliate Links******
Mini miter box and saw http://amzn.to/2yFt9Ys
Circular Saw - http://amzn.to/2l38lqk
Orbital sander http://amzn.to/2gVYfmU
Level - http://amzn.to/2xVuKMr
drill bit - http://amzn.to/2yELnLh
Speed Square - http://amzn.to/2gW11IU
Tape measure http://amzn.to/2yFgSTE
Stud finder http://amzn.to/2yDUYBJ
Material Support Stand http://amzn.to/2yEwsil
countersink drill bit set http://amzn.to/2yGqi2I
Dead Blow Mallet http://amzn.to/2gYrxB7
Chest Vest - https://goo.gl/qywmMK
(optional) Drywall Screw Anchor http://amzn.to/2xXuT1O
woodworking Plans (Big Bundle) https://gum.co/CpSyF
-Camera and recording equipment I use
******Affiliate Links******
Camera - http://amzn.to/2qTajaY
Mic - http://amzn.to/2qTtAZO
--------------------------------Limited Tools Videos --------------------------------
If your new to woodworking with little to no tool check out my "Limited Tools Videos (For beginners)" http://bit.ly/1PtWJEd
You may also like to read about:
loading shelves can be a great way to
enhance and freshen up your space
and whether you're looking to add some
change to your bedroom or you're just
looking to give your bathroom
a quick facelift they can go a long way
but you don't have to stop there maybe
you also want a solution to keep your
gear
organized now what make this appealing
is for less than ten dollars you can
create
all three shelves without any hardware
stay tuned and i'm gonna show you
exactly how it's made
and before we continue here's a list of
things that you'll need
to build your shelves you'll need one
two inch by eight
inch by eight foot lumber you'll also
need a 36 inch oak dowel
and in many hardware store you can have
the lumber cut to size
but for those who have tools all you
need is a circular saw
a drill a sander and a half inch bit
now i want to cut this number down into
three equal parts but being that i have
a chip corner i'm going to mark and then
remove that first
[Music]
the final length of each board will be
just shy of 31 inches
and after mark in the area i'm gonna now
add a piece of support under the bottom
to catch the wood after it's cut
i also want to check the depth of my
blade so i don't go all the way through
the support so i'm going to lift the saw
up a bit just so it barely touches the
support
and using a speed square is a quick and
simple way to keep the saw straight as
you're ripping through the lumber
now repeat the same step two more times
and that'll get you three shelves
[Music]
next i'm using a three foot section of
half inch dowels and what i'm going to
do is mark
that to four inches and you should end
up with nine pieces
it's going to be three of these per
[Music]
shelf
now the next thing we want to do is mark
three location for the dowels i'm going
to mark the very middle and then
two inches from the outside on both
sides
[Music]
next you want to find the center point
of each line and put a mark
now i'm going to take a half inch bit
and then i'm going to put tape around it
and this is going to be setting the
depth of the dial
you can use a phillips screwdriver or an
owl to mark the point and this would
help
the bit to stay focused and not wander
off
now just repeat the same step for all
nine holes
and while this is clamped let's go ahead
and sand it down and clean up this area
now i do feel like it would be easier to
drill the hole first then cut the wood
because this way i know everything will
be lined up perfectly
i'm going to use the guide that came
with a circular saw and set it to make
an inch and a half cut
then lock it in place and of course if
you have a table saw this would be a
much easier process to tackle
and you can go ahead and rip that on
your table saw as well and with this
demonstration i'm showing with the
circular saw just want to be sure to
hold on with a circular saw with two
hands if need be
to try and control the saw so it doesn't
wander off
now it will be easy to get these mixed
up so what we want to do is mark
each one of them and also put marking
points so we know which side go where
and which pieces go with which piece
i use the half inch bit and also half
inch dowels
now this make it difficult for the dials
to slide in and out of the holes
so that's fine for the back part of the
shelf and we want to hammer that in
but for the front side of the shelf i'm
going to mark these and then
sand down this section here we need the
extended part of the dial to slide in
and out of the shells fairly easy
and the best way for me to sand this
down was to place one side in the chuck
of my drill and then i'll take sandpaper
and hold it alongside of the dowel
now you don't want to overdo it you just
want to make sure that the dowels slide
in and out of the hole easily
now just repeat the same process over
and over until all of them is done
now you can move on to sanding down all
the shells and you can also
round over the ends using a router or
you can use the sander
so right now i'm going to line up the
pieces i'm going to drop the dial pins
inside of them and i'm going to hammer
those down we want to lock them in place
at this point
you can use wood glue but i think
they're tight enough that we don't
really need it and as you can see here
the pins slide in and out of the shelf
just fine and that's really what i was
going for so just repeat the same steps
for the remaining shelves
the next thing i want to do is to lock
the shelf into place so what i'm going
to do is install a screw
right through the dial and into the wood
we do want this to be tight so put a
clamp at this area here
pre-drill and countersink the screw and
although you could add one at each dowel
section
i believe one in the middle would be
just fine so to prep the shelf to take
the stain i'm going to use one coat of
minwax pre-stain
conditioner for the viewers that aren't
really familiar with the pre-stain
conditioner what this does is to help
avoid any blotchiness from your stain
and after the conditioner dries i'm
going to lightly sand it down
and the next step will be adding the
stain
now there is a few ways to apply stain
my favorite technique is the wipe on
technique where you just apply it and
then you remove it with a rack
and i also like to use the minwax gel
stain
[Music]
the next step to finishing the shelf is
putting on a top coat and i'm going to
be using a spray-on polyurethane
now i usually add two to three layers of
top coat and sand lightly between
each one of them when it comes to the
polyurethane you can use the brush on
version the wipe on version or you can
just spray
now i do prefer to use a spray for a
project like this because it's less mess
and you don't have to worry about a
whole lot of cleanup
the first step to mounting the shelves
we want to add a few holes in the back
bracket and to do so
you want to level that then find the
stud in the wall
next make a mark on the back bracket and
on the wall
if you don't have a stud finder you
could use a screw-in wall anchor such as
these which is rated for 50
pounds each and to speed up the process
we're going to transfer the marking over
to the other two pieces of wood
then we're going to put some cross marks
on those and drill a hole there
now i just eyeballed this section here
but all you need to do is drill about
half inch in because we want the screw
to be able to go
through the wood and into the wall but
not interfere with the shelf itself
now you're going to place the wood over
the mark that you put on the wall
and screw into the stud and again if you
didn't have a stud finder you'll be
screwing these into a wall anchor
now align the shelves with the dial pin
and slide the shove into place
repeat the same process for the
remaining shelves and add the safety
screw
you could also use a piece of scrap wood
to help you space the shelves properly
you