Home Assistant WireGuard VPN Install and Setup!
Published June 2, 2023, 9:20 p.m. by Monica Louis
The first 1000 people to use the link will get a free trial of Skillshare Premium Membership: https://skl.sh/everythingsmarthome06211
Setting up a vpn with wireguard has never been easier with Home Assistant, in this video I will show you how to install and configure a wireguard vpn with Home Assistant, and we also discuss what exactly a vpn is and what makes it different to a straight port forward and some of the advantages of using a vpn., not just with Home Assistant, but in general.
If you'd like to support me and future projects:
Patreon:
https://www.patreon.com/everythingsmarthome
Hardware to run Home Assistant:
Raspberry Pi 4: https://amzn.to/2Dviwyh
Raspberry Pi 4 Bundle: https://bit.ly/31TpS6Z
Micro SD Card: https://amzn.to/3lqBk2v
Micro SD to USB Adapter: https://amzn.to/2GcAk1P
SSD's: https://amzn.to/2Pyq5dw
Home Assistant Blue: https://bit.ly/31RZM4s
Buy Me a Coffee:
https://www.buymeacoffee.com/EverySmartHome
Written Article:
https://everythingsmarthome.co.uk
EVERYWHERE YOU CAN FIND ME:
Everything Smart Home Community Discord:
https://discord.everythingsmarthome.co.uk
Twitter: https://twitter.com/EverySmartHome (@EverySmartHome)
Instagram: https://www.instagram.com/EverythingSmartHome/
Facebook: https://www.facebook.com/everythingsmarthomeofficial/
#homeassistant #smarthome
________________________
Some of the links above are affiliate links, where I earn a small commission if you click on the link and purchase an item. You are not obligated to do so, but it does help fund these videos in hopes of bringing value to you!
0:00 - Intro
0:34 - What is wireguard? What is a vpn?
3:26 - SkillShare
4:31 - Advantages of using a vpn
6:08 - DuckDNS Configuration
8:05 - Installing and Configuring wireguard
14:20 - Port Forwarding
15:12 - Installing the wireguard Client and Testing
You may also like to read about:
hey guys and welcome back to another
tech tutorial tuesday
in this video we're going to be looking
at wire guard what is it
how to install it and how it can benefit
you for accessing not only home
assistant
but any other services on your network
over a
vpn so we're going to be going through
we're going to be installing a wire
guard
vpn on home assistant now this question
did come from a lot of you guys which
i'm grateful for
so if you want your question answered in
next week's tech tutorial tuesday
then make sure to leave it in the
comments down below and you never know
i might just answer it and you might as
well leave this video a like
whilst you're down there so what is
wireguard
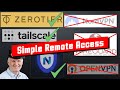
wireguard is a free open source
technology for creating
virtual private networks or vpn
for short now when we talk about vpns
the way most people have heard about a
vpn
is from people talking about using one
as a way of masking your internet
traffic for privacy
by making it seem like it's coming from
another location
so that you can watch a different
country's netflix or other
totally legit and definitely not
nefarious content
but vpn was actually originally designed
for a different purpose
entirely and that was to connect remote
workers to a business
as if they were actually physically
sitting there at their desk
connected to the network now these may
seem like
two completely different things one is
for masking your internet traffic and
one is for connecting to your
works network however they are both the
exact
same thing it's just that with the
former you are connecting to
someone else's network now when we talk
about vpn technologies
there are a number of different ones out
there but the ones that are typically
most
commonly used these days are ipsec and
openvpn both of which have been around
for a very long time putting ipsec
aside because it's typically only found
in business environments
openvpn has pretty much been the gold
standard for a very long time
it's incredibly mature stable and proven
to be very secure
and in the right scenario it's very very
fast and this is the technology that
pretty much all of the vpn providers out
there so private
internet access or nordvpn is what they
actually use to build their businesses
on
fun fact actually when the pandemic
first started and businesses
in the uk had to move to remote working
i was tasked with
designing a system that would allow 900
people
to work from home would be reliable with
redundancy and that would scale
to allow for great speeds over multiple
gigabit networks
and i designed that system on openvpn
multiple openvpn servers actually and we
still use that
system today and it's been incredibly
stable and
rock solid but anyways getting a bit off
topic i'm sure that nobody is interested
in that back to wireguard wireguard
intends to be a replacement for
these other technologies by being
simpler than ipsec to implement
whilst being faster than openvpn the
problem with
openvpn is that it is super stable and
secure and i did say that in the right
scenario it is very fast
but the speed can sometimes be limited
by your hardware
and so that's one of the challenges that
wireguard intends to solve
and so far it's doing a pretty good job
it's definitely a technology that i hear
more and more more people talking about
and certainly on the rise in
popularity now before we move on and we
talk about why you might want to use a
vpn
let me first tell you about the sponsor
of this video skillshare
skillshare is an online learning
community with thousands of classes for
creators
who want to learn a new skill or even
brush up on some existing ones
all of the classes are specifically
tailored for learning meaning there is
no ads
and they are always launching new
premium classes to their existing
library
you can choose from a wide range of
categories and with skillshare premium
you get
unlimited access so that you can learn
at your own pace
i've just completed a skillshare
original class with the one and only
marquez brimley
called youtube success script shoot and
edit with mkbhd
which is helping me to develop my video
making skills to make
better content but they also have
classes about arduino
raspberry pi 3d printing internet of
things and even networking
skillshare is less than 10 a month with
an annual subscription
and the first 1000 of you to click the
link in the video description
will get a free trial of premium
membership so you can explore your
creativity
thank you again to skillshare for
sponsoring this video
all right so brief history lesson about
vpn's over
let's very quickly talk about a couple
of reasons you might choose a vpn over
just a straight
port forward number one is that a vpn
will allow you to access more than just
the one thing you port forward
remember earlier i said that vpns are
used for connecting to a worx network
well in this case the work network is
your home network
and i'm oversimplifying here but for all
intensive purposes
a vpn will make it seem like you are
just on your home network
even when you are away from home meaning
that you can access
all your other services and computers
just like you would if you were at home
whereas using a straight port forward
would require you to port forward each
individual service that you wanted to
have available
and they would all need to be available
on different ports
number two is security using a vpn
tunnel is inherently more secure than
a straight port forward now there is a
bit of misconception here
because a lot of people i see think that
the actual act
of port forwarding is the bit that's
insecure
which isn't actually the case and as
you'll see even with a vpn we still need
to do a port forward the bit that could
potentially be insecure is within the
actual
service you're part forwarding to either
through the end point having a
vulnerability in the way it's coded
or just by having the service exposed
directly to the outside world
meaning it's open for brute force
attacks whereas with
when you use a vpn none of these
services are exposed directly to the
internet
the only way to access them is through
that vpn tunnel
okay hopefully you found that useful and
not just some meaningless waffle
let's finally get in and get started
with creating our wire guard vpn
and we're actually going to take a bit
of a playbook from the other video on
remote
access and go through the process of
creating a
dns domain name first because we still
need a domain name
to access our vpn you can buy your own
domain name if you want and they're
generally
around 5 or 10 pounds per year so
pennies really
and if you have your own domain name
already then you can skip this bit
but for everyone else let's create a
duck dns domain name head over to the
duckdns.org website
and then log in with one of the
available methods
once you've done that you will want to
create a domain name and this will be
the address that is used to connect to
your vpn
and can be whatever you want so long as
it's not in use by someone else
once you've created and saved it you can
go ahead and change the auto populated
ip address
to 8.8.8.8 which will make
more sense in just a minute save that
then at the top you will see a field for
a token
highlight and copy the token and head
over to supervisor
and into the add-on store and download
the duck dns
add-on hit the install button and then
once installed
you will want to check the watchdog
option and head over to
configuration you can leave the let's
encrypt
accept terms set to false because we
don't actually need a certificate this
time
in the token field paste in the token
that you just copied
and then in the domains field enter the
domain name that you just created
this will have.duckdns.org at the end
hit the save button and then start the
add-on and head to the logs tab it
should only take a couple of seconds and
you will have a message that says it was
okay and
changed to confirm this head back to the
duck dns page and hit the refresh button
and the ip address in the box should now
be your public ip address
now that we have our domain name set up
and working we can get to the
install of wireguard head back over to
supervisor and
into add-ons and find the wireguard
add-on hit the install button and after
completion
you'll probably want to enable the
watchdog option
also before starting the add-on head to
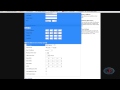
configuration
and there is some details that we need
to add first
you'll notice that there is two sort of
distinct blocks here
you'll have a server block and you'll
also have a pure block
the server block is obviously what we
are configuring here so the server
and then the peer block is the
configuration that the endpoint devices
will use
so your mobile phone for example under
the server block the first thing you
want to do
is add the host and this is going to be
the duck dns domain name
that we just created so in my case it's
going to be
everythingsmarthome.dns.org
under that we have the server address
and this is going to be the network or
the subnet
that your server will use and this is
going to require just a little bit of
thought
this is the subnet that your devices
will be giving out an
ip address on the advice here would be
to use a different network to the one
your main
network is on don't use the same one
otherwise you will most likely have
rooting issues and also ip address
conflicts
unless you know what you're doing if you
have a flat network so no vlans and no
additional subnets
then it is safe for you to just use the
next subnet up from where you are
so for example if your home router has
an ip address of 192.168.1.1
and all of your other network devices
start with 192.168.1.something
then you could use 192.168.2.1 for
example if you have a more advanced
network with vlans and multiple subnets
then chances are you already know what
you're doing and you don't need me to
tell you
but again just make sure to use a
separate subnet
and not one that is currently in use so
with that in mind the network i
am implementing this wireguard install
on is on 10.2.11.0
and i have subnets all the way from
10.2.11.0
all the way up to 10.2.22.0
so i'm going to make my server address
the next subnet up
which makes my server ip address
10.2.23.1
sorry if that was all a little bit
confusing we probably went a little bit
more in depth than you guys wanted
and hopefully i've not confused you but
i wanted to try and give you as much
um info as possible without actually
getting into the real technical stuff
if you're stuck then leave a comment
down below i always reply to comments
or even better jump into the discord
server that should be the most difficult
bit to explain out the way
now we want to configure a dns server
and typically this will be your router's
ip address
unless you configured ad guard or pi
hole in which case set your dns server
to whatever those are
if you have the ad guard add-on
installed then you can
use the exact ip address 172.30.32.1
to get ad blocking over wiredguard which
is pretty cool
next under the peers section this is
where we create individual configs
for each of our devices and essentially
this is a list of all the devices
permitted to connect to wireguard add a
new entry for your device
in this case i'm calling it lewis dash
phone
and then we need to give our device an
ip address also
and you'll want to make sure that this
ip is on the same network as what we set
above so my server address that we set
above is 10.2.23.1
so i can make the pier 10.2.23.2
now this can be any ip address you want
so long as it's not the same as the
server ip address
so in this example i can use any ip
address from 10.2.23.2
all the way up to 10.2.23.254.
if you used 192.168.2.1 as your server
ip address
then you can use any ip address from
192.168.2.2
all the way up to 192.168.2.254.
finally we come to allowed ips and
client allowed ips
for the scope of this video i'm going to
suggest ignoring allowed ips for now
and leaving it as is the client allowed
ips is going to allow us to control
which traffic
goes through the vpn tunnel and which
does
not if you want all of your traffic to
go through the vpn
then you can leave this unconfigured if
you only want
specific traffic destined for certain ip
addresses to go through the vpn tunnel
with the rest going through your normal
internet connection
then you will want to add those networks
here
keep in mind that you'll need to add
your normal router network as well as
the vpn
tunnel network we created above so for
example if your main router is on
192.168.1.1
and your vpn network is on 192.168.2.1
then add 192.168.1.0.24
and 192.168.2.0.
24 as a network in my case i need to add
10.2.11.0 24
as my main network and 10.2.23.0.24 as
my
vpn network again just to clarify if you
want
all traffic to go through the vpn then
just leave this
a setting as is unconfigured
now that we've done that there is one
final thing to take note of
just below the configuration box you
will see that it says wire guard will
run
on port 51820
you can change this port if you want to
but i'd probably recommend just leaving
it
unless you have a specific reason to
change take a note of this port
and then go ahead and start the add-on
once started
check the logs and wireguard should
start up and then you should see
some lines stating requesting current
status from wireguard
every 25 seconds if you see that then
this means that wireguard has started
successfully
we need to now port forward that port
that you just took a note of
to your home assistant server now again
taking a playback from the other video
you will need to figure out how to do
this on your specific router
the simplest way is to just google your
router's model number plus
port forward and you will find
instructions for how to do this
for your specific router unfortunately
it's one of those things where there are
so many different routers out there
i can't show you how to do this for your
specific model
once you've figured out how to port
forward you will need to port forward
port 51820 which is the number that you
took a note
of earlier to the ip address of your
home assistant
and this should be on udp and not tcp
your router should have the option to do
tcp
udp or both and make sure to just choose
udp only once you've done that we are
really close and we can now
test it out now i'm going to show you
how to add it on a mobile device since
that's probably
what most of you will use it for but you
can install the wireguard client on
windows
mac and linux as well as ios and
android wireguard actually generates
these nice little qr codes that imports
the config
to your device which is pretty handy
using visual studio code or whichever
file manager you use on home assistant
open the ssl folder if you're using
visual studio code
like i am you can right click in the
sidebar choose add
folder to workspace and then click ssl
then wireguard
and hit ok this will add a new folder to
your sidebar called the wireguard
and inside it will be another folder
that has the same name
as the name that was in the peers list
earlier
open this folder and then open the qr
code to display it
on screen then download the wireguard
client from the play store or the app
store
and then press the add button and select
the scan
and qr code option and scan the code on
screen
then enter a name for the connection and
hit create
tunnel before connecting you will need
to disconnect from your home wifi
don't try to connect whilst at home as
it's unlikely to work
then you can go ahead and hit the
connect button tap into the connection
name to get more details and you should
see that it has
connected you can confirm it's working
by trying to
access your home assistant server by ip
address and seeing if the web page
opens you can also confirm this in the
wireguard logs
you'll see that your peer now has an
endpoint ip address associated with it
which is your device's public ip back on
your mobile you should also have some
data
in the rx and the tx columns meaning
traffic is being transmitted
and also received you can also try to
connect to some other ip addresses on
your home network
such as your router's web page and there
we go you have now
successfully added your first wireguard
client
if you want to add more clients say for
example your partner's phone or
you want to add a laptop or something
else then simply create
a new peer in the list like is shown
making sure to give it a unique name
and also unique ip address and that is
about it whenever you go out the house
you can simply hit the connect button
in the wireguard app and wireguard will
simply connect to your home network
and you'll have access to all your
different ip addresses and devices and
servers
as if you were actually sat at home on
your network
without having to port forward multiple
devices and services
you'll just have instant access but
that's about all the time we have for
this video hopefully you guys enjoyed it
hopefully i didn't ramble on too long
about vpns and
just talk nonsense and you actually find
the information useful
if you want to support the channel you
can do so by becoming a patreon on
patreon
and your support allows me to keep on
making these videos
thank you to all my current patreon
supporters as always your support
it's very much appreciated make sure to
drop this video a like and
get subscribed if you aren't already and
i will see you
in the next video