DIY Plywood and Reclaimed Pallet Wood TV Stand / Media Console - How to Make It
Published June 5, 2023, 7:20 a.m. by Bethany
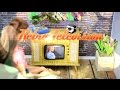
In this video I use one full sheet of plywood and pallet wood to make this mid-century modern TV stand / media console.
Check out and Subscribe to my channel: https://bit.ly/2DbjPOG
Materials I used:
-3/4'' - 8'x4' sanded pine plywood
-1/4'' - 2'x4' sanded plywood for the drawer bottoms
-pallet wood
-Titebond 2 wood Glue
-Pocket Screws
-Construction Screws
-4 - 12" Drawer slides
-1" aluminum flat bar
-Minwax Waterbase Polycrylic finish
-White paint
Follow me on Instagram: https://www.instagram.com/imagineitandmakeit/
Thanks for watching!
#woodworking #tvstand #palletwood #mediaconsole #plywood #diy #howto
You may also like to read about:
hello everyone i'm brad from macon and
today i'll be building this TV stand
using plywood and free pallet wood let
me show you how you can make it
I began by cutting my sheet of plywood
into more manageable pieces before
bringing it inside I'm using one full
sheet of 3/4 inch sanded pine pie would
this type of plywood is super easy to
work with it comes in pretty straight
pieces and is very affordable I will be
painting this plywood so I don't need
any of the fancy stuff I continue to
make the rest of my cuts on the table
saw but before I could assemble the TV
stand together I needed to cut out the
tracks for the sliding door to do this I
use my router with a straight trim bit I
set my appropriate depth for the bottom
track I then clamped down a guide fence
using a piece of scrap wood which
allowed me to get a nice straight cut
for my router
I repeated the same process for the top
track except this time I made the depth
a little deeper because this will allow
me to catch the cabinet door on and off
when I need to this edge will be exposed
on the outside and I didn't want to
start my cut right on the edge so I
drilled an oversize pilot hole to begin
my router cut I drove the hole a little
larger than my router bit so I could
start my router clearly before making my
kind after my cracks were cut I selected
a decent sized pallet board I cut out
the rough length and then squared up the
board using my jointer and planer I made
sure the board fit in my track before
running it through my table saw to get
the desired height I then temporarily
clamped the top part of my TV stand
together so I could do a quick test fit
once it was good it was time to start
assembling the TV stand
[Music]
I used a combination of pocket screws
and wood screws this plywood will be
painted and I can cover over any holes
with wood filler I also made sure to put
any pocket holes I use in a place where
it won't be seen I used the rest of the
3/4 inch plywood to make my drawers I
cut the left and right side first for
the back and front side of the drawer I
needed to take into consideration the
thickness of the side pieces of plywood
and in the drawer slides which is
exactly 1/2 inch per side I measured the
total length of the cabinet sides where
the drawers will be and then subtracted
1 inch I then took my left and right
drawer sides and use those in my
measurements as I marked my front panel
this allowed me to measure my front side
piece which showed me how short I needed
to cut it down to I cut a scrap piece of
wood and tested it to make sure
everything fit and as it should
you could always cut your piece a little
longer and shave off one edge until you
get your perfect fit once all the sides
were cut I ran them through my table saw
to make my groove that will allow a
quarter inch thick plywood panel to
slide into I've cut my pieces at the
same time and then slid my fence over a
little until it could fit a quarter inch
sheet of plywood in it using a test
piece really makes this part much easier
I'm using pocket screws to assemble this
drawer because they're strong and quick
to use I glued the front side of my
drawer together and then screwed it in
making sure to have the pocket holes
facing the outside I could then slide my
panel in and attach the back side of the
drawer I don't like gluing the back side
of the drawer in case I need to ever
replace the bottle panel for the drawer
front cabinet door and artificial side
support I'm using more pallet wood I
began by cutting my boards to rough
length using my miter saw and table saw
for those of you who are not familiar
with working with pallet wood there are
some pallets that have been heat treated
or chemically treated you will
definitely want to do your research on
the type of pallet wood you're using and
I would avoid using chemically treated
pallet
I used my table-saw jig to get one
straight edge on the pallet board which
then allowed me to run the board
through my table saw like normal I was
eyeing everything into rough size I
lightly sanded the board using a grit
sandpaper before running them through my
planer to get them all the same
thickness working with pallet wood can
be a little unpredictable I ran into a
small problem when I found a board with
a massive crack in it you could cut and
plane a new piece of pallet wood or you
can completely rip it apart and glue it
back up with clamps and then you're good
to go I'm just dealing with power wood
here so it doesn't need to be perfect
any imperfection you make just adds to
the character once everything was planed
down I could start to glue up my panels
[Music]
when glowing up panels like these it's
important to alternate your clamps from
top to bottom to reduce bowing and to
taking a step further I tape the bottom
of two by fours using packaging tape and
clamp them across my panels as well the
next day I could start trimming my
panels down to size I started on the
artificial side support where I will be
wrapping it around the 3/4 inch plywood
panel
I cut 45-degree angles using my table
saw to give the corners a nice clean
look once I had all my pieces cut I did
a quick test fit to make sure everything
fit
I moved on to squaring up my drawer
fronts and cabinet door using my table
saw and miter saw to open the drawers I
cut out a knot on the top using the same
template from my previous project for
the feet of the TV stand I made a
template out of plywood and then traced
eight pieces out on a pallet board I cut
those pieces out using a jig saw I added
an identical piece of plywood between
the pallet wood pieces and glued them
together after the glue had a chance to
dry I flushed up the edges using a
sander and I really liked how this
turned out I used a rabbeting bit that
has a bearing at the end of it to cut a
slot out in the back to allow a quarter
inch sheet of backer board to sit in it
next I moved on to filling my holes
cracks and any other imperfections using
wood filler I don't like how the end
grain soaks up paint so I rubbed in wood
filler to help fill in some of the voids
found in plywood you could also use edge
banding here but I found this is to be a
cheaper option and I just made sure that
sand the edges real well i sanded
everything down using 80 120 and 220
grit sandpaper also if your joints
aren't perfectly lined up like mine is
then just flush it up using your sander
next it was on to painting I chose white
because I liked the contrast with the
natural reclaimed wood after the paint
had dried I could attach my pallet wood
panels with wood glue
I use painters tape on the corners to
help hold the panel in place long enough
until I was able to clamp everything
together after I had it mostly clamped I
realized it would be much better if I
use it for across my panel so that's
what I did after the glue dried I
touched up the cord with my sander and
sanded down any leftover glue residue
I used water-based poly acrylic over all
the pallet wood panels as well as the
white paint I chose this finish because
it's very true to color and it doesn't
yellow the would like oil-based finishes
do with the finished dry I could finally
start putting the rest of this TV stand
together and I started with the drawers
to attach the drawer fronts I use
spacers to hold my panel in place long
enough to clamp it down which allowed me
to remove the drawer with the panel
attached I used one inch LAN Craig
screws because they already only one as
long screws I had in my shop I needed a
way to attach the feet to the bottom of
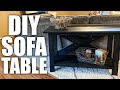
the TV stand so I used this aluminum
flat bar that I had lying around in my
shop I cut it down into four strips and
drilled three pilot holes on one side
and two on the other I then counter sunk
the holes aluminum is very soft metal
and I had no problem using my regular
wood bits for this I screwed the flat
bars to the top of my feet and then
attached him to the bottom of my PVC
I also attached a fifth leg and hid it
in the back middle to help prevent the
plywood from sagging over time I then
moved to on to attaching the cabinet
door my daughter wasn't quite thick
enough for my hinges so I glued a small
strip of quarter-inch plywood to the
back when attaching the door to the TV
stand I use spacers and a block of wood
to help hold and locate where I needed
the hinges to be screwed on in the
inside for the door style I used this
pushing magnet stop which allows me to
open and close the door
having to use a handle and keep it clean
straight look for the finishing touches
I added the back panel using Brad nails
I also added finishing wax to the top
and bottom of the sliding door to help
it glide back and forth I intentionally
made my drawer short so I had enough
space in the back for a power trip and
this TV stand is officially done
thank you all for sticking around and
watching my video if you liked what you
saw hit the thumbs up button also if you
want to see more videos like this then
subscribe that's all for this one and
I'll catch you on the next one bye
[Music]
you