DIY Farmhouse Sofa Table | TV Stand with Build Plans
Published June 5, 2023, 7:20 a.m. by Bethany
This is how to build a DIY farmhouse sofa table | TV Stand. This isn't limited to only being used as a sofa table though. You can use this small table as a hallway table, an entryway table, foyer table, console table, even a TV stand for a 65 inch TV, or tons of other uses!! I built this X style table with easy to use techniques that anyone can follow. The X brace in the back of the farmhouse sofa table build gives it a lot of character but also adds to the stability of the table. I went with an ebony stain on the table which gives it a classic farmhouse look and feel. Why buy cheap furniture when you can build your own console table that is a better quality and will last years longer! This build is an easy pocket hole project using the Kreg K5 pocket hole jig. This project can be built using minimal tools and supplies. The only lumber you'll need for this build is: 2- 8 foot 2x6's / 2 - 10 foot 2x4's / 1- 12 foot 1x6 / 1 - 8 foot 1x6. The dimensions of the table are 50 inches wide, 20 inches deep and 30 inches tall. Total cost of the lumber and supplies was less than $75. So you can build a table for under $75! This design might give you some sofa table ideas. Feel free to use this to make your own sofa table bar. A TV stand for flat screens like this in a furniture store would cost you $250 to $350! Don't buy a pre-made tv stand when you can make a tv stand yourself! Check out the information below to find the tools and supplies I used in this build.
Detailed Woodwork Plans For this Build here: https://www.731woodworks.com/store/sofa-table-plans
*Other Videos You Might Like*
Pocket Hole Projects Playlist: https://www.youtube.com/watch?v=oo7ot4wGsUE&list=PLWVlC66wUw8ZllU7o9agPUaDcvTFQC65c
Delta Table Saw Review: https://www.youtube.com/watch?v=hgBDKAGzhaU
DeWalt Sander Review: https://www.youtube.com/watch?v=yYRPvh1mBs0
DeWalt Miter Saw Review: https://www.youtube.com/watch?v=OQBCTEB_CaQ&t=31s
*Tools used in This Build*
Kreg K5 Pocket Hole Jig: https://amzn.to/2FzLkT5
Kreg Face Clamp:https://amzn.to/33IarxO
Quick Clamps: https://amzn.to/2OlRfQf
Swanson Combination Square: https://amzn.to/2O9xqeD
DeWalt Sander: https://amzn.to/2HJ9UV3
36" Clamp: https://amzn.to/2THzT0L
48 Inch Level: https://amzn.to/2QeORNF
DeWalt Miter Saw: https://amzn.to/2HJQZtd
Ridgid Router: https://amzn.to/2HMuN1u
Ridgid Drill / Impact combo w/ batteries: https://amzn.to/2QczKUK
*Supplies Used in This Build*
Table Top Fasteners: https://amzn.to/2O55k4e
Varathane Polyurethane: https://amzn.to/2q0rbC2
1 1/4 inch Kreg Screws: https://amzn.to/2HKF7qR
2 inch Kreg Screws: https://amzn.to/34Zn5cc
2 1/2 inch Kreg Screws: https://amzn.to/2X8LY2n
Rustoleum Ebony Stain: https://amzn.to/373GaLQ
Pre Stain Wood Conditioner: https://amzn.to/2OtrexM
120 Grit Sandpaper: https://amzn.to/34WTyje
1/8" Straight Router Bit: https://amzn.to/2Kib3Tc
*Other Stuff*
My ear buds: https://amzn.to/2OdugXc
My Justin boots: https://amzn.to/2QlSmC5
Help support me by becoming a patron: https://www.patreon.com/731woodworks
*Shirts and Gear*
Rep 731 Woodworks by getting one of our shirts: https://teespring.com/stores/731-woodworks If you do, tag us on Instagram @731woodworks
Visit the blog for more pictures and details about this project. https://www.731woodworks.com/731-blog/
*Follow us on social media*
www.instagram.com/731woodworks
www.pinterest.com/731woodworks
www.facebook.com/731woodworks
www.twitter.com/731woodworks
Disclaimer: Amazon affiliate links are used in this description and they help support this channel.
You may also like to read about:
hiya and I'm Matt at 7:31 blueworks calm
today we're gonna build this sofa table
TV stand entryway table hallway table
for your table we're gonna build this TV
stand for a 65 inch TV we're gonna build
this table that can be used for tons and
tons of different things I'll leave it
up to you to decide what you're gonna
use this table for this is a great
little project 30 inches high 50 inches
long and 20 inches deep so really all
you need to build this project is a saw
a drill a pocket hole jig and a sander
you have those items you can build this
now what will make your life easier is
if you have a miter saw a table saw but
if you don't have those don't worry you
can still build this it'll just be a
little more challenging on you mainly
just to get these cut square cuz you're
going to be your main challenge and also
the angles back here on the X but this X
doesn't have to be there you can totally
leave that out so let's get started
first thing we're gonna do is cut the
legs out this some tables gonna be 30
inches tall so all my legs would be 28
and a half inches tall because the top
is an inch and a half thick
that gives us 30 inch total height one
of those I just got some number one
grade two befores this is yellow time
you can use everyone I would not use the
stud material that are kind of they're
usually a little worse off let's cut
around some knots but I'm gonna make
four legs at 28 and 1/2 inches long and
then we're gonna cut our top out I
always like to take the end it's usually
pretty rough I'll go ahead and trim that
off and what that does is it cleans it
up but it also gives me something square
to start with
all I did was cut that knot out on all
that bad piece the easiest way to get
four equal pieces is to lick away they
line them up right here if you have your
miter saw I like to flush this end up
make sure it's nice and flush and then
I'll just move it into the blade you
just touches make sure that's flush and
you can move out of the way that's going
to give you an equal cut I'll do that
three more time four legs so I got my
four legs cut out when you buy a
construction grade lumber it has a
rounded over edge from the factory if
you want to keep that that's fine
there's nothing wrong with that when you
join them just know that there's gonna
be that little gap that shows there
still nothing wrong that however I'm
going to go ahead and take the edge off
of these and also want to make sure that
they're perfectly the square and the way
I do that is I join with my table saw if
you have seen those videos I've got a
video specifically about how to join the
other side using a straight edge which
is this family four foot level what's
news if you need something straight to
reference off of so that this edge is is
straight
so we're referencing off this edge lay
it up against that too and for the key
to is move the straight edge with your
stock if you don't keep my little shoes
your fence if you're just going to slide
this and not move your image so why
don't I just do this movie right over to
the AR up to the edge gets taken off and
then I will run this through do all four
boards that way once that's done I'll
flip it over until the cut sides against
the fence
and I'll move the fence side in until it
just takes the edge off and we'll do all
four that way we'll get them all squared
up
[Music]
all right you know got that side flat
this side still the factory edge I just
laid on my fence move it over until it
takes off so basically the blade width
is what I'm taking off
let's go end up making these boards
three and a quarter inches wide so I'm
basically taking a quarter inch off by
no table 50 inches to the top fifty
inches and I want a little overhang on
each end let's say three inch over the
table is upside down at this point this
is your legs the bottom leg top of the
leg measure in three just lay your tape
measure there put this leg it breach you
just put this one at 47 and then we'll
take that off and measure from there to
there give me 37 and 3/8 is what this
runner will be now I want to put two
runners around the top or stretchers
rails what are you going to call all
around the top and then a two by two on
the bottom for the bottom show the way I
want to do that is I'm going to cut
those out of this extra two before that
I have time for assembly of the firm
anyway so the table top is pretty simple
it's just pocket open structure which is
what this is a lot of people disagree
with using pocket holes they don't like
it but I do it and I build a tough stuff
out of pocket holes and I've got
personal furniture in my house that I
built with pocket holes and this is hold
up very well so I have a problem all the
heirloom pieces right on will they work
absolutely can I look good what we're
gonna do is go into simple everything
you need a nice flat area to the symbol
of subhan if you don't have that find it
because if you don't have a flat area
what I wanna packing it's one of these
legs will be lower than the other when
you turn it over you can have a big
wobble and nobody wants to wobble wall
what I like to do is just get up I'm
gonna take a little bit of glue and each
one of these joints I'm using two and a
half inch pocket hole screws when I
drilled this away but when I drilled
this away into this I like to use two
inch screws just because I don't want to
bust through this side and sometimes it
tends to do that if you or drive it
especially with this soft wood with a
glue and the 2-inch screws cleaning to
hold the base of why the frame goes is
just like this these pieces I cut 14
inches I don't know if I mentioned that
these are 14 inches my table is just a
little by tops a little bit over 20
inches so I'll cut these 14 set all this
up like everything plant will put the
screws in it and then what I'll do on
the bottom shelf will just take a tape
measure it just depends on how far think
I'm gonna put that shelf in there at
about 8 inches I'll put a link to the
tools and supplies I'm using in this
build so you'll be able to just go down
to the description and you check those
out as you want this is a combination
square I believe it's a Swanson so you
can just move this to 8 inches like I
mark mega more I'll take that and use
that 8 inch more as
God now we're gonna say one more thing I
want to mention when you put this
together it's important that these two
pieces are flush when this is if
anything gets off here in this raises or
this raises or whichever way you'll get
that wobbles in so trying to keep that
as flat as possible if it's just a
little bit off don't worry about that
too much but if it is if it is off a lot
then you you just come and cause you
some issues so keep that in mind again
that's why you got a flat space to work
on just try to keep everything nice and
snug where you put it together you don't
have to go crazy with glue just enough
to speak if you get a bunch of this and
you're staining you gotta have to clean
it back up because it'll wind up
discolor and you're staying wherever the
glue that if you don't get it sand at
all we'll keep that in mind if you get
it an excessive amount of squeeze out
this bikes clamp is good for this kind
of thing because it's gonna hold this in
place you can reach over there and feel
if it's flush it's actually not flush
right here just I mean now I'm talking
about maybe 1/32 on these pieces we will
make sure it's flush with the outside
edge as well as that side too so keep
that in mind so what I likely do is I'll
go ahead and take some wood glue and put
on the end of each one of these take a
clip get everything nice and snug this
is just our one 36 inch clamp these are
like $15 or so I'll put a link below the
third we're in the nice cool
[Applause]
[Music]
all right so my buddy put this bottom
piece on there's an X that's going to go
in the back so I want to make sure that
I have enough room that it'll actually
look okay so I'll move this way down
here and there would be like a tiny but
think thing I'm gonna set my
accommodation square at five inch so I
did put one piece in the middle here
that's to attach the table top make sure
you put my table top bachelors on that's
a step later that's good for several
combination square root five inches
it's no I'm just gonna hold it to the
bottom if it needs to move let's take my
little mallet make sure this stays
square and that it's barely touching
right there
this face clamp will hold it flush on
each side so that's not something I have
to be concerned with one thing you can
do is you can actually just hold it at
five inches and Mark it so that you know
about where it's gonna go and that's the
bottom that's going to the five inch bar
[Music]
[Music]
all right so we got a basic frame
together this is just a 1 by 6 and we
now I'm gonna put that X in the back I
hope that's what I've done is I've
measured over 2 and 3/4 of an inch which
is the center of this board on both ends
and I'm gonna put that center line right
in the corner on each side I'm gonna
clamp it then I'm gonna mark it so that
I can cut my angles
couple these quick clamps are perfect
list
I've decided I'm going to use this in
the back we want this the inset so the
best way my way home specially let's go
take this little quick clamp just barely
squeeze it on here do the same thing on
this side
so there's my mark and up I'm pouring it
right at the center I don't know this is
the right way so this is the way I'm
doing it so once that's done I'm looking
for a pencil so once that's done we'll
just take our pencil that should be our
cut I'll cut that out it should fit
right in there we're gonna try it anyway
see what happens it worked
so I'm halfway there now it's time to do
the other so I gotta cut up you got
those angles just mark them it's very
simple just hold up there market what
you saw me do is hold this one up there
behind this one mark my angles and then
mark these cuts but also made a mark
back here on this one so that I would
know where these pieces go once they're
reinstalled and how we're going to
attach these pocket holes I'm just going
to take some inch and a quarter pocket
hole screws I'm gonna put one here one
here in each corner and then two on each
one of those where they join up that's
gonna hold it perfect
so rockin right along got that X
installed not a lot to that that was
easier than I was gonna be if you hold
those things up to the back and Markham
get them clamp down with those quick
clamps in the market makes it a lot
easier then you just trim it to the
March to your table saw I like to sneak
up all those cuts so a lot of times I'll
cut just a little bit long and then trim
that as necessary just tiny bits at a
time that's some pretty tight fits there
so everything's nice and tight not only
does that add a little extra something
than just a square table adds a little
character to it a little eye catching
piece to it
not only does it do that but it also
helps Shore that thing up because now
you've got an X brace in there and it's
going to prevent it from rocking I don't
think that it would have anyway with
these on the bottom anyway but that just
gives us some extra support the things
when we solid as a rock
next thing I'm gonna do is put some
shelving in here with some more 1 by 6 I
may leave some gaps in there I have not
decided yet just kind of winging this as
I go once this shelf is built we'll be
ready to sand and stain all right so now
it is time to put the Shelf in on the
bottom and that's what I'm gonna do I'm
gonna use 1 by 6 to do that 1 by 6
appearance grade or paint grade it's a
spruce material or spruce wood it's real
soft and it'll it's easy to work with so
we're gonna put that in there and I'm
just gonna run them lengthwise here so
I'm gonna probably use 3 I may have to
trim down I haven't measured that you so
I'm gonna use that and lay those in
there and I'm just gonna pocket hold
those in some one pocket hold them in to
the end with the inch and a quarter
pocket hole screws and also on the sides
and if I need if I feel like I need a
brace under the middle I will put that
in after
the shelf is in there's a tip I use the
DeWalt Pro mobile app use the calculator
to calculate so I got a 14 inch span
from there to there I've got three
boards so with app you could just do 14
inches divided three equals four and
eleven sixteenths inch so each board I'm
going to cut four and eleven sixteenths
of an inch rip them down I want to join
them first on one side with the table
saw so that I get a nice square edge and
then I'm going to take them down to four
and eleven sixteenths inch each and then
I will attach them in here the way I
will do that is I'm gonna pocket hole so
this is number one board one of the
front put a couple pocket holes here
maybe three four one yeah three down the
front maybe a couple in the middle to
tie to the second board the second board
also have a couple here to go to the
third board and then the third board the
same way around the back pocket holes
just ancient three inch and a quarter
pocket hole screws put in there that's
gonna hold everything nice and tight I
will check and see if it needs a brace
I'm thinking it probably walked with
those pocket holes in there so written
down let's get started
[Music]
so just a quick rundown on how these
tabletop masters work so what will
happen is I'll cut a slot here I'll take
this edge guide and set how far down I
want it to go and then this bit how deep
I wanted to go just like that I'll just
set this up here and then adjust
everything like I want it but what
happens is you cut a slot in your piece
of material that's close to that's on
the top and then this will slide into
that slot and then a screw goes from the
underside up through the tabletop
fastener into the table and it holds or
to the top
it holds the top end like that so that
would expansion can come this way or
this way they work pretty well they're
very expensive again there's links in
the description below
now it's time to build the top and I'm
just gonna build it out to come in two
by sixes and we want the top 50 inches
but I'm gonna cut at about 50 and a half
51 probably 51 inches that way I can
once it's all assembled I can just take
a circular saw or even bring it over to
March so maybe it's not too wide and cut
the end off so that the end is nice and
square they all match it's easiest way
to do it if you cut them on 50
ultimately when you put them all
together it seems like there's always
one that's just sticking out a little
bit too much it's just a easier way to
do it make sure things nice and flush so
just don't flush this end up I'm gonna
cut four of them at 50 inches come on do
the same thing with my two pieces that
I've been with my two laforce I'm going
to joint the edge over straight edge and
my soft so that everything is nice and
straight so when I put my tabletop
together everything should match really
nice have nice tight joints sometimes it
work better than others but it keeps it
a lot better than if we just tried to go
factory edge to factory edge so when we
go get ready join this tabletop up if
you put factory as your factory edge you
may have one more that's a little warp
maybe one board just twist it or
whatever and this kind of helps
[Music]
[Music]
all right we're gonna stain this whole
thing in Ebony this is what the customer
wants a room with rust-oleum evany nice
thing first thing I'm gonna do those put
this Minwax pre-stain conditioner on
there if you've watched in my videos
where I've stained anything at all you
know I'm a believer in that stuff it
just takes it keeps it from having
blotchiness or a dark a lot of times a
black will pop through real dark blotchy
spots it will pop through that kind of
like it shows you on the can condition
versus condition you'll see that
especially in the Spruce which is what
this one biomaterial is but it'll also
show up in that yellow pine so keep that
in mind I highly recommend using that
that's what I'm gonna do I just wipe
this down fairly liberally I don't want
it pulled up but I do want it to coat
the surface I'm only going to put the
pre-stain conditioner on the top
surfaces and then I'll stain everything
underneath and all let that priests
think it is you're dry at least 30
minutes no longer than 45 minutes to an
hour before you put your stain on I'm
gonna take the top off stain it
separately because it makes it easier
and so far man this thing's looking good
[Music]
[Music]
all right so that's gonna dry for about
30 minutes and while that's drying I'm
gonna talk to you about perfection I'm
not a I would love to be perfect
I would love to create perfection but
I'm an imperfect being so it's gonna
happen that I'm not gonna be perfect
just so if you're building this at home
and you're just fretting over gaps and
things like that let me show you this is
my bottom shelf you can see it's tight
in the middle it gets a little looser
down here there's a little bit of gap
there
same thing little gap there same thing
on this end there's a tiny bit of gap
there pretty flush there is a little lip
here they're talking to 30 seconds of an
inch I mean very minor
wouldn't worry too much about that as
long as you don't have one pop way up
over the other but little things like
that was gonna happen
don't let that fret when we stain this
that ebony color you probably won't even
see that gap and if you do it's gonna be
very minimal so don't don't be too hard
on yourself because what I'm saying
main thing is you get these joints or
these cuts square here one if you get
those square and when you put this
together if you get all this flush then
your furniture will set level and flush
if you don't if this is off or it throws
it off any or if these aren't flush what
you'll get is a little bit of a wobble
and so if you want to fix that wobble
what you have to do is just find which
leg is causing it usually it's one leg
and then you can just take I usually
just take a sander and sand that down
that leg say if it was this one I would
flip it over and sand that a little
while and then set it back up on a flat
surface to make sure I don't have that
wobble and they usually fixes it if it's
minor if it's major you know if you got
a gap this big you got issues and they
probably need to maybe shorten a leg or
two or three
anyway so we're gonna let that drive up
this stain on there alright so I've let
that stain dry overnight I know it says
dries in one hour but it don't I'll let
that dry overnight now it's time to put
that clear coat on I'm going to put
three coats of this barrier thing a
water-based polyurethane I like this
because it doesn't leave brushstrokes or
anything like that put a nice thin coat
on and it dries very quickly normally
it's really cold here today is like 26
degrees out get that shot Peter on so
I'm gonna put three coats on and then
we'll install our table top and that'll
be done after that so it's coming along
nice I think it's looking good I like
the way that ebony thing turned out you
can see nice wood dream pop it through
that ebony it looks really good and this
is this water-based clear coats gonna
put a nice satin finish on this thing
it's going to look really really nice
just it
[Music]
[Music]
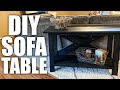
so this is about the easiest way to put
that top on just flip this thing upside
down I'm gonna go to your table or your
flat surface I'll put this old sheet
down just to keep anything from scuffing
it on the tabletop
I'm just gonna measure three inches from
this end
perfect breaches from this end and then
I believe it was an inch and a half over
anybody's side we'll just install those
tabletop bachelors and so we'll put this
tabletop all with these tabletop
fastener these are very simple to use
you see they're just some people calling
Z clips or tabletop fasteners so you
just put the solid end into the slotted
hole doesn't matter where as long as it
can move in there
I always pre-drill my holes I don't want
those to split it doesn't take a lot
just drill a little pilot hole then take
your Phillips bit with the included
screws they come with these black
included screws they're your they don't
have to be super tight we're just
snugging that up and we'll do all the
rest on the same way and then we'll be
ready to turn over
[Music]
finished product turned out nice I like
it they having stained that pine and
spruce with that satin clear coat it
looks good what I didn't discuss was I
used a quarter or a quarter inch ampere
bit on my my handheld router to put a
chamfer all the way around the top and
bottom of the top and the bottom side it
gives it a nice little detail will
something extra also did that on the
bottom of the legs just so that it's
always a good idea to use a round over
bit or a champ a bit on the bottom of
your legs to prevent splintering if you
don't have those just take your sander
and just round that over a little bit
just to keep that from splintering and
stuff like that definitely drop a
comment below let me know what you think
about this build if you're going to be
attempting this I would love to know
about it if you do post a picture on
your social media and tag at 7:31
Woodworks in that you let me know
because i like to check those out don't
forget to check the description down
below links to the supplies and the
tools are using this builder down there
for you to use hey check out this
playlist right here if you want more
pocket whole projects you can build your
own furniture using simple joinery works
great i'll build tons of stuff like that
also check these cards down below the
video here you'll see t-shirts and
things like that if you buy all of those
that help support this channel I really
appreciate and give you a virtual fist
pump for that