CRAFTED! ✂️🎨Disney DIY Lilo & Stitch Challenge w/OverTheMoony 🏰🧵🐭 DIY Stitch Notebook & Scrump Doll
Published May 23, 2023, 6:20 p.m. by Bethany
What's up, party people?! In this week's Disney DIY, we're taking on the Lilo & Stitch Challenge! We'll be crafting our own Scrump dolls, making DIY Stitch notebooks, and more!
This challenge is perfect for any Disney fans out there who love to get crafty! So grab your supplies and let's get started!
For our first project, we'll be making our own Scrump dolls! This project is inspired by the adorable little doll that Lilo makes for Stitch in the movie.
To make your own Scrump doll, you'll need:
-A small plush toy
-A sharpie
-A hot glue gun
-Scissors
-Ribbon
-Fabric paint (optional)
First, use the sharpie to draw a face on your plush toy. This can be as simple or as detailed as you'd like! Once you're happy with the face, use the hot glue gun to attach ribbon around the toy's neck.
If you'd like, you can also use fabric paint to add details like stitches or freckles. Once your doll is complete, give it a big hug - it's sure to bring a smile to your face!
Next up, we're making DIY Stitch notebooks! These cute notebooks are perfect for jotting down notes, doodling, or writing down your dreams.
To make your own Stitch notebook, you'll need:
-A4 size paper
-A4 size cardstock
-Scissors
-Stapler
-Ruler
-Pencil
-Blue washi tape
First, fold your A4 paper in half lengthwise. Then, use the scissors to cut the paper into thirds. Next, take one of the pieces of cardstock and cut it into a rectangle that is the same size as the folded paper.
Now, use the stapler to attach the cardstock to the folded paper. Be sure to line up the edges so that the notebook will lay flat when open.
To decorate the cover of your notebook, use the washi tape to create a border around the edge. Then, use the pencil to draw a cute little Stitch face in the center. If you're feeling extra creative, you can also add other details like flowers or stars!
That's it for this week's Disney DIY! We hope you had fun crafting along with us! Be sure to show us your finished projects by tagging us on social media (@woverthemoony). We can't wait to see what you create!
You may also like to read about:
hey friends welcome back to my channel
if you're new here or if you're coming
from my friend katie from over the
moonies channel hi so nice to meet you
guys my name is jessie also known as
miss cherry or if you're a returning
subscriber hey guys i'm so happy that
you're back thank you so much for
spending time with me today
today is another installment of crafted
and i know that this series is so
special and so many of you love watching
this series and katie and i
are so very appreciative that you love
this series for those of you who don't
know what craft it is crafted is a
disney diy challenge that my friend
katie from over the moon and i do every
single month we challenge each other we
tell each other hey we want you to make
this craft or we send craft supplies or
do something along those lines so
we do the craft that the other person
has assigned and then we also do a craft
of our very own after this video is done
be sure to head over to katie's channel
to check out her craft uh katie is an
absolutely amazing disney youtuber she
does diys hauls
she also does unboxings and reviews if
you guys love the content on this
channel you're gonna absolutely love
katie and on top of that she's an
absolutely incredible person so win-win
so be sure to go and check her out all
of her information is gonna be linked in
the description box down below including
a crafted
playlist so all of our crafted videos
are all in one location for you guys to
watch and enjoy so if you cannot tell
from these ridiculous years
today we are celebrating one of my most
favorite films of all time lilo and
stitch i'm so very excited why don't we
just go ahead and get into it let's get
crafting
[Music]
craft
so for the first lilo and stitch craft
we are going to do
katie sent me a really fun tutorial that
was kind of like school supplies related
which is perfect for like the timing of
this video right it's like everyone's
starting school and things are starting
up so there were two
crafts as options in this tutorial and i
will link the tutorial below so you can
check it out
but it was a notebook with stitch on it
and then it was a zipper pouch with
stitch on it the zipper pouch i was
going to need to buy like a lot of
supplies for
but for the notebook the only thing i
was really going to need to get was the
notebook which is great because i have a
ton of craft foam that i can use
so i ended up getting this steeno pad
the notebook that was shown in the video
itself was actually like a regular
notebook that opens to the side
but i just thought with the image of
stitch it would just be easier to flip
it up and then it wouldn't like crush
his ears because his ears kind of stuck
out
from the side of the notebook itself so
we are going to be making a stitch
notebook then the notebook that was
shown on the video itself is him like
holding a love letter
and i found this image online
it's like a plush notebook and i thought
it was so cute so i'm gonna try
to recreate this and make this
into a notebook today with all of this
craft foam
oh my gosh how does anyone know how i
got all this craft foam if you could
please let me know down in the comments
down below i seriously have another full
drawer like that
right over there i'm like please
if anyone has any craft foam um
ideas for crafting please let me know
also as always we always ask that you
guys please comment down below let us
know if you were to do a lilo and stitch
craft what craft would you do
those are some of my favorite comments
to read i love seeing how creative you
guys are so much fun to see
kind of all of your creative juices
rolling and like the takes and the
things that you would do with this craft
so we're gonna go ahead and get into it
guys i'm gonna turn the camera down so
you can see i'm not using a cricut or
anything i'm straight up just using
scissors and just trying my hand at free
handing a stitch so
this might go horribly wrong
so here i am putting the main piece of
foam onto the notebook itself i'm using
aleene's tacky glue which is a clear
tacky glue it's one of my most favorite
craft adhesives and i'm adhering it to
the front of the notebook
now i am going to be choosing craft foam
that has a adhesive already on the back
of it
i
wanted to do this because it will stick
really well to the craft foam that has
the glitter on it so that's the
direction that i went in by choosing all
the ones that had the adhesive on the
back
so i'm going to take this stitch image
that i printed off from online
and just cut out certain pieces of his
face and then use it as a pattern for
the foam because i really liked the size
of the stitch that i printed out on that
piece of paper so i thought why not use
it and create
the same proportions that were in that
printout so that's what i do here and i
just continue to do that over and over
again
until i get a stitch that i am happy
with something that i forgot to record
is i do go over some details in this
stitch
with
permanent marker to give him a little
bit more definition like under his chin
and then also i use a white paint pen to
do um some light shining in his eyes to
make him look more real but this is
where i'm gonna end this craft because
it's a pretty simple one and i can't
wait to show you what it looks like at
the end of this video
okay so for the craft of my choice this
one was a pretty easy one for me to
choose
i'm going to create a scrump and i'm
talking a real scrump we are making a
rag doll today that is scrump so i'm
gonna pop a picture of scrump up here on
the
video and i just here's the thing i love
scrumptious a character not even a
character she's not a character she's an
inanimate object but i love what scrump
represents in this film scrump is lilo's
friend that she created and as a
creative little girl myself when i was
little i always loved creating things
and i just love how off-the-wall and
different this ragdoll is
and i collect scrump and so i thought
why not
try my hand at making my very own so
i have printed out a sphere pattern i've
used this pattern before it's fabulous
it's perfect for making round objects
which scrumps head is very large and
very round i'm going to be making a
pattern
for scrumps body so i decided to do just
a traditional ragdoll style because in
the film that's how she's represented in
merchandise she's a lot more complex
than what she's depicted in the film so
i'm gonna try to make it as close to the
film as i possibly can
i got some embroidery thread
and then i got two different sizes of
buttons for scrubs eyes because scrump
has two different size eyes we got some
satin fabric for her bow
and some really nice mint green
flannel for scrumps
body and head
like skin color i guess you would say
and so we're gonna go ahead and get
started i also have some pink ribbon
that i already had here and we're gonna
fill
scrump's body with beads so i have
some polyfill beads they're like plastic
beads that go inside of the
doll and they kind of like weight her
down so she'll sit down really well and
be able to hold up her own little body
and then we're gonna fill the rest of
her
with um polyfill so
why don't we go ahead and get started
and let's make a scrum something that i
forgot to mention is i picked up this
really chunky yarn and that yarn is
gonna be scrumps hair
so now i'm gonna do a traditional
ragdoll style of pattern which is
basically just like half a body
and then i'm gonna fold the piece of
paper and
make sure it's cut out evenly
to where it makes an entire body i don't
know if i'm explaining that right but
you can see what i'm doing right here
it's gonna be a really simple pattern
and very easy to put together
okay so all of scrumped pattern pieces
are fully cut
so she is ready to be assembled and sewn
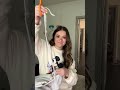
i took my chunky yarn and i just like
did a bunch of loops
and then i did a stitch right on the top
there
and that way
once
i get this inside of the seam of her
head
i can take it out and like give her a
little haircut because you may notice
like
scrum's hair is like really uneven like
she needs to go to the salon so
we are
going to make sure that that happens
that she goes purposefully to the uneven
salon tonight
and then
next i have to choose a button for her
belly button so i have a little
tradition um
my grandmother passed away when i was 13
and
one of the things that
um my mom made sure that i had was her
buttons
and i have three milk jugs in my craft
room that i keep like as a decoration um
but these were her buttons from her
button drawer and so
i am going to find a button
to use as scrump's uh belly button and
so i'm just going to turn the camera
down and we're going to like sift
through here there's a bunch of really
amazing like vintage buttons in here
so in honor of my grandma let's go ahead
and put a button
onto this scrump doll
[Music]
[Music]
it was so fun going through all the
buttons but this is the one that i chose
i wanted to go with a dark button but i
didn't really have any like blue navy
buttons which would kind of match scrump
but i thought this was so like vintage-y
looking and really pretty and so we're
going with a brown for the belly button
so
i am getting ready to start hand
stitching all of the eyes and then i'm
going to use the embroidery thread to
make this stitched mouth
and then we're going to be done so i
think i'm going to leave you guys here
and go to future jessie where she's
going to introduce and show you all of
the crafts
this crafted has been so much fun again
i always love to know what you think of
the crafts that i have created and i
would love to know what you would do if
you were going to maybe assign a craft
to someone or if you just have a craft
in mind for lilo and stitch please leave
it in the comments down below it's like
my favorite comments
to reply to are the ones from the
crafted video we're gonna get into our
first craft the first craft happened to
be the notebook that katie challenged us
to create and actually i'm pretty happy
with how it turned out i do have a
little bit of glue that's exposed but
honestly it's just a notebook for myself
so it's going to be just fine here is
my stitch notebook i think it turned out
so well i was so thankful that i had a
lot of the supplies because oftentimes
we buy new supplies for these crafted
videos so it's kind of fun to use what i
already had so let's take a closer look
so this is a steeno pad right so it
lifts open like that
and there
is a stitch so you can see like there's
a little bit of glue that you can see on
his ears but it is what it is i think it
looks okay
i do love that it protrudes out of the
back see the little ears poke out the
sides which is really fun and my
favorite part
look at these fingernails
yes this is so cute i'm totally gonna be
using this i think it would be fun to
sit on my desk at work
and then like
take notes in it and then after you have
a meeting just dramatically close it
like
living my stitch notebook fantasy for
you guys and then next are you guys
ready to see scrump
i just feel really happy about how this
how these crafts turned out and i am so
excited to show you this one drum roll
please
[Music]
oh my god we're in love with her
um first of all
[Music]
this is such a fun craft to make i am
telling you like it's so easy and so fun
if you get the opportunity to make your
own please do send me photos okay let's
do a close look
so here is scrump's face
look i love the buttons and the smile
turned out wonderfully this satin bow i
put a little bit of poly fill in to make
it kind of fun and we gave her a crazy
haircut and i think it looks kind of
cute actually and it kind of like hangs
out the back too
and then here is her little body so the
only thing i would like to change maybe
if i make her again is i like her to
make maybe a little bit more chunky
because i do think she's a bit stiff but
honestly i still think she looks good
and then there is my special button that
is for my grandmother that i put on the
front
but i really like how she turned out
she's gonna go perfectly on my lilo and
stitch shelf she's a very bottom heavy
and her head kind of like tilts to the
side because she's not like super well
supported
but here it here she is
oh my god i love her are the two crafts
that were created let me know down below
what you think if you enjoyed this
series please give this video a thumbs
up also be sure to go check out katie's
channel because she is doing something
for the first time and i am so excited
to see how it turns out i'm going to
link her channel down below
thank you guys so much for being here if
you enjoyed this video please be sure to
subscribe down below because lots more
disney diys
vlogs and also haul and unboxing videos
are coming your way i will see you guys
in the next video ttfn
bye
go check out katie's channel
[Music]